

Introduction
Welcome to the official Connect and Advanced Finance manual.
The Dynavision Connect Module includes a number of smaller features that are used by a lot of different Dynavision apps. To make this generic and available on the different modules these features are grouped in one Connect module.
These features include:
• Sales price simulation (linked to Advanced pricing module),
• Print Node,
• FTP
Sales Price Simulation
The Sales Price Simulation functionality is related to the Dynavision Advanced Pricing module (see Dynavision Advanced Pricing manual).
In the Dynavision Advanced Pricing module a number of functionalities are added to the sales price list and it is made possible to choose a hierarchical price calculation method instead of the standard lowest price calculation method.
There are also a number of new discount options added that can be used in the price lists and sales documents (e.g. amount per quantity)
To have an insight into which price will be offered to a particular customer, for a specific item, on a particular date, the Sales Price Simulation function is implemented.
This simulation will list, based on filters, all prices that are retrieved and which price will be used.
This functionality was designed primarily to have an overview of which prices/discounts were applied and for testing purposes.
Run the simulation
Choose the search icon, enter Sales Price Simulation, and then choose the related link.
- Customer Setup Tab
a. Customer No.
Specifies the customer No. for which the price will be simulated.
b. Customer Name
The Name of the selected customer will be displayed in this field.
c. Order Date
Indicates the order date that will be used for simulating the price.
d. Calculate Margin
Only visible when advanced pricing is installed.
Indicates if the margin must be calculated for the simulated lines. - Asset Type
Specifies the type for which the price simulation will be performed. The options types that can be used in the simulation are: G/L Account, Item and resource.
The Asset Types Fixed Asset and Charge (Item) cannot be used in the simulation.
a. G/L Account Information Tab
When the asset type G/L Account is selected, this tab will become available.
i. G/L Account No.
Specify the G/L Account for which the simulation needs to be performed.
ii. G/L Account Name
The Account Name of the selected G/L Account No. will be displayed.
iii. Quantity
The quantity for which the simulation needs to be performed.
iv. Unit of Measure Code
The Unit of Measure Code that has to be used to calculate the simulated price.
b. Item information Tab
When the asset type Item is selected, this tab will become available.
i. Item No.
Specify the Item Number for which the simulation needs to be performed.
ii. Item Description
The description of the selected item will be displayed.
iii. Quantity
The quantity of the item that needs to be taken into account when calculating the simulated price.
iv. Unit of Measure Code
The Item Unit of Measure Code that will be used to calculate the simulated price.
v. Variant Code
In case the selected item has variants, an Item Variant can be chosen to use when performing the simulation.
vi. Allow Blocked Item
If enabled, the simulation can also be performed for blocked items
vii. Item Discount Group
The Item Discount Group of the selected item will be displayed in this field
c. Resource Information Tab
When the asset type Resource is selected, this tab will become available.
i. Resource No.
Specify the Resource Number for which the simulation needs to be performed.
ii. Resource Name
The name of the selected resource will be displayed.
iii. Quantity
The quantity that needs to be taken into account when calculating the simulated price.
iv. Unit of Measure Code
The Resource Unit of Measure Code that will be used to calculate the simulated price. - After entering the parameters that are needed, the simulation can be run. Choose the action Price Simulation in the Action bar. This action will execute the light version of the price simulation.
- In the Price information Tab the Unit price and invoicing unit price will be shown that will be used for the selected parameters. If there is a discount found for the selected parameters, this will also be shown in the fields.
The unit cost, the total amount, the VAT % and the amount incl. VAT are also noted.
a. Simulated Sale will show how the line would look on a sales document when the same parameters are added.
If the action Price Simulation (extensive) is chosen, The page will also show the prices that were taken into account when determining the sales price and the discounts that were found and chosen.
If no price is found, standard Business Central takes the price on the item card (if an item is chosen as type). The user sill get a notification and the price list line tab is not visible on the page. Only the Sales line tab will be visible.
PrintNode
Configuration customer PrintNode API
For using the printnode integration a printnode account with subscription is needed. More info can be found on www.printnode.com.
The PrintNode client must be installed on the print server of the customer, in the network of the customer. Using the online tool of PrintNode, printers can be defined which can be accessed to print documents from Business Central.
PrintNode Setup
- Choose the search icon, enter printNode Setup, and then choose the related link.
- On the page that opens, fill in the fields in order to set up PrintNode.
a. API Key
The API key that has been generated for the customer PrintNode account.
b. Base URL
The Base URL to the printnode API. Choosing action Apply Default Settings will fill in this field.
c. Default Paper Width (mm)
Specifies the default Paper Width (mm) for printers with unknown paper types.
d. Default Paper Height (mm)
Specifies the default Paper Height (mm) for printers with unknown paper types.
e. Enable logs
This option enables the logging of outgoing API calls to printNode for troubleshooting. - Choose the action Test Connection to verify if the API Key of the customer and the Base URL are entered correctly.
- Choose the action PrintNode Printers to get an overview of the printers that are available on the PrintNode API. On this page, some settings can be changed for the printers.
a. Choose action Get Printers to get the PrintNode printers from the PrintNode API.This action will renew the list of printers and can be used when a new printer is added or when a certain printer is not visible in the list.
b. The settings that can be edited are:
i. the paper type;
ii. in case custom paper type is checked on the line, the dimensions can be changed;
iii. Landscape can be checked (or unchecked); and
iv. Fit to page can be checked (or unchecked).
9.3 Printer Selections
When the printers are defined in the PrintNode printers, they have to be added to the printer settings in order to use them to print. - Choose the search icon, enter Printer Selections, and then choose the related link.
- On the page that opens, add the printers that need to be selected when printing certain reports. Choose action New to enter a new selection.
a. User ID
Specifies the ID of the user for whom the permissions are defined.
If no User ID is specified, the specific printer will be used/proposed in the printer selection screen when printing the selected report by any user.
b. Report ID
Select the report that will be printed by the selected printer. If no report ID is specified, the printer will be set/proposed in the printer selection screen for all tasks that this user prints.
c. Report Caption
The Caption of the selected report will be displayed in this field.
d. Printer Name
Select the printer that will be used to print the selected report.
Printer management
The Printer management page can be accessed in two ways.
Option 1
On the Printer Selection page, choose the action Printer Management.
Option 2:
Choose the search icon, enter Printer Management, and then choose the related link.
On this page it is possible to edit printer settings, set default printers (for all users), add an email printer and add a (or all) Universal Print printers by using the corresponding actions.
Usage
When choosing the action Print or choosing an action that prints a layout, if the printer selection has been set up for the report that is printed, the printer will be proposed in the Printer field in the screen that opens to add filters and options to print the layout. This selection can be overwritten in this screen.
FTP
The Dynavision Connect application provides an FTP framework. This framework allows to send or receive files using (S)FTP. This can be done manually, but also using code (e.g. exporting the store labels as XML and send it to the Digilabels in the shop)
FTP Setup
Choose the search icon, enter FTP Setup, and then choose the related link.
On the page that opens, add a line for each FTP URL that needs to be supported in order to send and/or receive files.
Choose the action New to enter a new FTP connection or use the action Edit List to update an existing connection.
- Code
The code that is used to identify the FTP connection. - FTP type
The FTP type that is used to send and/or receive files.
The options are available:
a. FTP,
b. SFTP (secure) and
c. FTPS. - FTP Url
The path that is used to find the FTP server. This path is needed in order to be able to send/receive files. This is the URL of the file or directory that needs to be downloaded or accessed.
Remark: if a certain port needs to be used in communication, this should be specified as follows (e.g.): sftp://url:port/map. - File Filter
Enter a filter that has to be used to filter files that are received. Any file matching this filter will be downloaded from the directory indicated in the field FTP Url.
Use ? for any letter and * for 0 or more letters. (E.g. *.PDF)
It is also possible to download *.ZIP files. These files will be automatically be unzipped. - FTP Request type
Specifies which type of request has to be executed. This is set up from the point of view of the user’s computer.
The following options are available
a. Download file: download files from the FTP server,
b. Download & delete file: download the files from the FTP server and delete the downloaded files,
c. Upload file: upload files to the FTP server,
d. Move file: Moves a file from one specified location to another specified location. 2 folders need to be set up in order to use this Request Type.
When executing the move request manually by choosing the action Send new request to FTP server when the line with the move type is selected, a subfolder+filename for the source and target destination needs to be specified in the screen. - Direction
Will be automatically filled in, depending on the chosen FTP Request Type. This will either be Import or Export. - Username & change password
A username and password will have to be inserted to use the FTP-server functionality. This will be needed in order to send and receive files. - In order to manually send a request to the set up FTP server on the selected line, choose the action Send new request to FTP server in the Action bar.
Depending on the FTP Request Type a file will have to be selected that needs to be downloaded or a file that needs to be uploaded using the actions in the Line tab.
By choosing action Send to FTP, an FTP request can be send to the specified FTP Url.
a. All requests are logged and can be viewed by choosing the action Show Requests in the Action bar of the FTP Setup page
Usage
The set up FTP connections can be used in setup pages or functions that require an FTP connection to function. This can be done example given in the TOMRA Setup when choosing FTP as the type of the TOMRA voucher that is used.
Dynavision Finance (WW & BE)
Document version: 28.0.0
1 Introduction
1.1 Dynavision Advanced Finance BE
Dynavision Advanced Finance is a feature rich solution for Microsoft Dynamics 365 Business Central, designed to help finance teams succeed by automating repetitive finance processes.
The range of core financial tasks – such as invoicing and debtor management – can now be automated. This not only reduces the risk of delays and inaccuracies; it also frees the team to do more useful stuff.
The Belgian localization of Dynavision Advanced Finance will also install the worldwide version of Dynavision Advanced Finance.
Features:
- Unified VAT registration no. and enterprise no.;
- Structured reference for purchase invoices;
- Structured reference for sales and service invoices;
- Enhancements for EB payment journal;
- Enhancements for financial journal;
- Enhancements for CODA statements;
- Isabel Connect interface: import bank statements and export payments;
- VAT-unit functionality;
- Electronic version of Fiche 281.50;
- …
1.2 Dynavision Advanced Finance
Dynavision Advanced Finance is a feature rich solution for Microsoft Dynamics 365 Business Central, designed to help finance teams succeed by automating repetitive finance processes.
The range of core financial tasks – such as invoicing and debtor management – can now be automated. This not only reduces the risk of delays and inaccuracies; it also frees the team to do more useful stuff.
Features:
- SWIFT (BIC) generator for bank accounts;
- Approval vendor bank accounts;
- Enhanced factboxes on sales and purchase documents;
- Purchase order number using “get receipt lines”;
- Check invoice document amount when posting purchase invoice;
- Approval posted purchase invoices (for payment);
- Visually apply customer and vendor entries;
- Credit collection management;
- Value details on fixed assets list;
- …
2 Installation
2.1 Extension
The Dynavision Advanced Finance BE and Dynavision Advanced Finance module is a separate Business Central extension.
- Choose the search icon, enter Extension Management,and then choose the related link.
- Choose Manage in the Action bar on the page and choose action Extension Marketplace.
- In the search bar, enter Dynavision Advanced Finance BE or Dynavision Advanced Finance and install this app.
- Activate the trial as described in following Get Started guide.
Remark: when Dynavision Advanced Finance BE is installed, the Dynavision Advanced Finance module gets installed as well.
In the Extension Settings of Dynavision Connect, Dynavision Advanced Finance, and Dynavision Advanced Finance BE modules, make sure that the option Allow http client requests is enabled. This is needed for the BIC generator functionality.
2.1.1 Default VAT formats
After installation of the Dynavision Advanced Finance BE application, following default VAT formats will be set up in the environment:
| Language Code | ||||
| ENU | VAT BE########## | VAT BE ########## | VAT BE ####.###.### | VAT BE####.###.### |
| FRB | TVA BE########## | TVA BE ########## | TVA BE ####.###.### | TVA BE####.###.### |
| DEU | MWST BE########## | MWST BE ########## | MWST BE ####.###.### | MWST BE####.###.### |
| Other | BTW BE########## | BTW BE ########## | BTW BE ####.###.### | BTW BE####.###.### |
| Other | BE########## | BE ########## | BE ####.###.### | BE####.###.### |
Remark: VAT formats are maintained per BTW/TVA/VAT prefix.
2.2 Dependencies
When installing the Dynavision Finance (BE) application, the Dynavision Connect and possibly other Dynavision modules will be installed automatically. These modules should not be deleted.
2.3 Get Default Data – Advanced Finance Setup
In order to make it more efficient to find relevant data links (configuration packages, documentation) for the Dynavision Advanced Finance BE and WW applications, the function Get Default Data is added to the Advanced Finance Setup.
This function will show the data links that are configured for the App Name and will always show the data links for Advanced Finance BE and Advanced Finance WW.
3 Enhancements master data
3.1 BE Specific
3.1.1 Duplicate VAT Check
The System will run a check if the entered VAT Registration/Enterprise No. has already been entered on another Customer, Vendor or contact. If this is the case, a message will be displayed. The check is always executed between entities of the same type, so customer is checked against customer etc.
3.1.2 Merge VAT Registration No. and Enterprise No.
The Dynavision Finance BE module has merged the two standard Business Central fields, Enterprise No. and VAT Registration No. that need to be used to identify Belgian customers, vendors and contacts into one field VAT Registration/Enterprise No.
This field can be found on the Customer, Vendor and Contact Card.
After inserting a value in the VAT Registration/Enterprise No. field, in the background, the system will automatically fill in the Enterprise No. and VAT Registration No. fields. The standard check of the standard BE localization field Enterprise No. will be performed against the VIES database.
When choosing the assisted setup button in the field VAT Registration/Enterprise No., the VAT log will be opened. This action is also supplied in the Enterprise No. field.
The new VAT Registration/Enterprise No. fieldwill be automatically filled in for all existing Customers, Vendors and Contacts in the system.
3.1.3 VAT Registration No./Enterprise No. on posted documents
The information that is saved in the field VAT VAT Registration/Enterprise No. is also added on posted documents. This can be added trough personalization to the list pages and can be used in filtering in the list page.
The field is not added to unposted document list pages/tables.
When a document is posted, and the VAT Registration number or Enterprise number is captured and added to the posted document.
3.1.3.1 Action Update VAT Registration/Enterprise No.
When the app is updated (or installed) there is no upgrade routine that will populate the field automatically. For this, use the action supplied by the app.
- Choose the search icon, enter Advanced Finance Setup,and then choose the related link.
- Choose Actions > Update VAT Registration/Enterprise No.
- Select the documents on which the updates need to be done and choose ok.
3.1.3.2 Use prefix for VAT liable
On the Advanced Finance Setup page an option is added, to either transform the VAT number on the Customer card by adding a prefix, or not transform the VAT number.
- Choose the search icon, enter Advanced Finance Setup,and then choose the related link.
- Enable the option Use prefix for VAT liable.
On the customer, contact or vendor card if the field VAT Liable is activated and the option Use prefix for VAT liable, the system will make sure that, when the Customer, Vendor or Contact has BE as country/Region Code on the Card, the letters BTW, VAT, MWST or TVA will be added in front of the inserted VAT Registration/Enterprise No. value to indicate that the Customer, Vendor or Contact is VAT liable.
Remark: The letters BTW, VAT, MWST or TVA are depending on the language of the Customer, Vendor or Contact.
When the Country/Region Code of the Customer, Vendor or Contact is not BE, nothing will be added to the value of the VAT Registration/Enterprise No. value.
If the Customer, Vendor or Contact is exempted from declaring VAT, the field VAT Liable needs to be disabled on the Card before entering the number in the VAT Registration/Enterprise No. field.
The formats that are used to check the value of the entered VAT Registration Number can be found in the VAT Registration No. Formats page.
- Choose the search icon, enter Countries/Regions,and then choose the related link.
- Select the Country/Region Code for which the formats need to be viewed or edited. In the actions bar on the page, choose Country/Region and next choose the action VAT Reg. No. Formats.
- On the Page that opens, the different VAT Registration No. Formats are listed. At installation of the Dynavision Advanced Finance (BE) application, the formats will be set up with the default formats as can be seen in section Default VAT formats.
Remark: the VAT Registration/Enterprise No. set on a Contact Card will be copied to the Customer or Vendor that is created from the Contact Card, using the action Create as Customer/Create as Vendor.
3.1.3.3 Use BE in Enterprise No.
In some cases, it is not wanted that there is BE added to the information that is entered in the Enterprise No. field.
If this is not desired, there is an option added that can be disabled, to prevent the addition of BE for not VAT liable parties to the Enterprise No.
- Choose the search icon, enter Advanced Finance Setup,and then choose the related link.
- Disable the option Use BE in Enterprise No. This option is only shown when Show More is selected.
3.1.4 VAT VIES CHECK Optimalisation
3.1.4.1 VAT Reg. No. Validation Templates
The VAT registration template is adapted to include the Name, Street, City and Postcode columns. This makes it possible to edit the Response column of the Validation Details, to manually split the Address that is returned in the Response as one line into the different components.
- Choose the search icon, enter EU VAT Registration No. Validation Service Setup,and then choose the related link.
- Choose the action Show VAT Reg. No. Service Templates.
- Following columns are shown, that can be enabled in order to validate the information into the fields needed when the VAT VIES Check Response is accepted.
- Validate Name,
- Validate Street,
- Validate City, and
- Validate Post Codes.
- When the VAT Registration number validation is executed, in the VAT Registration Log, for the valid line, choose the action Validation Details.
- This information can be manually pasted in the correct fields or automatically using the option Parse Address.
- To manually add the fields:
Snip and paste the information from the response line in the corresponding lines in order to process the data in the correct fields.
- Choose Accept All to process the changes.
- To manually add the fields:
3.1.4.2 Parse address
On the page EU VAT Registration No. Validation Service Setup, the option is added to automatically parse the address information. This is currently supported for NL, BE, FR, FI, AT, PL, DK and IT.
Enable option Parse Address to let the system parse the address information by street, postcode and city.
After the parsing of the address information, it is possible to apply transformation rules to the data. These rules can be specified in the fields Street transformation rule, Post code transformation rule and City transformation rule.
3.1.4.3 Remarks
- Is the customer is VAT liable, and there is already a prefix (VAT / BTW / TVA / MWST) included in the VAT number, there will no extra prefix added by the system.
3.1.5 Payment Reference on Vendor
On the Vendor Card, the possibility is added to specify a Payment Reference Format. This can then be used to Update the invoice document in order to fill in the Payment Reference on the invoice based on the setting on the Vendor Card. Example given %ACCOUNT – %INVOICE.
3.1.6 Default Export Protocol based on Vendor bank account currency
On the Customer/Vendor Bank Accounts, it is possible to specify the Export Protocol that needs to be used when Payment lines in the EB Payment Journal are generated that need to be exported.
Dynavision Advanced Finance added the possibility to configure a default export protocol that needs to be added to newly created Customer or Vendor Bank Accounts for a certain currency specific, or in general.
3.1.6.1 Setup on Currency
- Navigate to the page Currencies.
- Specify the default Export Protocol in the column Export Protocol Code that needs to be set on Customer/Vendor bank accounts that are created for that currency.
- Once set, when creating a Customer or Vendor Bank Account, and selecting the currency, the specified export protocol will be added to the Bank Account Card.
- If the currency is changed, the system will give a prompt to also change the export protocol in case this is set up on the newly selected currency, or on the Advanced Finance Setup.
3.1.6.2 Setup in Advanced Finance Setup
- Navigate to the page Advanced Finance Setup.
- In the tab Masterdata, select the default Export protocol code that needs to be added to newly created Customer/Vendor Bank Accounts.
3.1.7 Disable creation of general journal Lines when exporting payments
Dynavision Advanced Finance BE makes it possible to disable the creation of general journal journal lines when exporting payment lines in the EB payment journal.
- Navigate to the page Advanced Finance Setup.
- In the tab Bank & Payment Management, an option is added. Enable or disable this option.
- Create General Journal Lines
Specifies if general journal lines will be created when SEPA payments are exported. This is also applicable when Isabel Connect export is executed.
- Create General Journal Lines
3.1.8 Tile Open Journal Lines
In order to quickly view how many journal lines are unposted, a tile is added by Dynavision Advanced Finance BE.
The tile Open Journal Lines displays the number of open lines in the general and financial journals.
Clicking on the tile will show the lines that are open, with the relevant information displayed.
Remark: if the unposted lines belong to only one batch, the journal will be opened instead so that the lines can be processed.
3.2 WW
3.2.1 Highest reminder level on customer
In order to be able to filter the customer list on the highest reminder level, or to see this reminder level, a flowfield is added to the Customer card and list (default hidden on list).
This can be consulted on the customer card in the section Payments (show more), or by customization on the list page.
3.2.2 Posted Sales Invoice / Posted Sales Credit Memo – edit comment lines
In some cases, in the posted sales invoices or posted sales credit memo’s, it is necessary to edit the comments that are noted on the lines of the document.
This is made possible by Dynavision Advanced Finance.
- Navigate to the posted sales document on which the comment lines need to be edited.
- Select the line with type Comment that needs to be edited and choose Update Line (under the line tab).
- Enter the new Description and optionally Description 2 to be noted on the comment line.
- Close to page to commit the change.
3.2.3 Sending profile on Posted Sales invoice/Posted Sales Credit memo/Issued reminder list
On the Posted Sales Invoice, Posted Sales Credit Memo and Reminder list page, a column is added that displays the configured sending profile for the customer for that document.
This is hidden by default and can be added trough personalization.
After adding the column to the page, it may be necessary to close and open the list page to see the Sending Profiles.
3.2.4 SWIFT (BIC) generator for bank accounts
On the Customer, Vendor and Company Bank Account Card and the Company Information, the International Bank Account Number needs to be specified.
The SWIFT code field needs to be used to indicate the BIC of the bank account.
There is an open source tool that indicates the BIC Code that is linked to a given International Bank Account Number. Dynavision Advanced Finance uses the Openiban.com tool to complete the SWIFT, Bank Name and Bank Branch No. fields once the IBAN field is filled in.
This functionality can be enabled by choosing the search icon, entering Advanced Finance Setup, and choosing the related link.
In the Masterdata Tab, enable the field Use BIC/SWIFT Generator. The first time this functionality is enabled, the message will be shown to ask if the OpenSource service can be used. Choose “Allow Always”.
When enabling the Use BIC/SWIFT Generator option, a message will be shown with the information that the supported countries were indicated in the Country/Region table. This message is shown to indicate that not all countries that use IBAN are supported by OpenIban and thus the generator.
In the Countries/Region page, the supported countries are indicated by the checkbox in the column Use BIC/SWIFT Generator.
The Open source tool currently validates Bank codes for the following countries (Validation of IBANs also returns the BIC/Bank account Name of this country is indicated on the Card in Business Central.
- Belgium,
- Germany,
- Netherlands,
- Luxembourg,
- Switzerland,
- Austria, and
- Liechtenstein.
Once the option Use BIC/SWIFT Generator is enabled, and the IBAN is filled in on the Bank account Card, Employee Card or Company Information, the SWIFT code and other parameters will be determined and filled in. The BIC will be added to the SWIFT Codes list in Business Central.
The system will also ask if the Name of the Bank account needs to be changed to the name of the bank that matches the entered IBAN.
If the country is not supported by OpenIban, a message will be shown to indicate that this is not yet supported by the SWIFT generator.
3.2.5 Bank account country code from IBAN
When creating a new Bank account (Customer, Vendor, Employee, Bank account), the country code will be extracted from the entered IBAN number.
The country code that is extracted will be the first two characters from the IBAN that is entered.
The Country will be searched first by ISO Code, if none is found, the country is searched by Code.
Remark: When the Country Code on the Bank account is already filled in, there will be no change of the country code.
3.2.6 Invalid IBAN – option to confirm or make blocking
Dynavision Advanced Finance makes it possible to check the IBAN that is entered on a bank account card (Customer, vendor, Bank Accounts, Company information pages).
- Choose the search icon, enter Advanced Finance Setup,and then choose the related link.
- Invalid IBAN
Specifies the action that the system will take when an invalid IBAN is entered. The options are Confirm or Error.
3.2.7 Workflows
In Dynavision Advanced Finance, workflow templates are added with additional finalities. These can be used to set up workflows.
In order for these templates to be generated, navigate to Advanced Finance Setup. Choose the option Create Workflows to create the templates.
Remark: if the templates were already added in the environment, the action will not be clickable.
3.2.8 Vendor/Customer Update Preferred Bank Account
Dynavision Advanced Finance makes it possible to update the Preferred Bank Account for a Customer or Vendor, when a new bank account is created and if the newly added bank account Is the first bank account that is created for the customer or vendor.
If the preferred bank account is already filled in, or there are already other bank accounts, the preferred bank account will not be changed.
- Choose the search icon, enter Advanced Finance Setup,and then choose the related link.
- Enable the option Update Customer/vendor Preferred Bank Account.
This option Specifies if the Customer Preferred Bank Account should be filled when a customer bank account is created. This only applies to the first customer bank account and if the preferred bank account is not ready.
3.2.9 Vendor bank account approval
Dynavision Advanced Finance added an approval flow to the Vendor Bank Accounts and prevents non-approved vendor bank accounts to be used to export payments from Business Central.
The Approval Vendor Bank Account is a workflow that can be added to the Standard Business Central Workflow templates.
- Choose the search icon, enter Workflows,and then choose the related link.
- Choose the action New Workflow from Template to set up the Vendor Bank Account approval workflow.
- Select the template Vendor Bank Account Approval Workflow from the listed templates.
- Fill in the necessary fields on the Workflow card. These fields are the same fields as the standard Business Central Workflow Fields. (More information in the Microsoft Documentation.)
- Enable the workflow.
- When there are existing Bank Accounts, the status will be set to Open when enabling the approval flow. A message will be shown with the question if approval entries need to be created for each Vendor Bank Account. These can then be approved in bulk by the approver.
- Remark: when the approver activates the workflow, all approval entries will be automatically approved.
Remark: end users do not have permission to deactivate or delete the approval flow.
When navigating to the EB Payment Journals page, the function Check Payment Lines can be used to validate the lines or when choosing the action Export Payment Lines a validation will also be performed.
When one or more Vendor Bank Accounts has the Status Open or Pending Approval, an error message will be shown to the user.
This same check will be performed when the Payment Journal Lines are send to Isabel, using the Isabel Connect functionality Send lines to Isabel (can be found in section Isabel Connect (BE)), and in the Payment Journals page when using the action Suggest Vendor Payments…
3.2.9.1 Example – Basic Approval flow
- Navigate to a Vendor and go to the Payments Tab.
- The field Preferred Bank Account Code is noted. Choose the action New after selecting the field to add a new code.
- Fill in the necessary fields in the page that opens. More information can be found in the Microsoft Documentation.
- After filling in the information, choose the action Send Approval Request to send all information for approval. The Status will change from Open to Pending Approval.
- An Approval Entry is created and this can be approved by using the Standard Business Central approval functionality.
- The Approver can also approve the Vendor Bank Account on the Bank Account Card by using the actions supplied on the Card for the approver.
- Once the Vendor Bank Account Card is approved, the Status will be changed to Released.
- When the approver rejects the request, the Status will be changed back to Open.
- Once a Vendor Bank Account Card has Status Released, in order to make modifications to the Card, the Vendor Bank Account needs to be Reopened and the modifications will then again be approved.
3.2.10 Set Bank on Purchase Documents
Dynavision Advanced Finance makes it possible to set the Recipient Bank Account that is preferred for the payment for that pay-to vendor on the purchase invoice.
The IBAN will also be displayed on the document.
The bank account is pre-filled in using following information on the purchase invoice: the pay-to Vendor and Currency.
- If there is only one bank account on the pay-to vendor configured for the currency, this bank account will be suggested on the purchase invoice.
- If there are multiple or none bank accounts configured on the pay-to vendor for the currency on the purchase invoice, the preferred bank account of the pay-to vendor will be suggested.
- If there is no unique combination and no preferred bank account configured for the pay-to vendor and currency, no bank account will be suggested.
The bank account information can be changed on the purchase invoice before posting the invoice.
When the purchase invoice is posted, the Recipient Bank account is also transferred to the posted document, and is also transferred to the Vendor Ledger Entries.
When the action Suggest Vendor Payments is used on the Payment journal, or the EB-payment journal (in the BE localization), the Beneficiary bank account from the vendor ledger entry will also be transferred to the line.
3.2.11 Advanced Costing – Cost for inventory revaluation
On the Item Card (in the Costing & Posting Tab) and SKU Card (in the Invoicing Tab), the Cost for Inventory Revaluation can be defined.
In this field, a decimal value can be specified for the Base Unit of Measure, in the local currency, excluding VAT. This information will be used in the revaluation of the inventory.
The SKU Card will inherit the Cost for Inventory Revaluation from the Item Card when it is created for this item. This value can then be changed on the SKU Card.
After defining the Cost for Revaluation, on either the Item Card or the SKU Card, the Item Revaluation Journal Report can use this cost to calculate the Revaluation value.
- Choose the search icon, enter Item Revaluation Journals, and then choose the related link.
- On the page that opens, select the wanted Batch Name and choose the action Calculate Inventory Value… in order to open the report page in which some extra options and filters can/need to be added.
- Fill in the Posting Date. By default, the work date will be filled in.
- In the Calculation Base, choose the option Cost for Inventory Revaluation to include items in the Revaluation Journal that have a value in the field Cost for Inventory Revaluation on the Item Card or the related SKU Card.
- Remark: if there is a value in the field on the SKU Card, this value will be taken into account and takes precedent over the value on the Item Card. In case no value is specified on the SKU Card, the report will fall back onto the Item Card in order to retrieve the cost.
When the option Last Direct Cost (excl. Cost for Inventory Revaluation) is chosen, the standard Business Central functionality will be used when proposing the lines for revaluation. This proposition will exclude items that have a value in the field Cost for Inventory Revaluation, either on the Item Card and/or the SKU Card.
- Run the Item Revaluation Journal Report by choosing OK.
- In the Column Unit Cost (Revalued), the cost for the inventory Revaluation is displayed.
3.2.12 Expected Costs on Inventory Valuation report
In order to print the expected costs on the Inventory Valuation report, an adapted RDLC is provided. This RDLC needs to be set as default, in order to print the correct information.
- In the Report Selections, set the adapted RDLC report 1001 Inventory Valuation (Detail) as default.
- After setting this report as default, choose the search icon, enter Inventory Valuation and choose the related link.
On the report page, an option is added. Include Expected Cost. When enabled, the report will also show the entries that only have expected costs.
- Choose print.
- The printed report will always show the actual amounts, which is the cost of entries that have been posted as invoice. If the option is enabled, the received or shipped entries will also be taken into account in the print of the report.
3.2.13 Allocation account on G/L account Card
In order to make the use of Allocation accounts more efficient, Dynavision Finance added the possibility to define the default allocation account for G/L accounts.
This allocation account will be taken over on the financial journal/Purchase or sales documents when the G/L account is added.
- Navigate to the G/L Account Card.
- In the section Posting, define the default allocation account in the field Default Allocation Account No.
- Specifies the allocation account number that will be used to distribute the amounts during the posting process.
3.2.14 Credit Limitation
To make it possible to print credit limitations on documents, there is a field added to the Payment Terms. When this percentage is specified, the payment terms, including the credit limitation percentage on the amount can be printed on sales documents.
3.2.14.1 Setup
- Navigate to the page Payment Terms.
- For the payment terms that need to have credit limitations configured, fill in the percentage in the field Credit Limitation.
- Configure this payment term for the desired customer, or select on the document.
3.2.14.2 Usage on document
In order to print this information, Dynavision Report Layouts can be used. In the Dynavision Report Layouts, the option Print Payment Terms needs to be set to Header or Footer. The Text Constant CREDITLIMITATION can be configured in the field Credit Limitation Text constant on the report layout setup card in order to be printed on the desired document.
More information about the Dynavision Report Layouts app can be found on App Dynavision Layouts Business Central – Dynavision.
3.2.15 Check account type compatible with Belgian CoA
When running the report Close Income Statement, a check is added to make sure that the account types that are configured are compatible with Belgian CoA.
This is set up following way.
3.2.15.1 Rulesets
The ruleset can be created manually or imported using the supplied Ruleset Configuration Package that can be found on the page Configuration Packages, action get Default Data on a sandbox environment.
- Choose the search icon, enter Rulesets,and then choose the related link.
- Add a ruleset for the Belgian Chart of Accounts. Choose Edit to open the Ruleset Card.
- Choose the table G/L Account.
- In the Rules, addlines for the check of the Account Type.
In the Event field, select Close Income Statement.
3.2.15.2 Close Income Statement Report
Navigate to the Close Income Statement Report. If there are errors according to the set up Rulesets, a message is displayed on the report page.
Click on Review Data to view the errors that are found according to the rulesets.
3.2.16 Payment Journal Enhancements
3.2.16.1 Select Batch on Open
By default, when the payment journal is opened for a journal Template, the last used Journal Batch will be opened for that template.
On the General Journal Template, there is an option added, Select Batch on Open.
When enabled, A Journal Batch needs to be selected by the user when opening the payment journal.
3.2.16.2 Fields added to the payment journal
Dynavision Advanced Finance WW adds functionalities to the Payment Journal. Amongst these functionalities, there are also fields added to make the usage of the payment journal more user friendly.
- Recipient IBAN
Displays the Recipient IBAN from the selected Recipient Bank Account on the line. - Recipient Bank Account No.
Displays the Recipient Bank Account No. from the selected Recipient Bank Account on the line. - Recipient Bank BIC
Displays the Recipient Bank BIC from the selected Recipient Bank Account on the line.
4 Dynavision advanced Finance BE
4.1 Payment and bank Management Enhancements
4.1.1 Structured Message on Purchase documents
4.1.1.1 (Posted) Purchase Invoice
The Dynavision Advanced finance BE module added a field to the (Posted) Purchase Invoice, and that can be used to enter a Structured Message.
After inserting a value in the field Structured Message on the Purchase Invoice, when using the EB Payment Journals to Suggest Vendor Payments, the Structured Message will be filled in as Payment Message. This way, the Structured message will be used for the payment, and mentioned in the Exported XML.
In Standard Business Central, the Structured Message can also be inserted in the Vendor Invoice No. or the Payment Reference fields. The information from these fields will also be transferred to the Payment Journal.
The added benefit of the Dynavision Advanced BE functionality of the Structured Message is:
- The Possibility to insert the message with symbols (+++); and
- A modulus 97 check on the entered number to check if the Structured Message is valid.
With this added field, the Standard Business Central fields can now contain the values for which the fields were intended. The field Vendor Invoice No. can now contain the Invoice number that is indicated on the received Invoice of the Vendor. The field Payment Reference is set up for the case where the vendor needs to be paid with another unstructured message, instead of the Invoice Number. (Example given: when the Customer Number or Contract Number needs to be mentioned in the payment.)
After Posting of the Purchase Invoice, the Structured Message is transferred to the Posted Purchase Invoice.
4.1.1.2 Purchase journal and Vendor Ledger Entries
On the Purchase Journal the column Structured Message can be added trough personalization. This structured message can then be edited manually and posted, so that this is transferred to the Vendor Ledged Entries.
On the Vendor Ledged Entries, the Structured Message value can be edited if needed.
4.1.1.3 Example basic flow
- Navigate to the Purchase Invoices List page, and add a new Purchase Invoice for a Vendor.
- Fill in the information received from the Vendor Invoice on the Purchase Invoice Card.
- In the General Tab, fill in the Structured Message that is communicated by the Vendor.
- The Structured Message can be filled in using the structured message format +++###/####/#####+++. Example given +++123/4567/89002+++.
- The Structured Message can be filled in without using the structured message format. Example given 123456789002.
- Upon Validation of the entered value, the number will be checked according to the Modulo 97-check. This check will be executed for all entered formats.
- Navigate to the EB Payment Journals Page.
- Use the action Suggest Vendor Payments…
- The Structured Message will be filled in in the column Payment Message for the suggested Payment Line.
- Choose the action Export Payment Lines to export the Payment Lines. The Structured Message will be entered on the bank payment.
- Business Central will recognize if the payment message contains a Structured Message or not. If it contains a Structured Message, the column Standard Format Message will be checked for the Payment line.
4.1.1.4 Purchase order
The Structured Message can also be inserted on the Purchase Order, in order to make sure this message is copied to the Vendor Ledger Entries.
This message will be transferred to the Vendor Ledger Entries when a Purchase invoice is posted, starting from the Purchase order, or if a Prepayment Invoice is posted for the Purchase Order.
After Posting the Purchase Invoice, the Structured Message field will not be editable on the Posted Purchase Invoice. This can however be changed using the action Update Document on the Posted Purchase Invoice.
The MOD97 check is also available in this field on the Update page.
The Posted Purchase Invoice page and the related Vendor Ledger Entries are updated accordingly.
4.1.2 Structured Message on sales document
To make (Electronic) Banking easier, the Structured Message can be used for Sales Invoices.
A Structured Message field is added to the Posted Sales Invoice and Posted Service Invoice tables, and the related Customer Entries table. When using this field, make sure the field is also added to the Layout of the Sales Invoice.
The customer who receives the Sales Invoice must enter this Structured Message when making the payment for this Invoice. When handling the Customer Payments, the Structured Message will be included in the CODA and CAMT/XML processing of Bank Statements. This makes the automatic processing of the payments more efficient.
When Posting a Sales invoice (or a sales order and invoice directly from the Sales order), the Structured Message field will be filled in with an automatically generated message. This can be seen on the linked Posted Sales Invoice.
The generated Structured Message consists of the Posted Sales Invoice No. with zeros added at the front until the Message contains 10 characters. Based on this 10-character number, two digits are added at the back for the modulo-97 check.
This same generated Structured Message is added to the related Customer Ledger Entry. This will be later used in the matching of CODA or SEPA CAMT Bank Statement File information.
On the Posted Sales Invoice, the Structured Message can also be modified by choosing the action Update Document.
4.1.2.1 Sales journal and Customer Ledger Entries
On the Sales Journal the column Structured Message can be added trough personalization. This structured message can then be edited manually and posted, so that this is transferred to the Customer Ledged Entries.
On the Customer Ledged Entries, the Structured Message value can be edited if needed.
4.1.2.2 Remarks
- When several Sales Journals are used with different Number Series (e.g. SIA21001 for sales invoice A and SIB21002 for sales invoice B), an extra different number must be added in the Number Series format. This extra number has to be added to make sure that there will not be two posted invoices with the same generated Structured Message. Example given: SIA121001 and SIB221001.
This is also applicable for Prepayment and Service Invoices. - ! When using service invoices and sales invoices, it is important to use a number series that will lead to uniquely created structured messages. If e.g. following number series is set up for sales invoices VFT+2400001 and following for service invoices SFT+2400001 this will lead to creation of the same structured message, as this uses the numbers (underlined) of the number series, which are the same in these cases.
An easy fix is to use a different quantity of numbers for the service invoice number series and the sales invoice number series, e.g. SFT+24000001 and VFT+2400001. - Because the Number Series is used for the generation of the Structured Message, the Number Series is limited to 10 digits, excluding the alphabetic or special character(s).
When more numbers are used in the Number Series format, the 10 most significant numbers will be used (left numbers will be stripped). - If Dynavision Layouts is installed on the environment, it can be added to the posted Sales Invoice layout by creating a Text Constant for the Structured Message and add this in the footer text of the layout.
In the Text Constantfollowing needs to be added in the Data, in order to print the Structured Message field value: F%71176650F%. Make sure the correct Table No. is selected for the Text Constant. - When using the Business Central prepayment functionality, the structured message will also be generated and indicated on the posted prepayment sales invoice. This is also the case for service invoices.
4.1.2.3 SEPA CAMT XML Bank Statement Matching using Structured Message
If the Customer pays using the Structured Message, this message will be used when matching the Bank Statement Line to the related Invoice in Business Central. In this section, the matching using a SEPA CAMT Electronic Bank Statement will be discussed.
First make sure that the Structured Message tag of the SEPA CAMT XML is linked to the Description field in the Financial Journal Page.
- Choose the search icon, enter Data Exchange Definitions, and then choose the related link.
- Choose the SEPA CAMT Data Exchange Definition, or add the definition if this does not exist yet.
- On the page that opens, in the Column Definitions section, add the Column Definition with following parameters:
- Column No.
Enter the next number that follows the last Column number on the existing lines.
- Name
Stmt/Ntry/NtryDtls/TxDtls/RmtInf/Strd/CdtrRefInf/Ref
- Data Type
Text
- Description
StrdRef
- Path
/Document/BkToCstmrStmt/Stmt/Ntry/NtryDtls/TxDtls/RmtInf/Strd/CdtrRefInf/Ref
- Column No.
- After inserting this data, choose the action Field Mapping, which can be found in the Lines section on the page.
- In the Field Mapping section, add a new Line.
- Column No.
Enter the Column No. that was inserted on the previous step when setting up the Column Definitions.
- Column Caption
Will be filled in automatically when entering the Column No.
- Field ID
Choose 8, Description.
- Optional
Check the Optional column; this specifies if the map will be skipped if the field is empty.
- Column No.
- After setting up this link, navigate to the Financial Journals Page and select the needed Batch Name.
- The Description Column will be filled in with the Structured Message If it has been found for the Payment Line.
- Import the SEPA CAMT XML file by using the standard Business Central function Import Bank Statement, which can be found when choosing Bank in the actions bar.
- Select the file to import.
- After importing the Bank Statement, the Structured Message is filled in the Description column automatically.
- Choose the action Apply Automatically, that can be found by choosing Application in the actions bar. The Customer will be added and the Financial Journal Line will be applied to the related Sales Invoice.
4.1.2.4 CODA Bank Statement Matching
The same functionality for matching using the Structured Message is also added for the CODA version of the Electronic Bank Statements.
In order to make sure that Business Central correctly processes the CODA files, in the Bank Account Card, the Protocol No. and Version Code needs to be up to date. These values are checked when the CODA files are imported.
- Choose the search icon, enter Bank Accounts, and then choose the related link.
- Select the Bank for which the CODA files need to be imported.
- Choose the action Import CODA File.
- The CODA files can also be imported by choosing the action Import Bank Statements from Isabel Connect, on the list page of bank accounts. This action requires that the customer has an Isabel Connect license.
- After the import has been completed, the result can be viewed by choosing the action Coda Statements.
- On the page that opens, the CODA Statements can be viewed and processed. Choose the action Process CODA Statement Lines and for the (selected) lines, the matching will be performed. The Customer will be added to the CODA Statement Line, and the CODA Statement Line will be applied to the related Sales Invoice.
The full CODA functionality is described in the chapter CODA import and processing.
4.1.3 General Journal Template enhancements
4.1.3.1 Action Open Journal for Bank Account
To work more efficiently, Dynavision Advanced Finance added an action to the bank accounts list page where you can go directly to the financial journal for the selected bank account.
This action can also be executed from the bank account card page.
4.1.3.2 Document No. in General Journal
The last used document number can be consulted when statements are posted for a certain Bank Account. On the Financial Journals, it is possible to use the same Document No. for multiple lines by using this module.
This functionality needs to be set up in the Advanced Finance Setup Page.
- Choose the search icon, enter Advanced Finance Setup, and choose the related link.
- Navigate to the Bank & Payment Management Tab, and enable the option Automatic copying of the Document No. in the financial journal. The Document Number will only increase when the financial journal is posted and not when a new line is created. After posting, the Last Used Document No. can also be found on the Bank Account Card of the related bank.
It is advised to check the column Increment Batch Name of the General Journal Template that is used to post the statements for that Bank Account. This ensures that new batches are created after posting and that the user will be informed about the changing of batch names.
In case a certain document No. format is desired, the field Document No. Prefix can be filled in on the Bank Account Card. In this field, placeholders can be used which will be automatically filled in by the system when the lines are created (e.g. %YEAR). This value will be joined with the Statement Number from the statement (e.g. KBC-2023-123). Pay attention that the Document No. cannot be longer than 10 characters
Remark: In case batches per statement are required, complete the field Journal Batch Name Prefix on the Bank Account Card. This value will be joined with the Statement Number from the statement, resulting in a new batch name (e.g. KBC-123). Pay attention that the batch name cannot be longer than 10 characters, otherwise an error will be displayed when transferring lines to the journal.
Remark: when manually importing bank statements, the file will be imported in the current batch. After the import, the document numbers will be updated according to the Last Document No. value on the Bank Account.
4.1.4 Payment as default document type option on financial journal line
All Vendor and Customer entries have a Document Type, which can be Payment, Invoice, Credit Memo, Refund or Empty.
On a financial journal line, the document type is empty when standard Business Central functionality is used.
Dynavision Advanced Finance provides the functionality to set Payment as the document type for each newly added Financial Journal line. This will be set when manually adding a line, or when importing a line from a SEPA CAMT XML file. The functionality is not applied when converting CODA statement lines to financial journal lines.
4.1.4.1 Advanced Finance Setup
In order to use this functionality, navigate to the Advanced Finance Setup Page. In the Bank & Payment Management Tab, enable the function Financial Journal Default Doc. Type Payment.
4.1.5 EB Payment Journal enhancements
4.1.5.1 Select Batch on Open
By default, when the EB payment journal is opened for a journal Template, the last used Journal Batch will be opened for that template.
On the Payment Journal Template, there is an option added, Select Batch on Open.
When enabled, A Payment Journal Batch needs to be selected by the user when opening the EB payment journal.
4.1.5.2 Payment Journal Template
In order to make it more easy to work with export protocols, in Dynavision Advanced Finance BE an extra field is added to the Payment Journal Template, Export Protocol Code.
This field can be used to set the Export Protocol Code that is used by default for exporting payment files for that bank account.
When this is configured, this will be automatically filled in on the EB payment journal as filter.
4.1.5.3 Applies-to Doc. Due Date
The column Applies-to Doc. Due Date is added on the EB Payment lines. This field contains the Due date of the document on which the payment is applied.
4.1.5.4 Action Open EB Payment Journal for Bank Account
It is possible to create a payment journal template for each bank account. This can then be used to process the payments made for this Bank Account.
If there are several Payment Journal Templates set up for the bank accounts, an action is added that can be used to open the Payment Journal directly from the Bank Account list page. This action is called Open Payment Journal.
The same action is added to the Bank Account Card Page. On the Bank Account Card, the action is called Payment Journal and a Payment Journal needs to be selected.
If there is no Payment Journal Template set up with the Bank Account for which the Open Payment Journal is executed, a new Payment Journal Template will be created for the Bank account that was selected.
4.1.5.5 Action Suggest Customer Payments
There is an action added, Suggest Customer Payments, that will suggest lines based on open Customer Ledger Entries in the EB Payment Journal.
This function works the same way as the Suggest Vendor Payments action, but instead of vendor ledger entries, customer ledger entries are suggested.
This makes it possible to include the Sales Credit memo’s in the payment suggestions that are generated.
4.1.5.6 Suggest Vendor Payments
Dynavision Advanced Finance BE added the possibility to filter on the Payment Method that was used when posting the Purchase invoices for vendors. This makes it possible to filter the suggested payments, to only make payment suggestions for vendor ledger entries that are posted using a certain payment method (or to filter out certain payment methods that should not be included in the suggestions). The beneficiary bank account from the vendor ledger entry will be noted on the suggested lines (if filled in).
4.1.5.7 Inherit beneficiary bank account for manually entered payment line
When using the suggest vendor payment action, the beneficiary bank account was inherited by the system from the Vendor Ledger Entries.
This is now also supported when the line is entered manually, and an Applies to Document Number is validated on the line.
4.1.5.8 Suggest Vendor/Customer Payment with export protocol filter
When on the EB payment journal the export protocol code is filled in on the header, when using the functionality to suggest vendor/customer payments, only lines will be inserted for that selected export protocol.
When the filter of export protocol is cleared when running the report, and there are payment suggestions for which the Export Protocol Code is blank, a notification will be shown to make sure the end user does not forget to process these lines.
There is also a field available on the header, indicating the number of lines that have an empty export protocol set.
Clicking on the number in this field will delete the export protocol filter on the header, to filter the list to only show these lines. This makes it easier to add the export protocol to these lines quickly.
The lines (with empty export protocol) will be visible after the suggest functionality is used, even when the filter is set on the header. This will make it easier for the end user to complete these lines, without needing to clear the export protocol filter first.
4.1.5.9 Action Clear Export Protocol Filter
In standard Business Central, it is not possible to clear the Export Protocol Filter that is added to the header of the EB payment journal.
Dynavision Advanced Finance BE adds the action to make this possible.
On the EB Payment journal, navigate to the Home tab and choose the action Clear Export Protocol Filter to remove the set value in the field Export Protocol on the header of the EB Payment Journal.
4.1.5.10 Action Open Vendor Card
The EB Payment Journal Lines show a column Description. This column contains the name of the Customer or Vendor that matches the Account No. that is assigned on the line. The functionality is added to make it possible to open the Customer or Vendor Card by selecting the assist button in the field.
4.1.5.11 Action Show Document
To make it possible to easily open the Document of a selected EB Payment Journal Line, directly from the EB Payment Journals Page.
Select the Payment Line from which the document needs to be viewed and choose the action Show Document. The Document that is noted in the Applies-to Doc. No. column of the line will be opened and shown to the user. Following documents can be opened using the Show Document:
- Invoice
The Posted Purchase Invoice linked to the Payment Journal Line will be opened. - Credit Memo
The Posted Salas Credit Memo linked to the Payment Journal Line will be opened.
When using the Show Document for the types Payment, Reminder or Refund, no document will be generated since these are not used in the Payment Journal. Following message will be shown when the action is executed on one of these previously mentioned documents: There is no Document for the Applies-to Doc. Type: X”.
4.1.5.12 Action Fill Bank Account
On the EB Payment Journals Page, there is an action added that can be executed in order to fill in the Bank Account of all EB Payment Journal Lines.
- Choose the action Fill Bank Account in order to fill in the Bank Account for the selected lines.
- Select the Bank Account that needs to be filled in for the selected lines.
Remark: if a line is selected that already has a bank Account assigned, a message will be shown to the user before the Bank Account can be selected.
4.1.5.13 Mandatory Bank account selected on header for export
When payment suggestions are created over several banks, the export of the payment lines still need to be set in order for the export to succeed.
When no Bank Account is set on the header level of the EB Payment journal, an error message will be shown when exporting the payment lines.
4.1.5.14 Export SEPA Pain.001.001.09 BE file
It is possible to export payment lines in the (EB) Payment journal using the XMLPort SEPA Pain.001.001.09 BE file. To use this format in the EB Payment journal, set up the needed export protocol with Export Object ID 2000007 and select this on the lines and header on the EB Payment Journal for export.
To use this format in the Payment journal, it needs to be set on the bank account card, in the field Payment Export Formal.
Set up the Bank Export/Import Setup with Processing XMLPort ID set to 71176650. Select this setup on the bank account card.
When exporting payment lines for this bank account, the wanted XMLPort for SEPA Pain.001.001.09 BE will then be used.
4.1.5.15 Action Open General Journals
In the standard Business Central flow for payments, first a payment proposal or suggestion has to be created in the EB Payment Journal. These Payment Lines will then be exported to an XML file and to a General Journal. Only when this General Journal is posted, the payments are applied to the linked Invoices, and the Vendor balance in Business Central is then correctly displayed.
Dynavision Advanced Finance added an action General Journal. After selecting the action, a General Journal Template List has to be selected. Choose OK to open the General Journal. From this page, the Payment Lines can be posted.
In case a fixed General Journal is used to post the result of the Payment Journal, it is possible to set this as default on the Advanced Finance Setup Page.
- Choose the Search icon, enter Advanced Finance Setup, and choose the related link.
- Navigate to the Bank & Payment Management Tab.
- General Journal Template For Payments
Specifies the General Journal Template that has to be set as default for posting the payments. Remark: only General Journal Templates with type General can be selected.
- General Journal Batch For Payments
Specifies the General Journal Batch that has to be set as default for posting the Payments. Remark: only General Journal Templates with type General can be selected.
- General Journal Template For Payments
These fields are optional. Beware that, if these fields are filled in, the same parameter will be used when using the action Send lines to Isabel.
After selecting the Templates in these fields, when using the action General Journal, these parameters will be used to open the General Journal.
4.1.5.16 Action Test Report
It is made possible to view a test report of the payment journal posting, so that any errors can be identified and corrected before executing the actual posting of the journal lines.
This action can be found under Related > Payment.
Remark: the Test Report ID 71176658 needs to be specified on the Payment Journal Template. If this column is not visible, add it trough personalization.
4.1.5.17 Action Reset Status
Once the Payment Journal Line has been processed (exported), it cannot be processed again. Choose the action Reset Status, that can be found by choosing Related > Payment.
This action will change the status of the selected Payment Line from Posted to Created.
Important remark: this action does not reverse any Ledger Entries or Files that have been uploaded to Isabel.
Remark: this functionality can be enabled or disabled for users, in the User Setup page.
Navigate to the User Setup page, and enable the option Allow Reset Status (EB Payment Journal) for all users that should be able to execute the Reset status action.
4.1.5.18 Split line for non structured lines
It is possible to enable the Separate Line option for lines in the EB payment journal, even tough the line is not a partial payment, of a standard format line. This makes it possible to export payment journal lines as separate lines in the payment file.
Remark: it is not possible to enable the option for negative lines, as these can’t be included as separate lines in the exported payment file.
The option Separate Line can be enabled and disabled by checking the box for each line, or can be executed in bulk using the actions Set Separate Line/Clear Separate Line.
Remark: the action Clear Separate line cannot be executed for lines that are marked as Standard Format Message or Partial Payment.
4.2 Financial journal numbering based on statement number
Dynavision Advanced Finance added the functionality to consult the last used document number when posting statements of a certain Bank Account. It is also possible to use the same Document Number for multiple lines.
In standard BC this is not possible since each line has a balancing account and thus a balance of zero, so each line gets a new document no.
4.2.1 Advanced Finance Setup
In order to use this functionality, navigate to the Advanced Finance Setup Page. In the Bank & Payment Management Tab, enable the function Automatic copying of the Document No. in the financial journal. The Document No. will only increase when the Financial Journal is posted and will not create a new line.
Make sure that there is NO Number series linked to the Financial Journal. This is set up in the General Journal Templates.
4.2.2 Usage
After enabling the functionality, when opening the Financial Journal, the field The Document No. the last time you posted is visible, and the field Document No. Current Statement.
Dynavision will use the last used document number and will increment with 1 to get the current document no.
When a line is added to the Financial Journal, the document No. will be used and will be extended with an incremental line number. For each added line in the financial journal, the same Document No. will be used(instead of an incrementing Document No. for each new line).
When entering a different number in the field Document No. Current Statement, Business Central will display a prompt to ask if the lines need to be updated.
When a journal is posted, the value of the Document No. Current Statement is saved to the Bank Account Card. This value will be displayed in the field Last Used Doc. Number.
When a Bank Statement (XML/CAMT) is imported in the Financial Journal, the Document No. on the first line will be copied on all lines. Make sure that the field The Document No. the last time you posted is filled in on the Bank Account Card before the import (or fill in the current number on the financial journal and update the lines after the first import).
4.3 Annual Accounts enhancements
In order to make it possible to create an annual account according to the requirements set by the Belgian government, enhancements are made to the financial report Row Definition page and the financial report Column Definitions page.
The report page is also enhanced and there is a report and analysis action that is added to quickly generate the Annual Accounts report using the RDLC that is created by Dynavision.
Use the Get Defaults function on the Configuration Packages page to download the Annual Account that is desired. There is a complete and shortened report.
4.3.1 Financial report Row Definitions
To the Row Definitions, following fields are added.
- Code
Specifies the code that needs to be noted for annual accounts reporting. - Include Details
Specifies if additional G/L account lines should be inserted for all G/L accounts related to the totaling account that is noted on the line in the row definition.
4.3.2 Financial Report Column Definitions
To the Column Definitions, following field is added.
- Comparison Period Formula
Specifies a period formula that indicates the accounting periods that need to be used to calculate the amount in the column.- E.g. for the previous financial year, use the formula -1FY[1..LP]
4.3.3 Annual Accounts Report
- Choose the action View Financial Report on the page Financial Reports and choose the action Print, or choose the action Print/PDF on the Financial Reports page.
- The report can also be executed by choosing the search icon, typing Annual Accounts and choosing the related report link.
- Select the Report Layout Annual Account, supplied by Dynavision.
- Fill in the requested information.
- Choose the action Show More next to the Options.
- Following option is added
- Show Detail
Specifies is the report should display detail lines per G/L account, depending on the option that is configured in the row definition.
- Show Detail
4.3.4 View Financial Report
When the action Choose Financial Report is chosen, the page opens with the annual accounts information opens.
The action Show Detail can be enabled to view the detail G/L accounts that are added as detail lines to the report, after running the Print action.
This detail information will be updated each time the annual accounts report is executed and printed, to keep this page up to date and make sure the page always reflects the printed annual account.
4.4 VAT/ Fiscal restrictions
Some G/L entries need to be reported in a certain way and are subjected to certain fiscal restrictions. In order to facilitate this, some concept are introduced by Dynavision Advanced Finance BE.
4.4.1 VAT / Fiscal Restrictions Categories
- Choose the Search icon, enter VAT / Fiscal Restrictions Categories, and choose the related link.
- Add the Restriction Categories that can occur in the company.
- Code
Specifies the code of the category.
- Description
Specifies the description of the category
- Restrictions
Specifies the number of restrictions that are associated to this category.
- Code
- (Optionally) Add Restrictions to the category.
Choose the action Restrictions.
Or select the value in the column Restrictions next to a category and make the page editable. - On the page that opens, the restrictions can be added for the categories.
4.4.2 VAT / Fiscal Restrictions
- Navigate to the page by selecting the action as mentioned in the previous section, or choose the Search icon, enter VAT / Fiscal Restrictions, and choose the related link.
- Code
Specifies the code of the fiscal restriction.
- Description
Specifies the description of the fiscal restriction.
- Category
Specifies the category for which the restriction is set up.
- Non Deductible VAT%
Specifies the percentage of VAT that cannot be deducted. These can be set per date, so the non deductible VAT % cannot be deducted for certain dates.- Choose the three dots in the field to select a start date for the percentage that is entered. When no date is specified, the current workdate will be added by default to the percentage. In the factbox, the percentages and start dates can be consulted.
- Fiscal Restriction %
Specifies the percentage of the fiscal restriction that applies to the line. These can be set per starting date.- Choose the three dots in the field to select a start date for the percentage that is entered. When no date is specified, the current workdate will be added by default to the percentage. In the factbox, the percentages and start dates can be consulted.
- Enabled
Specifies if the restriction can be used on documents.
- Code
4.4.3 G/L Account
The Fiscal Restriction Category needs to be linked to the desired G/L accounts.
- Navigate to the desired G/L Account Card.
- In the section General, select the Restriction Category, and, if relevant, the Restriction Code which is set for the G/L account card in the Restriction Category.
- When the G/L Account is now noted on a document, the Restriction Category/ Code will also be noted on the line, together with the restriction % and the non deductible VAT % that was configured.
- When these lines are posted, the information will be transferred to the General ledger entries.
4.4.4 Usage on purchase documents
On purchase documents, it is possible to select a VAT Restriction Code, which will auto-fil the Nondeductible VAT % on the purchase document in the line on the document for which the code is set.
The field is available in following documents:
- Purchase quote and purchase order (Hidden by default);
- (non-posted) purchase invoice, purchase credit memo.

4.5 Standard functionalities made available on financial journal
4.5.1 Amount LCY column
This column makes working with another currency in a Financial Journal for a bank account more efficient. The column Amount (LCY) contains the amount that will appear in the general ledger entries in Business Central.
4.5.2 Incoming documents
Incoming document is a standard Business Central functionality which can be used in a general journal.
This functionality makes it possible to attach files linked to the current posting.
When posting the general journal, these attachments are linked to the created general ledger entries.
Dynavision Advanced finance made the same functionality available in the financial journal.
Choose the action Create incoming Document from File…, or use the action Attach File in the Fact box. Choose the file that needs to be inserted.
After posting the Financial Journal, these files will be visible in the Incoming Documents fact box in the G/L Entries Page.
Remark: there is a limit to the database size of Business Central. Consult the implementation partner for more information.
4.5.3 Preview posting
On all Standard Business Central Documents and Journals, a preview posting is available. This functionality is also added to the Financial Journal. All needed checks are performed when using the preview posting functionality.
4.6 CODA
4.6.1 What is CODA
CODA is a report format that is used in the Belgian Electronic Banking System. This report format allows companies to automatically import the bank statements into the system in order to process this information in the bookkeeping in Business Central. This import can be executed for both the Bank Accounts and other accounts (Customers, Vendors, VAT, etc.).
Each transaction on the bank statement, each attachment to the bank statement (Credit Message, Debit Message), and each supporting document (statement) is listed in the file with the corresponding Code.
A separate CODA file will be generated for each account, and will be sent each banking work day when there has been a movement. These files will be sent in one single physical file.
4.6.2 Contents of a CODA file
Each transaction mentioned on the statement of the account will be included into detail in the CODA file. Extra information pertaining to the movement will be saved in informative records. Information which is not linked to a particular transaction can be included into free records. These free records can be inserted only between the new balance record and the trailer record.
Each CODA file contains the following recordings:
- A header,
- Several data records, and
- A trailer.
The data records include in order:
- The old balance,
- The movement on the bank statement,
- (Optional) Additional information, related to the movement,
- The new balance,
- (Optional) Free communication regarding the movement, and
- (Optional) Free communication not related to the movement.
Each file containing movement will at least consist of a header record, the old balance record, the movement, the new balance and a trailer record.
An Empty file consists of a header record, the old balance and a trailer record.
When there are Free Communication Records, the Empty file consists of a header record, the old balance, the new balance, the free communications and a trailer record.
4.6.2.1 Coding of the transactions
In the CODA format, each transaction will be given its own code, which is always made up of the following 8 positions.
The First position contains information about the type of transaction.
The Second and third position contains information about the Family of the transaction.
The Fourth and fifth position contains information about the Transaction/Operation itself.
The Sixth, seventh and eighth positions contain information about the Category of the transaction.
4.6.2.1.1 Type
Position 1 contains information about the transaction type. This code represents the amount that is communicated (total, subtotal). This code makes it possible to determine whether the entry is an accounting entry or another type of entry.
| 0 | Simple amount without detailed data; e.g. an individual Credit Transfer (free of charges) | ||
| 1 | Amount as totalized by the Customer; e.g. a file regrouping payments of wages or payments made to suppliers, or a file regrouping collection for which the Customer is debited or credited with one single amount. | ||
| 5 | Detail of 1. This is mentioned in case the Customer asks for detailed data to be included into his CODA file after the overall record (type 1). | ||
| 2 | Amount as totalized by the bank; e.g. the total amount of a series of credit transfers with a Structured Communication. | ||
| 6 | Detail of 2, simple amount without detailed data. Normally, data of this kind comes after Type 2. The Customer may ask for a separate file containing the detailed data. In this case, one will speak of a Separate Application. | ||
| 7 | Detail of 2, simple account with detailed data. The Customer may ask for a separate file containing the detailed data. In this case, one will speak of a Separate Application. | ||
| 9 | Detail of 7. The Customer may ask for a separate file containing the detailed data. In this case, one will speak of a Separate Application. | ||
| 3 | Simple amount with detailed data; e.g. in case of charges for cross-border credit transfers. | ||
| 8 | Detail of 3. |
It is possible to combine type 2 and types 6 and 7,9.
4.6.2.1.2 Family
Positions 2 and 3 contain information about the Family of the transaction. This code specifies to which broad division of banking operations the transaction belongs. Example given: Credit Transfer.
4.6.2.1.3 Transaction
Positions 4 and 5 contain information about the Transaction. Within the Family, the transaction code provides a precise explanation of the transaction.
For each Family Code, there are a number of different Debit or Credit Transaction Codes.
4.6.2.1.4 Category
Positions 6, 7 and 8 contain information about the Category of the transaction. This code provides additional information about the nature of the transaction. For each movement record, the category clearly distinguishes between the different items relating to a single transaction.
4.6.2.1.5 Remarks
When a financial institution encounters a transaction which is not yet received a common code and which should be given one, Code 39 or 89 will be given to the transaction within family 30. This will facilitate the allocation of a definitive code afterwards.
Within each family, numbers 40 to 48 and 90 to 98 have been earmarked for the transactions which are proper to one bank and for which no common code is required immediately.
Numbers 49 and 99 identify the correction and cancellation entries.
4.6.2.2 Structured Communication
Communications may occur both in the Movement record and the Information record. The Communication Format indicates whether the communication is Free (0) or a Structured Format (1).
When the communication is a Structured Format, a three-position code indicates the type of communication. The number of positions and their meaning differ, according to the type of record.
In Business Central, the assignation of the Structured Message is done by padding the Invoice Number on the left with zeros, up to 10 positions. The last two digits are reserved for the control number, which is then added.
4.6.3 Setup
4.6.3.1 Bank Account
In order to be able to use the CODA functionality in Business Central, a Bank account needs to be set up.
- Choose the search icon, enter Bank Accounts,and then choose the related link.
- Add an account for each Bank Account for which CODA statements need to be imported.
- Fill in the necessary information in the Bank Account Card. If any information is missing, when choosing the action Import CODA file and selecting a CODA file, the system will display a message of the missing information and the value that should be filled in in the field (according to the imported CODA file).
Remark: when importing a CODA file with non-matching enterprise number, it is possible that the displayed enterprise number contains an additional leading zero. In this case the leading zero should be deleted.- General Tab
- Disable Automatic Payment Matching – Standard BC option
Specifies whether to disable automatic payment matching after importing bank transactions for this bank account.
- Disable Bank Reconciliation Optimization –Standard BC option
Specifies whether to disable bank reconciliation optimization for this bank account. It will result in more precise matches, but it will be slower. Disabling the optimization is useful when there are several bank ledger entries with the same amount and date that need to be auto-matched.
- Match Tolerance Type
Specifies by which tolerance the automatic payment application function will apply the Amount Incl. Tolerance Matched rule for this bank account.
- Match Tolerance Value
Specifies if the automatic payment application function will apply the Amount Incl. Tolerance Matched rule by Percentage or Amount.
- Payment Service Provider
Specifies the payment service provider for CODA statement line processing. This needs to be set id the CODA statements are regarding Mollie or Multisafe payments.
- Disable Automatic Payment Matching – Standard BC option
- General Tab
Remark: when a value is selected in this field, the Coda Match By and CODA Transformation Rule cannot be specified/edited.
- Coda Match By
Specifies against which customer ledger entry field the non-structured CODA statement lines should be matched. This can be set to Document No. or Payment Reference.
For Mollie files, where the matching will be done using the external document number, this should be set to Payment Reference.- Coda Transformation Rule
Specifies a rule to transform the statement message for improved payment reference matching for non-structured CODA statement lines.
- CODA Exact match
Specifies whether the matching of CODA statement lines should require exact matches of the document number or payment reference only, or if it should allow partial matches (contains).
- Communication Tab
- Country/Region Code
The Country/Region Code needs to be filled in on the Bank Account, in order to be able to correctly process imported CODA files.
- Country/Region Code
- Posting Tab
- Protocol No.
Specifies the Protocol Number used by the CODA system to import coded bank account statements. This is a unique number that identifies a Belgian bank.
- Version Code
Specifies the Version Code used by the CODA system to import coded bank account statements. This is used by the bank for reading coded statements.
- Protocol No.
- Transfer Tab
- SWIFT Code
Specifies the international bank identifier code of the bank.
- IBAN
Specifies the bank account’s international bank account number.
- Factoring Enterprise No.
(Optionally) In case another company is responsible for the collection of payments for invoices, the enterprise number mentioned in the CODA file will be the Enterprise of this other Company. This number can be noted in this field. This will have precedence over the Enterprise No. on the Company information.
- Document No. / Journal Batch Prefix
Specifies how the document no. or journal batch name is composed when importing CODA files. Add a prefix and/or placeholders.
The prefix is added to the document No. to make sure that there is no issue importing coda statements for different bank accounts, which possibly have the same document number.
Remark: take into account that the total of allowed characters in the Document No. is 20.
- SWIFT Code
- Coda Transformation Rule
- When importing CODA files, the system checks if the filled in values in the fields match the values noted in the CODA file.
If not, a message will be shown mentioning the value that the field, that contains wrong information, should contain.- In case the message is about the information in the Enterprise No. field on the Company Information, or in the field Factoring Enterprise No., in the message shown, the ID that is fetched from the CODA file contains a prefix zero. This zero needs to be omitted when copying this value in the field.
- In case the message is about the information in the Enterprise No. field on the Company Information, or in the field Factoring Enterprise No., in the message shown, the ID that is fetched from the CODA file contains a prefix zero. This zero needs to be omitted when copying this value in the field.
4.6.3.2 Advanced Finance Setup and General Journal Template
The last used document number can be consulted when statements are posted for a certain Bank Account. On the Financial Journals, it is possible to use the same Document No. for multiple lines by using this module.
This functionality needs to be set up in the Advanced Finance Setup Page.
- Choose the search icon, enter Advanced Finance Setup, and choose the related link.
- Navigate to the Bank & Payment Management Tab, and enable the option Automatic copying of the Document No. in the financial journal. The Document Number will only increase when the financial journal is posted and not when a new line is created. After posting, the Last Used Document No. can also be found on the Bank Account Card of the related bank.
- In case the CODA statement files do not need to be saved and attached to the imported CODA, disable the option Save CODA Statement Attachments.
It is advised to check the column Increment Batch Name of the General Journal Template that is used to post the statements for that Bank Account. This ensures that new batches are created after posting and that the user will be informed about the changing of batch names.
Remark: In case batches per statement are required, complete the field Document No. / Journal Batch Prefix on the Bank Account Card. This value will be joined with the Statement Number from the CODA statement, resulting in a new batch name (e.g. KB23-123).
4.6.3.3 Customer Bank Account Exclusions
When a CODA statement line is imported and manually matched to a customer and posted, if the IBAN is not yet linked to that customer as bank account, the system will add this one to the bank accounts of the customer for quicker matching in the future.
This functionality can however be skipped for certain customers and bank accounts if desired.
- Choose the search icon, enter Customer Bank Account Exclusions, and choose the related link.
- Remark on certain relevant pages (Advanced Finance setup, Code Statement), an action is added to quickly navigate to the excluded bank account list.
There will also be a non editable counter on these relevant pages.
- Remark on certain relevant pages (Advanced Finance setup, Code Statement), an action is added to quickly navigate to the excluded bank account list.
- On the page that opens, add the IBAN or Customers that need to be skipped by the system for adding bank accounts after posting of the CODA statements.
- Type
Specifies whether the exclusion applies to a customer or a specific IBAN number.
- No.
Specifies the customer Number or normalized IBAN that is excluded from automatic creation.
- Customer Name
Specifies the customer name when the selected type on the line is set to Customer.
- Type
4.6.3.4 Transaction Coding
After setting up the information on the Bank Account Card, the Transaction Code mapping needs to be specified. This has to be set up in order to make it possible for Business Central match the CODA Statement Lines, read from a CODA file, to the correct accounts.
- Choose the search icon, enter Transaction Coding,and then choose the related link.
- Add the lines for the Coding for a specific combination of parameters.
- Bank Account No.
Specifies the bank account number for which the combination and rule on the line is valid. If this field is left empty, the transaction coding line applies all bank account numbers.
- Transaction Family
Specifies the transaction family for which the encoding is set up.
- Transaction
- Bank Account No.
Specifies the Transaction for which the encoding is set up.
- Transaction Category
Specifies the transaction Category for which the encoding is set up.- Description
Specifies a description that is used when posting this combination.
- Globalisation Code
This code specifies whether the coded transaction refers to a Global or a Detailed movement.- In Global processing, the detail lines are referred to as Indirectly settled.
- In Detail processing, the detail rules are processed and the Global rule is marked as Indirectly settled.
- Account Type
Specifies the type of account that the entry on the journal line will be posted to.
- Account No.
Specifies the number of the G/L Account, Bank, Customer or Vendor that the journal line is linked to.
- Divide VAT Amount
Indicates if the VAT amount from the CODA statement line will be divided on related lines.
- VAT Prod. Posting Group
Specifies the VAT product Posting group. This can be used to overrule the default on the general journal line.
The Account No. used for the Banking Costs will normally be configured without VAT (or D0).
When BC needs to apply the VAT, the account defaults need to be overruled with a different ‘VAT Product Posting Group’.
- Matching Rules
Shows the number of matching rules for the current transaction coding.
- Description
4.6.3.4.1 Best Practices
It is necessary to create a Transaction Coding line that has following parameters:
- Bank Account No.: EMPTY;
- Transaction Family: 0;
- Transaction: 0;
- Transaction Category: 0;
- Description: Default posting (or other description);
- Globalisation Code: Global;
- Account Type: G/L Account;
- Account No.: 499999 (or other holding account).
This coding is used as an alternative, for operations that the system cannot immediately interpret.
For bank charges with VAT, following can be set up
- Select Global processing for each bank cost-related line in the Transaction Coding table.
- In automatic processing, this will link the total amount to a general ledger account. The sub-amounts will then be settled indirectly.
- This allows to apply the correct VAT calculation in the financial journal.
- When posting the Financial journal after transferring the CODA statement lines, VAT entries should be created. It is therefore required to include VAT codes in the financial journal.
- This can be done by manually completing the information on the Financial Journal Line before posting,
- By including the VAT information in the Ledger Card of the General Ledger for the bank costs, and allow it to be copied to the journal.
- Remark: if this option is checked in the setup on the journal, the VAT setup of other ledger accounts will also be included. Example given: when posting on a 61* account to pay for sandwiches and the 61 account has a VAT setup, this will also be included in the financial journal, which is not allowed
- Another option is to work with a Purchase Invoice. The Vendor is then the Bank.
- When the Bank sends the Invoice, the amount is posted to the 65* account. This automatically charges VAT.
- This Invoice is then paid using the Payment Journal. The resulting miscellaneous entry debits the supplier, and creates a Payment on the waiting account.
- When the Bank statement is then received in a CODA file, the global amount needs to be deducted from the payments.
For bank charges containing lines with and without VAT in a statement, following can be set up.
- Select Detail processing for the bank cost-related line in the Transaction Coding table. In case this differs from bank to bank, also specify the Bank Account No. when defining the lines mentioned.
- Set up the CODA Matching Rules for the bank cost and VAT lines. (see section CODA Matching Rules.
- Import the CODA statement for the bank, and process. The lines will be linked to the corresponding account no. as has been set up in the transaction coding.
This can be transferred to the General Ledger and processed in the ledger.
Result: - The VAT Entries will be as follows:
Remarks:- The lines, regarding the bank costs (excluding the VAT-amounts), are handled as if there is no VAT, meaning that VAT Prod. Posting Group D0 is used, which is configured at 0% VAT.
- The line(s), regarding the VAT amounts, use the VAT Prod. Posting Group BTW.
- These VAT Prod. Posting Groups should be configured on the G/L Account Card of both the Bank cost and the VAT G/L Account, before transferring the CODA Statement lines to the Financial Journal.
- The VAT statement will contain the correct information, as the information for the base line (bank cost) will be noted in box 82 and the VAT amount will be noted in box 59.
4.6.3.5 CODA Rules
The CODA Rules are divided in Split Rules and Account Matching rules.
Underlying, the same table is used, but on the page that is created, the filter buttons can be used to see either the Split Rules or Account Matching Rules.
The CODA Rules can be accessed in a few different ways.
Option 1: by selecting the value in the Matching Rules column on the Transaction Coding Page.
Remark the filter Account Matching will be enabled, so if no rules are showing, change the filter.
Option 2: by choosing the search icon, entering CODA Rules,and then choose the related link.
Option 3: by choosing the action Rules (either under Account Matching or Document Matching) on the CODA Statement Card, in the CODA Statement Lines section.
- On the CODA Rules Page, an overview is shown of the set up Account Matching rules or Split Rules, depending on the filter that is applied on the page.
- In order to set up the rules, the same applies as the Transaction Coding.
Working with the combination of Bank Account No., Transaction Family, Transaction and Transaction Category.
There are however some other columns that can be used in order to set up the matching of the CODA statement lines using the correct rule.
Remark: the CODA Rules will be validated in the Processing of the CODA statement lines beforethe Transaction Coding is validated.
4.6.3.5.1 CODA Account Matching Rules on general line
Following fields can be used to match the original line that has been imported from the CODA file.
Either select the Rules action (or Add Rule) under Account Matching on the Coda Statement Card, or make sure that the view is set to Account Matching by clicking this action on the Coda Rules Page.
- Bank Account No. Other Party
Specifies the bank account of the other party. - Search Text
Specifies the text to compare against the statement message of the CODA statement line. - Is Regex
Specifies if the search text contains a regular expression. When this is enabled, the search text will be processed as a regular expression pattern.
Example of a regex is: (\W|^)po[#\-]{0,1}\s{0,1}\d{2}[\s-]{0,1}\d{4}(\W|$). This will match order numbers for a company and will have various possible formats, such as:- PO nn-nnnnn
- PO-nn-nnnn
- PO# nn nnnn
- PO#nn-nnnn
- PO nnnnnn
- Search in information
Specifies if Business Central also needs to search the information that is noted in the Information field of the CODA statement line. If enabled, Business Central will look in the information field and will search for the entered search text on the line. If disabled, only the statement message will be searched. - Account Type
Specifies the type of account that will be assigned to the CODA statement line. - Account No.
Specifies the number of the G/L Account, Bank, Customer or Vendor that will be assigned to the CODA statement line. - Account Name
Displays the name for the selected Account No. - Shortcut Dimension 1
Specifies the code for Shortcut Dimension 1, which is one of two global dimension codes that can be set up in the General Ledger Setup Window.
Remark: when setting up split lines, the dimension from the main line will be taken over to the split line in case no dimension is specified for the other split line. - Transformation Rule
Specifies a transformation rule that transforms the statement message. Optionally, up to three transformation rules can be added to the rule. The other transformation Rule fields can be added trough personalization. - Description
For Non standard coda lines, it is also possible to overwrite the description of the coda statement line. This may be text, or placeholders can be used to e.g. add values from a transformation rule. Select the three dots in the field description to see the possibilities.
If no value is filled in, the description is not changed. If a value is filled in, the description will be taken over on the CODA statement line. - Enabled
Specifies if the rule is enabled. Disabled rules are disregarded when processing CODA statements.
Remark: when the CODA matching rule is not valid, e.g. no G/L account selected when the Account type is set to G/L Account, an error will be displayed when attempting to enable the rule.
Remark: the fields at the bottom of the page will indicate if the system found the entered search text in the statement message line that was selected when navigating to the matching rules. It will also indicate (in case of split lines), if an amount was found, and if yes, which amount.
4.6.3.5.1.1 Use case: SEPA Direct Debit Structures Message 127
When debtors are paid using Direct Debit, the original imported line of the CODA statement will have information about the SEPA Creditor ID in the Structured Message and the reference of the mandate.
The SEPA Creditor ID is a unique number, linked to the bank account of the vendor. The reference of the mandate is a unique reference to the specific direct debit.
It is thus possible to immediately add the SEPA Creditor ID to the CODA Account Matching Rules, when this information is received, or to add the SEPA Creditor ID to the CODA Account Matching Rules when processing the statement for the first time.
If the matching needs to be done using the reference of the mandate, it is possible to use this information in the Statement Message for the matching.
Remark: the SEPA Creditor ID’s are different for each country. In Belgium, this is the last 10 numbers of the Enterprise Number in case this is known for the enterprise. If not, this will be a unique generated identifier.
An example of the matching rules is displayed below:
As can be seen in the image, it is possible to automatically match using the SEPA Creditors ID or the Polis number.
4.6.3.5.1.2 Use Case CCV statement message – use transformation rules
The Account matching can be used to match CCV lines and change the description if desired.
An example described below uses a transformation rule to use Regex to get a certain value, and this value is added as description to the matched CCV line. The statement message of the line in this example is as follows: AFREK. DEBIT BETAALAUTOMAAT DAT. 20260320/6077 AANT.20 MREF. Customer Name
The Transformation rule that is used is the following.
- Code: MATCHINGRULE_CCV
- Description: MATCHINGRULE_CCV
- Transformation Type: replace by using Regular Expressions
- Find Value: ^.*DAT\.\s*(\d{4})(\d{2})(\d{2})[\/\d]*\s.*MREF\.\s*(.+?)\s*$
- Replace Value: $4 – $3/$2
With the sample text that is given below, the expected result of the transformation rule will be Customer Name – 20/03.
In the Coda Rules, following Account Matching Rule is set up to make the matching and change the description of the statement message.
As can be seen on the image, the Transformation rule is set for the line, and in the Description, the output of transformation rule 1 is used – %T1.
The output after the processing of the CODA statement is as follows.
4.6.3.5.1.3 Use Case Bancontact statement message – use transformation rules
The same as the example above can be done for CODA statement messages for bancontact transactions.
The example described below uses a transformation rule to use Regex to get a certain value, and this value is added as description to the matched line. The statement message of the line in this example is as follows: 10519965916724702103262649002103267Customer Name
The Transformation rule that is used is the following.
- Code: MATCHINGRULE_ATOS
- Description: MATCHINGRULE_ATOS
- Transformation Type: replace by using Regular Expressions
- Find Value: ^(\d{16})(\d{2})(\d{2})(\d{15})(.+?)\s*$
- Replace Value: $4 – $3/$2
With the sample text that is given below, the expected result of the transformation rule will be Customer Name – 20/03.
In the Coda Rules, following Account Matching Rule is set up to make the matching and change the description of the statement message.
As can be seen on the image, the Transformation rule is set for the line, and in the Description, the output of transformation rule 1 is used – %T1.
The output after the processing of the CODA statement is as follows.
4.6.3.5.2 CODA Rules Split Lines
Following fields can be used to split an original imported line into different lines based on information that is noted in the Statement Message. The information can be searched, and the lines can be split using the amounts found in the statement message by specifying the location of that information. Example given: when a payment for a loan is received, the line contains a general amount, but a part of this amount is interest and a part is capital.
Either select the Rules action (or Add Rule) under Split Lines on the Coda Statement Card, or make sure that the view is set to Split Lines by clicking this action on the Coda Rules Page.
- Split Line
Specifies if the rule will split the original CODA statement line. This means that the original line will be removed, and replaced by the 2 new split lines. - Search Value by
Specifies how to search the amount in case of split lines.
The options are:- Search Text
This option will extract the amount appearing after the specified Search Text.
This text is specified in the field Search Text. Remark: when splitting lines using search text, Regex can not be used to find the part of the statement message containing a certain amount.
- Position
This option will extract the amount based on its position in the statement message.
- Search Text
- Position
Specifies the position of the amount field in the statement message. This position indicates the word that has to be found in the Statement Message. - Sign
Specifies the sign to add to the amount field. This can be positive or negative. Example given: Sodexo line of 119.37 euros needs to be split in COST and COMISSION; COST is in statement message: 120,60 euros, and the commission needs to be subtracted (-1.23 euros). - Transformation Rule
Specifies a transformation rule that transforms the statement message. Optionally, up to three transformation rules can be added to the rule. The other transformation Rule fields can be added trough personalization. - Description
Specifies the description to assign to the split CODA statement line. This will be the description that will be transferred to the financial journal when processing the CODA lines.
If no value is filled in, the description is not changed. If a value is filled in, the description will be taken over on the CODA statement line.It is not possible to overwrite standard coda line descriptions. - Number of Decimals
Specifies the number of decimals that needs to be used when converting the value found in the Statement Message to the amount for the split line.
Remark: when the amount is already converted in the message, and thus had a decimal in the value already, this column needs to be cleared in order to correctly fetch the value from the statement message.
Remark: the split functionality is executed first, after that the search text functionality. This makes it possible to first split the lines, and then assign the general ledger account to the line using the search text functionality. E.g. when the payment needs to be split in cost and a value per terminal. (See example 4)
Remark: The splitting only takes the text in the information lines into account when the option Search in information is enabled.
4.6.3.5.2.1 Examples CODA Split
The Splitting functionality is shown in following examples. In the examples, three scenarios are noted.
Example 1
The first example will show how the lines can be split for a statement message that is as follows: 5560900012 20230105 MS1 20230104165122 AMT:0,50 EUR MSC:0,01 EUR
- The Cost is indicated with AMT:
- The Commission is indicated with MSC:
These lines can only be split using the Search text, because there are characters in the words containing the amounts that interfere with the position search.
Following CODA Matching Rules are set up:
As can be seen in the screenshot, a result text will show the text that has been found by the system using the Statement message on the line. This can be used to verify if the correct information is inserted for the matching. The Number of Decimals is empty in this case, because the Result text already contains a decimal number.
The original line in the file is as follows:
After choosing Process, following result is shown in the CODA Lines:
Example 2
The second example will show how the lines can be split for a statement message that is as follows: R:7-82237996/087 VAN 03/01 TOT 03/01BRT:0000063,30EUR C:00001,01
- The Cost is indicated with BRT:
- The Commission is indicated with C:
These lines can only be split using the Search text, because there are characters in the words containing the amounts that interfere with the position search.
Following CODA Matching Rules are set up:
As can be seen in the screenshot, a result text will show the text that has been found by the system using the Statement message on the line. This can be used to verify if the correct information is inserted for the matching. The Number of Decimals is empty in this case, because the Result text already contains a decimal number.
The original line in the file is as follows:
After choosing Process, following result is shown in the CODA Lines:
Example 3
The third example will show how the lines can be split for a statement message that is as follows: EDENRED BELGIUM SA/NV 23031587629914ETR190723 0023031587 P00058953 00002300 0000058
- The First value is noted on position 7 (the 7th “word” in the statement);
- The Second value is noted on position 8 (the 8th “word” in the statement).
These lines can be split using the position of the amount in the message.
Following CODA Matching Rules are set up:
As can be seen, the amounts can be found in the 7th ad 8th word. The position is thus 7 and 8. In this case, the amounts are not yet decimal values, so the Number of Decimals needs to be specified. In this case, we want the number to be divided by 100, in order to get 2 decimals, so we specify the Number of Decimals as 2.
The original line in the file is as follows:
After choosing Process, following result is shown in the CODA Lines:
Remark
When the wrong sign is defined on the CODA Matching Rules, the user will receive following error message. This makes sure that no wrong postings are created by splitting the lines.
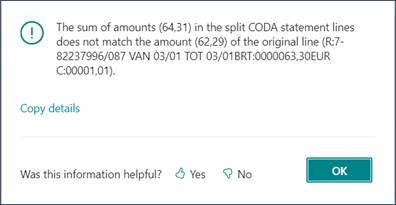
Example 4
The fourth example will show how the lines can be split in two lines: the line containing costs, and the line containing the payment value, and after the split that the line containing the payment value can be assigned to a specific terminal, that is added to the statement message in the CODA statement line.
The original statement line is as follows: R:5-92775252/062 MC 01121949 AFG:0000137BRT:0000500,00EUR C:00004,50;
- The terminal no is the value 01121949
- The cost is indicated with C:
- The Payment amount is indicated with BRT:
Following CODA Matching Rules are set up:
As can be seen, the G/L account on the first line (the one that will need to be assigned to a specific terminal) is not filled in. This will make sure that the line will be split first and then the G/L account will be assigned to the newly created line with the value after BRT:.
If this is filled in on the split line, the matching process will stop, as there will be a G/L account filled in for the line.
The Original line in the file is as follows:
After choosing Process, following result is shown in the CODA Lines:
As can be seen in the lines, for the payment cost, the correct G/L account is assigned that is set up for the terminal in the statement message.
Remark
When the wrong sign is defined on the CODA Matching Rules, the user will receive following error message. This makes sure that no wrong postings are created by splitting the lines.
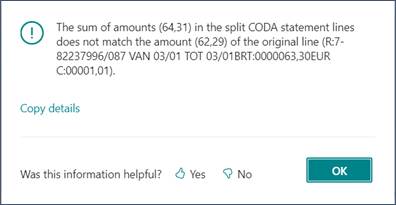
4.6.4 CODA Import and processing statements
4.6.4.1 Import CODA file
- Choose the search icon, enter Bank Accounts and choose the related link.
- Select the Bank Account for which the CODA file needs to be imported.
- Choose the action Import CODA file and select the CODA file that has been received from the Bank.
- When importing the CODA file, checks will be performed to make sure that the values set on the Bank Account Card match the values in the CODA file. If not, a message will be shown and the fields can be modified if needed.
- Remark: make sure that there are no special characters in the CODA file that is imported (e.g. é). Otherwise the system will stop processing the file and will give an error. Remove the special characters to import the file.
- Choose the action CODA Statements on the Bank Account Card.
- The imported CODA file will have been added, when the import was successful, as Attachment to the CODA Statement.
This makes it possible to easily find the original file for when an error occurs of when the original file needs to be checked.
- The imported CODA file will have been added, when the import was successful, as Attachment to the CODA Statement.
- Select the statement from the list in order to process the statement.
- In the list there are two extra columns visible.
- Unapplied Statement Lines
Specifies if the coda statement contains unapplied statement lines.
- Transfer to Journal
Specifies if the coda statement contains (partially) applied statement lines that need to be transferred to the general journal.
- Unapplied Statement Lines
- In the list there are two extra columns visible.
- Based on the field Disable Automatic Payment Matching, the CODA Statement Lines can have been matched and (partially) applied.
- If the Imported CODA file contained duplicate document numbers (when the file contains more than 9999 lines to be processed), a suffix will be added to the document number to avoid conflicts when matching and processing in Business Central.
- It is possible to add Dimensions to the statement line. Select the statement line for which the actions need to be managed and choose Dimensions (under Manage).
- Remark: the dimensions that can be assigned on the CODA statement line is limited to the dimensions that are added by the CODA matching logic, or by the Split Line Logic. Dimensions on CODA statement lines are not meant as full replacement of the financial journal dimensions.
- The columns for the Shortcut Dimension 1 and 2 can be added to the CODA Statement Line through personalization.
- Process the CODA lines, using the Standard functionality of Business Central.
- The IBAN number of the column Bank Account No. Other Party will be attempted to match with the stripped IBAN of Customers or Vendors (this means the spaces will be removed from the IBAN).
- Remark: the customer/vendor will only be suggested when there is a unique match found. If there are multiple customers/vendors with the same IBAN, there will be no suggestion made based on the IBAN.
- To make matching of payments easier, when choosing Apply Entries… on the CODA statement page, the Statement Message will be made visible on the Apply page.
- In the matching process, when the option Divide VAT is enabled and the statement line satisfies the conditions for the VAT to be extracted, the VAT amount will be extracted from the statement message. If the sum of the VAT amounts (and statement amounts) of the related lines matches the VAT amount(s) of the VAT CODA statement line, the related lines will be validated and marked as Indirectly applied.
- If the CODA statement contains additional information, this information can be viewed by choosing the value in the column Information in the CODA statement lines.
- In case this column is not visible, add it to the statement lines trough personalization.
- The IBAN number of the column Bank Account No. Other Party will be attempted to match with the stripped IBAN of Customers or Vendors (this means the spaces will be removed from the IBAN).
- Transfer the CODA Statement Lines after matching to the Financial Journal using the action Transfer to General Ledger (Standard Business Central action).
- It is possible to set up a Prefix that will be added when Transferring CODA Statement Lines to the Financial Journal. This prefix can be defined on the Bank Account Card, in the field Document No. / Journal Batch Prefix. It is currently possible to add the Year (last two digits of the year) and the document no to the value that will be shown in column Document No. on the Financial Journal lines.
- Dimensions that have been added trough Matching Rules are also transferred to the lines in the Financial Journal.
- The VAT amount and VAT Product Posting Group that is possibly added to the coda lines will be transferred as well.
- When choosing Apply Manually on the Financial Journal Page, the Structured message will be shown in the lines when there was a structured message in customer/vendor entries.
- If some lines do not need to be processed any more in a journal, but were manually processed another way, it is possible to use an action to indicate that the CODA statement does not contain lines that still need to be transferred to a journal.
Important remark:the action cannot be undone, there is no reset action available.- On the CODA Statements list page or CODA Statement Card, choose the action Actions > Functions > Set To Transferred. This will mark the CODA Statement as completely transferred to the financial journal.
Whenever a rules is applied that validates the Remaining Amount, the CODA Matching Rules also take into account if there is a payment tolerance and/or payment discount matching the payments. Following steps will be run through by the system when trying to match the payments:
- If there is an open ledger entry with the exact amount of the statement line, (with correct document no. and/or correct Customer no.), the payment is matched to this entry. The payment will be fulfilled in full.
- If there is no exact match found, check the open ledger entries, taking the set payment tolerance and Payment Discount into account. If there is an open ledger entry for the customer and/or document, with an amount within the payment tolerance or payment discount, the payment line will be matched. The remaining of the amount on the document will be processed as specified on the General Ledger Setup.
Example given (CODA statement line / payment of 99 EUR vs open ledger entry of 100 EUR within the payment tolerance boundaries (e.g. 1 EUR) = match if between 99 and 101 EUR). - If there is no exact match found or a match within the payment tolerance or payment discount, the payment line will be matched based on the customer and/or document number, only when the amount of the payment is less than the remaining amount on the open ledger entry.
Example given:
- CODA statement line / payment of 90 EUR vs open ledger entry of 100 EUR = match.A payment less than the amount will thus also be matched. (partial payment)
- CODA statement line / payment of 110 EUR vs open ledger entry of 100 EUR = no match.
- A payment higher than the amount will not be matched.
- CODA statement line / payment of 110 EUR vs open ledger entry of 100 EUR = no match.
Remark: For the matching of payments made to Vendors, no payment tolerance will be considered.
4.6.4.2 Improved CODA matching
There have been several performance improvements added to the CODA Matching Process in Business Central to handle large files. This includes an improvement in how the Structured Message is extracted from the statement message and how the customer ledger entry will be searched.
The matching process will also look at variations of the structured message in the statement message to try and find the customer ledger entry that matches the statement line in case there were typo’s or the structured message was formatted in another way.
These enhancements are available by enabling the Feature in the Dynavision Features page, which can be found through the Dynavision Setup Page.
4.6.4.3 Matching of payment with invoice numbers and credit memo numbers
In some cases, the customer pays a certain invoice and subtracts a received credit memo from that invoice payment.
The invoice number and payment are noted by the customer in the payment message of the CODA statement line.
When the feature mentioned above is activated, the system will try to match the payment to the mentioned posted sales invoice(s), as well as match the payment line to the mentioned credit memo(s) that are noted in the statement message.
- If the statement message contains multiple document numbers, the matching process will evaluate the numbers to see if it concerns an invoice or credit memo.
- If both documents are referenced in the same statement message, the application against the credit memo document is performed first, afterwards open invoice customer ledger entries are regarded.
- Remark: in the current multi document functionality, all documents are applied for the full remaining amount of the customer ledger entry, irrespective of the statement amount. Amount differences need to be processed manually.
4.6.4.4 Document No. Formats (CODA)
The Document No. Formats (CODA) can be set up to format information that is noted in the statement message of a CODA statement line to information that can be used by the system to correctly match the payment lines to documents that are noted in the file.
This can also be useful to transform the sales invoice numbers that are noted by the customer in the message, to the correct format that is used in Business Central.
- Choose the search icon, enter Document No. Formats (CODA) and choose the related link.
- Set up the format rules that need to be used to transform document numbers noted in statement messages.
- Find Value
Specifies the value that needs to be searched in the statement message.
- Replace Value
(Optionally)Specifies the value with which the found text needs to be replaced.
- Priority No.
(Optionally) Specifies the order in which the format rules need to be processed. Lower numbers have higher priority.
- Transformation Rule
(optionally) Specifies the transformation rule that needs to be applied on the extracted (or if applicable replaced) value.
- Ignore
If enabled, the extracted result will not be added to the document numbers field for the coda statement and will thus not be used in the matching process.
- Find Value
4.6.4.4.1 Example
E.g. VFT-25-12345 needs to be formatted to VFT+25-12345, then a format line can be set up as follows:
- Format VFT\-\d{2}-\d{5}
- Transformation Rule VFT- > +
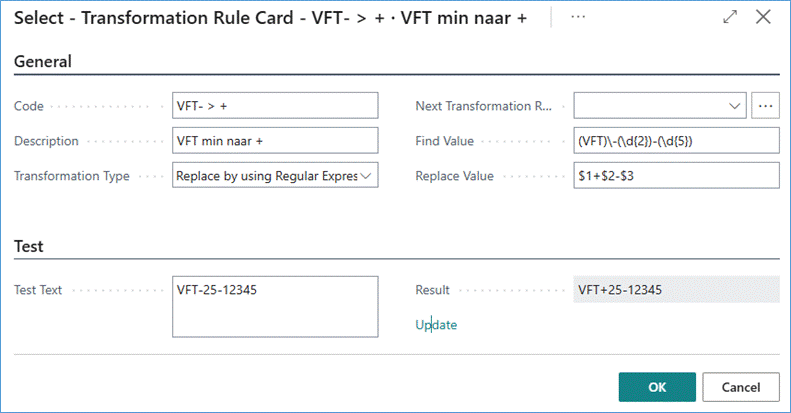
Example of set up formats:
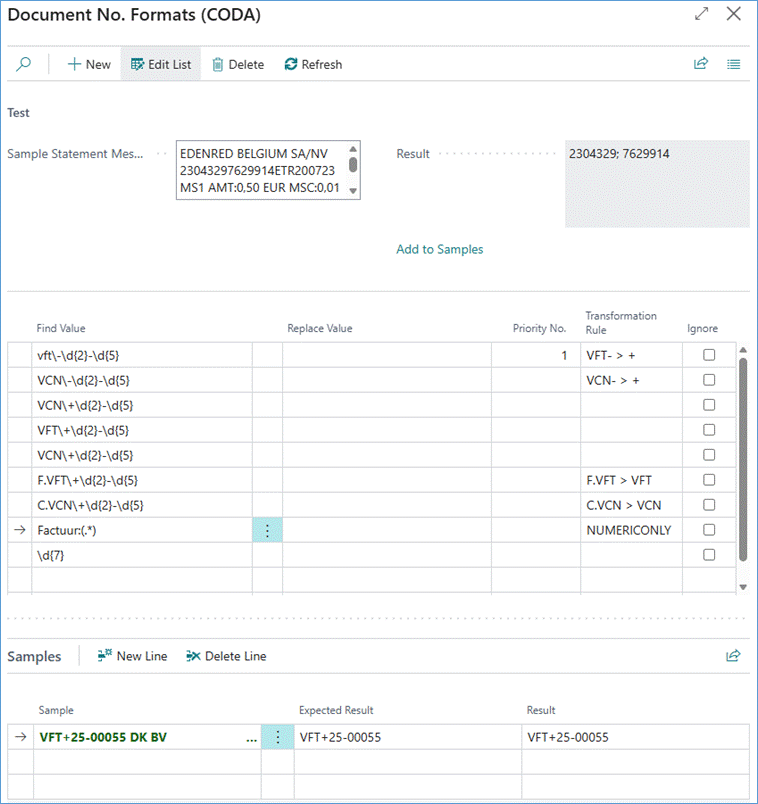
- The first two lines are used to identify the format that is used in Business Central as ‘Document No.’ for posted sales invoices and sales credit memos.
- Line 6 and 7 are used to identify possible non-conform formats and transform these to the Business Central formats that are set up in the two first lines.
4.6.4.4.2 Remark import CODA file with multiple statements for same bank account
It is not possible to import a CODA file that contains multiple statements for the same bank account. This will result in an error when importing. The solution is requesting separate CODA filed from the bank or Isabel. The manual workaround is splitting the CODA file in different CODA files per statement. These can then be imported separately.
Example given:
This file should be split into a file for the current account, and the Business account. The red line indicates where the other file should begin. This part can be cut and copied to another CODA file for import.
4.6.4.4.3 Import CODA Mollie files
When working with webshops or other e-commerce channels, Mollie is often used as payment provider.
Mollie provides CODA files where the payment data is itemized, and can be matched one on one with the sales invoices.
However, these cannot be imported directly as they work with a deposit into an intermediary account, which is a Dutch account, meaning the standard Belgian localization CODA import cannot be used. Therefore, a Mollie CODA import is provided in Dynavision Advanced Finance.
The first thing that needs to be done is setting up the NL bank account, which will be used to import the CODA files.
Import the CODA Mollie File just like a “normal” CODA file.
The check will use the NL IBAN number to check if the file contains the expected information, as set on the bank account card.
For Mollie payments, a non-structured CODA message is received with the paid order no in the statement message. This information can be used in the CODA matching, by defining the payment reference on the sales orders that will be paid with Mollie.
Fill in the field Payment Reference on the sales order/sales invoice, with the external document number that will be noted on the statement message for the corresponding Mollie payment. When the invoice is posted (and the Customer Ledger Entry is created), this value is transferred to the posted document.
Remark: if this has to be used in matching, this field (on the sales header) can be automatically be filled in via PTE with the external document value from the online order.
On the Bank Account Card where the Mollie payments are processed, following field should be set to use the wanted matching for the Mollie statements.
- Payment Service Provider
Select Mollie in this field. This will ensure that the system automatically removes certain prefixes in the statement message.
The system will normalize the statement message by lower casing the message, and trimming. After this, the phrases “online order”, “commande”, “bestellung” or “order” will be removed. If this yields a result, this result will be added in the Payment Reference on the CODA statement line, and will be used for matching.
The statement can now be processed.
More information about the Mollie documents can be found using following link: How do I export my balance report, transactions, and settlements? – Mollie Support. Open the section Settlements to view the needed information.
Remark: after the payment of Mollie is received on the effective bank account of the company, the value of the Mollie G/L account needs to be reconciled with the G/L account of the bank account on which the payment is received from mollie.
4.6.4.4.4 Import CODA Multisafe files
Similar to Mollie, multisafe is a payment provider, which also provides CODA statements that can be processed.
In the CODA statement lines for multisafe payments, the payment reference to be matched is contained in the Statement information.
Fill in the field Payment Reference on the sales order/sales invoice, with the external document number that will be noted on the statement message for the corresponding payment. When the invoice is posted (and the Customer Ledger Entry is created), this value is transferred to the posted document.
On the Bank Account Card where the Multisafe payments are processed, following field should be set.
- Payment Service Provider
Select Multisafe in this field. This will ensure that the system automatically removes certain suffixes in the statement message.
The system will remove the suffix from standard format lines and will only retain the information relevant for the matching of the CODA statement lines and the Ledger Entries. This result will be added in the Payment Reference on the CODA statement line, and will be used for matching.
The statement can now be processed.
4.6.4.4.5 Match multiple payments to a single customer ledger entry
Dynavision Advanced Finance BE made it possible to apply multiple payments in the same CODA statement, to the same open customer ledger entry.
This feature only works with automatic payment matching. This cannot be done manually for CODA lines.
On the Bank Account Card where the payments are processed, following fields should be set to use the wanted matching.
- Coda Match By
Specifies against which customer ledger entry field the non-structured CODA statement lines should be matched. This can be set to Document No. or Payment Reference. - Coda Transformation Rule
Specifies a rule to transform the statement message for improved payment reference matching for non-structured CODA statement lines. The result of the Transformation rule will be saved in a separate field on the CODA statement line.
This transformation rule needs to be set up, so that the payment reference from the statement lines are transformed to have the same value as the payment reference on the sales document, in order to make the matching efficient (e.g. transform ‘order 123’ to ‘123’ to match the set payment reference on the customer ledger entry).- It is possible to use a regular expression to find a certain value in the statement message. In the transformation rule, select Regular expression – Match to find a payment reference value in the statement message using a regex. E.g. find use the MM/YYYY value that is entered in the payment statement message as payment reference. This can be found using regex \d{2}\/(\d{2}\/\d{4}).
When this value is found in the importing process of the CODA statement, the value will be noted in the field Payment Reference on the CODA statement line.
Remark: if this is not set, and there is no immediate match with the statement message payment reference and this of the customer ledged entry, the matching process will be slowed down, as all customer ledgers will be searched for the matching value.
- It is possible to use a regular expression to find a certain value in the statement message. In the transformation rule, select Regular expression – Match to find a payment reference value in the statement message using a regex. E.g. find use the MM/YYYY value that is entered in the payment statement message as payment reference. This can be found using regex \d{2}\/(\d{2}\/\d{4}).
- Import the CODA statement file for the bank account.
- When importing the CODA statement file, the field Payment Reference will be filled in if this is configured, this value will be the transformed value.
- If the automatic payment matching is activated (otherwise this needs to be done by choosing the action Process CODA Statement Lines), the statement lines will be processed using the set up transaction coding and matching rules.
- Once the customer is known, and the payment reference or other value on which the customer ledger entry needs to be matched, the system will try to match the payment lines to the open customer ledger entries.
- The system will try to assign as many statement lines as is possible, taking into account the remaining amount on the open customer ledger entry.
- The system will also take into account the coda statement lines that are already matched in a previous coda statement (if this was not fully posted yet) or the amount that is already matched on the financial journal and is not posted yet. (On the Apply Customer Entries, in the columns Amount to Apply (CODA Statement) and Amount to Apply (Journal), these values can be consulted for a customer ledger entry.
- After matching of the statement lines, the Applies-to ID, Applies-to Doc. No. and Applies-to Doc. Type will be filled in with the information of the found matching customer entry. The applies-to ID will be filled in with the document no. of the first CODA statement line that is matched by the system.
Remark: these fields can be added through personalization to the CODA statement lines.
- If another statement line is matched to a same customer entry as another CODA statement line is already matched, the Applies-to ID of the firstly matched statement line will be copied to the applies-to ID field of the other CODA statement line.
4.6.4.4.6 Import Direct Debit SEPA files for Customers
There is extra logic implemented to process CODA statement lines of Standard message format and type 127.
This functionality can be disabled with a Dynavision Feature Flag, in case this logic is conflicting with the current processing of the company.
If a CODA file is read, and there are Detail lines found with account type customer, the structured message will be extracted from the statement message, which will be saved in the background in the (by default hidden) column Structured Message.
It is important the lines are set up as Detail lines in the Transaction Coding Page.
The line will then be processed following the Structured Message application logic, in which the Customer Ledger Entry is searched with the modified statement message value.
4.6.4.5 Process Direct Debit Refunds for customers
It is possible that, after posting payments to the direct debit invoice, that there is a refund that needs to be processed for the direct debit.
The CODA file with the negative amounts and the structured message can be imported in Business Central. The system will look for a closed payment that was applied to the direct debit invoice, with a matching payment amount. If this is found, the system will match the statement line and the payment that was posted for the posted direct debit invoice.
When the lines are posted in the financial journal, the system will try to unapply the payment line against the payment line. This will result in the payment line to be reopened, allowing the journal line to be posted.
Remark: when the refund lines are in the same CODA statement as the direct debit lines, the system cannot match the entry to a payment, as the payment is not yet posted. In this case, the system will suggest the Customer based on the structured message in the CODA statement message of the refund.
4.6.4.5.1 CODA Matching Process by document no. – Customer
The Matching process is drawn in the image below.
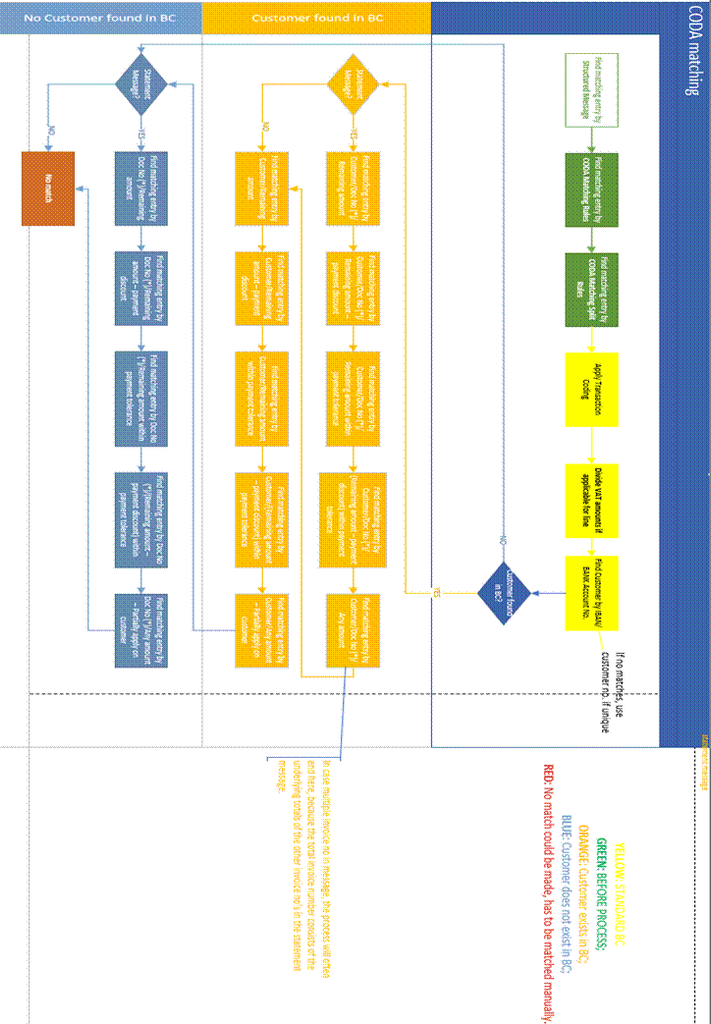
4.6.4.5.2 CODA Matching Process – Vendor
In case a CODA statement line with format 127 is found, it will be processed differently:
- If the line can be processed without the use of matching rules, it will be applied on the Vendor Ledger Entry.
- If there is a matching rule defined, this rule will be used to overrule the default transaction coding line. With this information, the statement line will continue to be processed, and the system will continue to search and apply the current line based on the found account type and account no.
- This will result in the possible application of Vendor Ledger Entries and Customer Ledger Entries.
4.6.4.5.3 CODA Matching when multiple invoice numbers in statement message
In case a CODA statement message contains multiple invoice numbers, these documents will be identified, and the matching will also check these documents when processing the lines.
The document sequence of the Document Numbers in the Statement Message are not taken into account. The system will first try to match the invoices that can be completely processed and thus closed, and will then match the remaining amount with the other invoice numbers if possible.
Remarks:
- If there are document numbers in the statement message that are linked to different customers, the entries will not be matched. The different document numbers need to be linked to the same customer.
- The matching process will continue until the remaining amount is not exceeded of the invoices. Example given: when the statement message contains 3 invoice numbers for customer A, (inv1: 50 euros; inv2: 50 euros; invoice 3 100 euros) and the amount is 100 euro’s, the invoices to which the payment lines will be applied are: inv1 and inv2.
- Only exact matches of the document no’s will be taken into account. Example given VF23/0001 will not match when the statement message contains VF23/00011.
4.6.4.6 Transfer to Financial Journal
- Navigate to the Financial Journal by choosing the action Open Financial Journal on the CODA Statement Card, or by choosing the search icon, entering Financial Journals, choosing the related link and choosing the Journal Template that is needed.
- In the Financial page, the CODA statements can be seen that have been transferred to the journal.
- The Description column noted on the Journal Line, contains the value of the Description field that has been specified in the CODA Statement Line.
- From this Journal, the transferred lines can be posted using the action Post.
- In case a customer Account Type and a Customer Account No. has been manually assigned, after posting the statement lines in the financial journal, there will be a Bank Account added to the Customer with the IBAN specified in the Statement line that had been assigned manually.
The Country Code for the Bank account will be extracted from the first 2 characters of the IBAN.
The bank account will have the export protocol filled in that is set on the Advanced Finance Setup page.- If this is the first bank account that is created, and the option Update Customer Preferred Bank Account is enabled in the Advanced Finance Setup, the first newly created bank account will be indicated as preferred bank account.
- In case a customer Account Type and a Customer Account No. has been manually assigned, after posting the statement lines in the financial journal, there will be a Bank Account added to the Customer with the IBAN specified in the Statement line that had been assigned manually.
Remark: only when the IBAN of the bank account is a valid IBAN, the customer bank account will be created.
- The Statement Message will also be posted, and will be visible in the ledger entries of the entity.
- Apply the posted lines.
Remark: when a line is deleted in the Financial journal, which is transferred from a CODA statement, it is possible to transfer the CODA statement line to the Financial Journal again, from the Coda Statement Card. Only the deleted line will be transferred again.
4.6.4.7 Archive CODA statements
Once the CODA statement(s) have been processed and posted, it is possible to archive these statements.
In the standard working of Business Central, when receiving a CODA file from a bank, the numbering will be reused by the banks each year, when importing, the existing CODA statement line would be overwritten by this new imported file.
The archiving of the CODA statements makes it possible to have a trace of the old CODA statements in case these statements need to be checked later on.
The statements in the archive will receive a new number, an entry number, which makes sure no entries will be overwritten.
- On the CODA Statement List, choose the action Archive…
- It is also possible to call the Archive task by choosing the search icon, entering Archive CODA Statements and choosing the related link.
- On the Archive CODA statements, it is possible to specify filters to make sure the correct CODA statements are archived.
- After specifying the filters, choose OK.
- The CODA Statements that were transferred and posted will be archived.
- Choose the search icon, enter CODA Statements Archive List and choose the related link. The CODA Statements Archive List can also be accessed by choosing the action CODA Statements Archive, which can be found by choosing Related, Bank Acc., CODA.
- The page that opens shows an overview of the archived CODA statements with the information of the statement.
Remark: only CODA statements that have been (partially applied) fully transferred to the Financial Journal and have no pending Journal Lines attached to them can be archived. Others will be skipped.
Remark: if CODA statements could not be archived, a list will be shown with the issues that need to be resolved.
4.6.4.7.1 Best Practices Archiving
A CODA statement should only be archived once, after using the Archive task, the CODA statements that are archived will be removed from the CODA statements list. If the same fille is imported again and processed again, and the Archive task is executed again, a new entry will be created for the CODA statement, even when the file and contents are the same as the existing archived CODA statement.
4.7 Isabel Connect
The Isabel Connect functionality can be used to connect Business Central to Isabel Bank Account Software. Normally, it is necessary to download Bank Statement files from Isabel, save them locally on the computer and then separately upload them in Business Central for each bank account in each company.
With Isabel Connect, Bank Statement files (SEPA CAMT/CODA) and payment files (SEPA:NON SEPA) can be exchanged directly between Isabel and Business Central.
The Isabel Connect manual consists of three parts:
- Setting up the Isabel environment and gathering all the authentication parameters.
- Done by the implementation partner.
- Setting up Business Central using the authentication parameters.
- Done by the implementation partner.
- Use of the Isabel Connect module of Dynavision.
Important remark: it is important that Isabel Connect is only set up in the Live Production environment. Once installed on the test environment of the customer, the CODA files will be imported in this test environment and will therefore not be available on the Live Production environment.
Good to know: Isabel Connect comes with a price tag. For prices, please refer to the documentation of Isabel, found on https://www.isabel.eu/en/legal.html under section 2d or https://www.isabel.eu/content/dam/isabel6/contrib6/documents/en-US/ratecard-connect.pdf.
4.7.1 Set up Isabel Connect
Setting up the Isabel Environment contains some important steps. This installation procedure is mentioned in the document Isabel Connect Setup Manual and will be executed by the implementation partner. The further setup for completing the connection will also be done by the implementation partner and is also described in the Isabel Connect Setup Manual.
4.7.2 Setup in Business Central
After setting up Isabel Connect, information will be needed from this setup in following steps.
There is also need for an Isabel Environment with card reader and card or an ISA Key.
The Card reader or ISA Key from the person for which Isabel Connect is activated will be needed.
The steps for setup in Business Central can also be found in the Isabel Connect Setup Manual.
Make sure that the creation of CODA or SEPA CAMT files works correctly in Isabel. If the customer has not activated this in advance, the bank will need to be contacted and Isabel will need to be contacted to activate this in the Isabel environment and make the electronic bank statements visible. Only when there are electronic files created in Isabel, it will be possible to import them automatically in Business Central via Isabel Connect.
4.7.2.1 Allow HttpClient Requests
The option Allow HttpClient Requests needs to be activated. This can be done by navigating to the Installed Extensions page in Business Central and choosing for Configure.
4.7.2.2 Isabel Connect Setup – Single Setup
This part needs to be done on the computer which uses the Isabel Card reader or ISA Key. Make sure that there is already a connection to Isabel in another tab of the internet browser.
Navigate to Business Central in another tab.
This setup is done for environments for which one Isabel Connect setup (card) is used to maintain all bank accounts for all companies in the tenant.
The same Isabel Connect setup is thus used for all companies in the tenant.
- Choose the search icon, enter Isabel Connect Setup and choose the related link.
- Following fields are filled in by the partner for the Isabel Connect functionality.
- Client ID
Identifies the Client ID used for the Isabel Connect API.
- Client Secret
Identifies the Client Secret used for the Isabel Connect API.
- Certificate
- ID
Identifies the ID of the certificate.
- Password
Specifies the password of the certificate.
- Expiration Date
Specifies the expiration date of the certificate. This date is obtained from the certificate. In order to fetch this information, the password is needed. If the password entered does not match the certificate, an error is displayed when uploading the certificate.
- Available
Indicates if the certificate is available.
- ID
- Redirect URL
Identifies the Redirect URL used for the Isabel Connect API.This URL, generated by Dynavision, and will be used by your implementing partner for setting up the Ibanity portal. This field will be automatically filled in when the setup page is opened for the first time, or when the value in the Isabel API Version field is changed to V2.
If the URL is empty, choose the action Set default redirect url which can be found by choosing Actions in the actions bar in the header.
- Isabel Comeback URL
Identifies the Comeback URL used for the Isabel Connect API.
- Beta mode
Enabled the Beta mode of the environment.
- Refresh Token
Identifies the Refresh Token used for the Isabel Connect API.
- Authorization Code
Identifies the Authorization Code used for the Isabel Connect API.
- Access Token
Identifies the Access Token used for the Isabel Connect API.
- Access Token Validity Period
Identifies the Access Token period used for Isabel Connect API.
- Certificate
- ID
Specifies the ID of the certificate.
- Password
Specifies the password of the certificate. Select the three dots next to the field to edit the password.
- Expiration Date
Specifies the expiration date of the certificate. This date is obtained from the certificate. In order to fetch this information, the password is needed. If the password entered does not match the certificate, an error is displayed when uploading the certificate.
- Available
Indicates if the certificate is available.
- The three dots can be used to upload the Certificate if needed.
- ID
- Signature Certificate
- ID
Specifies the ID of the signature certificate.
- Password
Specifies the password of the signature certificate. Select the three dots next to the field to edit the password.
- Expiration Date
Specifies the expiration date of the Signature certificate. This date is obtained from the Signature certificate. In order to fetch this information, the password is needed. If the password entered does not match the Signature certificate, an error is displayed when uploading the Signature certificate.
- Available
Indicates if the Signature certificate is available.
- The three dots can be used to upload the Signature Certificate if needed.
- No. of Signature retries
Specifies the number of retries to sign the request headers, before showing an error message.
- Signature Retry Interval (ms)
Specifies the interval between request header signing attempts.
- ID
- Bank Statement Import Format
Specifies the SEPA CAMT Bank Statement Import Format that will be assigned to new Bank Accounts. In this field, a Bank Export/Import Setup can be selected that has been set up to import the bank files.
- Last Report ID
Specifies the number of the last report that was imported.
- Show Payment Export Options
Specifies if the export options should be displayed when sending payments to Isabel. This will make it possible to select Dimensions to include in the financial journal when the payment lines are transferred to post the payments.
- Client ID
- The Connection can be checked by using the action Update Refresh Token. The Access Token and Access Token Validity Period fields should have received a new value.
- It is possible to check the Ibanity (Signature) Certificate by choosing the action Check Ibanity (Signature) Certificate.
- It is possible to upload the Ibanity (Signature) Certificate by choosing the actions under the tab Certificates in the actions bar on the header.
Remark: When one of the two certificates is about to expire (field Expiration Date is for less than 30 days valid), a notification will be displayed in the Role center on Business Central. When navigating to the page Isabel Connect Setup, the relevant fields will be indicated in a red color. This is to make sure that the correct certificate can be renewed.
4.7.2.3 Isabel Connect Setup – Multi Setup
This way of setting up Isabel is used when there are different Isabel Cards, that each contain the bank accounts for a specific company in the same tenant.
This thus makes it possible to set up different Isabel connections, and link a setup to a company in the tenant, to only have certain bank accounts available in the specified company.
- Choose the search icon, enter Isabel Connect Setup and choose the related link.
- Choose the action Multi Setup > Toggle Isabel Multi Setup.
- A message is shown to confirm the enabling of the feature. Choose Yes to enable the multi-tenant setup.
- Remark: when this feature needs to be enabled, there may not be existing Isabel Connect bank statements that have another status than posted. If this is the case, an error will be shown, and these statements need to be fully processed first.
- Once the multi-tenant setup is enabled, the Isabel Connect Setup List page will be shown when navigating to Isabel Connect Setup.
- Choose the action New installation Wizard to add a new Isabel Connect Setup to the list. Choose the action Show Setup Card to edit the selected card and complete the settings or change them.
By default, a setup will be created and assigned to all companies that were created in the tenant at time of the toggle. Complete this one first, and then add additional setups to assign to individual companies.- Set up the Isabel Connect Setup as described in previous section.
- Difference with single setup: Enter the Name for the Isabel Connect Setup on the Isabel Connect Setup Card, or when running trough the wizard.
- Use the action New Installation Wizard to add the extra setups.
- Set up the Isabel Connect Setup as described in previous section.
4.7.2.3.1 Isabel Connect Companies
In order for the Multi setup – Isabel connection to be complete, the created Isabel Connect Setup cards need to be assigned to a company in the tenant. If there is no connection to a company, when executing Isabel Connect actions, an error will be shown.
- Either navigate to this page by choosing the action Companies on the Isabel Connect Setup list page or on the Isabel Connect Setup Card; or choose the search icon, enter Isabel Connect Companies and choose the related link.
- For each company, add a line and assign the desired Isabel Connect Setup.
4.7.2.4 Synchronize Bank Accounts
- Choose the action Synchronize Bank Accounts to use the Isabel Connect Interface to synchronize the banks in Isabel to the Business Central environment.
- Remark: only a user with a SUPER permission set for all companies can select this action.
- If an error is displayed “No valid SWIFT Code has been found”, the BIC generator (in the page Advanced Finance Setup) needs to be temporarily disabled. Once the Synchronization between Isabel and Business Central is completed, the parameter can be enabled again.
- Remark: Please wait 15 minutes before opening the bank account mapping screen, because it takes some time for Isabel to assign the correct permissions after the user linking process.
- A wizard will be displayed, allowing to import or map bank accounts. An overview of all bank accounts in Isabel is displayed. If a related bank account is found in Business Central, information of this Bank Account Card will be filled in in the Company, Bank Account No. and Bank Account Name. The linked accounts are indicated in green.
Remark: when using multi setup, the bank account list will be filtered based on the assigned Isabel Connect Setup to the company in which the synchronize is executed.- Mapping is done based on the IBAN and currency of the Bank accounts in Isabel and Business Central.
- If a matching Bank Account is found, that is present in multiple companies, please select the correct company that needs to be linked.
- If there are Bank Accounts defined in Isabel, that are not used in one of the Business Central Companies, delete these Bank Accounts from the list in the wizard. This can be done by selecting the lines and choosing the action Delete. Remark: when the wizard is opened again later, these accounts will be displayed again.
- Fill in the necessary information in order to set up the Bank Accounts in Business Central.
- Reference
Displays the IBAN number that is fetched from Isabel.
- Description
Displays the description for the bank account, given by Isabel. This description will be used in a further step, in case there are bank accounts with the same IBAN in the system and same currency. This is the case for e.g. ING saving accounts and current accounts.
- Currency
Displays the Currency code that is specified in Isabel for the Bank Account.
- Account Holder
Displays the account holder that is noted in Isabel Connect for the Bank Account.
- Link To Company Name
Specifies the Company name in Business Central, to which the bank account needs to be linked.
- Link To Bank Account Number
Specifies the Bank Account Number to which this bank account needs to be linked.
- G/L Account No.
Specifies the account that will be used as the Account Posting Group. A 55* G/L account can be selected from another company If needed.
- Import Type
Specifies what kind of electronic bank statements will be imported for the Bank Account.
The options are:- Empty,
- CODA, and
- SEPA CAMT.
- Bank Statement Import Format
Specifies the Bank Statement Import Format that is defined by Isabel Connect for the bank account.
- Protocol No.
Specifies the Protocol No. used by CODA to import statements.- Remark: this is the 12th to 14th character of the first line of the CODA file. This can be checked with the list of Protocol numbers of the National Bank.
- Needs to be only filled in if CODA is used. Otherwise this can be left blank.
- Version Code
Specifies the Version Number used to import statements.- This is usually 2.
- Needs to be only filled in if CODA is used. Otherwise this can be left blank.
- Reference
Remark: all these values can be changed in the Bank Account Card.
- Choose the action Finish to import the accounts. The existing Bank Accounts will be mapped to Isabel Bank Accounts. Please do not change the Code field of the Bank Account in Business Central after linking the Bank Accounts with Isabel. This will delete the link between the bank accounts.
- Choose the action Open Banks per company or choose the search icon and enter Isabel Connect Banks PerCompany to open the list of companies that are synchronized from Isabel Connect to Business Central.
- Make sure that the IBAN for the Company and Bank is the same as the IBAN on the Bank Account Card of the bank. Otherwise the Isabel Connect files cannot be linked to the correct bank account when they are imported.
- The sync functionality will fill in the currency information that is sent trough by Isabel. This will also add the Currency Code that is set as local currency in the environment. This currency Code needs to be manually cleared for the bank accounts in order for the CODA statements to be imported without issues.
- Isabel Currency
It is possible that Isabel Connect sends a file in which the account Reference is the same for different valuta. To make sure that the sent trough files for the bank accounts are processed correctly, the column Isabel Currency is added (default invisible, but can be added trough personalization). In this column, the currency for the bank accounts need to be specified, as can be found in the file that is sent trough from Isabel.
- Isabel Reference
It is possible (differs from bank to bank) that Isabel Connect uses a certain Account reference when sending trough CODA files for the bank account.
In some cases this reference is the IBANNO.+CURRENCY.- It is possible that, when no CODA files are received in the system for a certain bank account, it is because of this mismatch.
This can be checked by navigating to the Web Request log list page and clicking on the line that fetched the CODA files from Isabel. This will have following Call URL: GET https://api.ibanity.com/isabel-connect/Accounts-reports?size=100&after=XXXX.
Look in the response and check the account references that are passed from Isabel to Business Central.
- In case this differs, fill in the account reference that Isabel Connect uses in the field Isabel Reference for the corresponding Bank Account.
- It is possible that, when no CODA files are received in the system for a certain bank account, it is because of this mismatch.
- Isabel Description
The Isabel Description is used to identify the bank account, in case there are bank accounts with the same IBAN and same currency. This value needs to be the same as the description that is used by Isabel in the received CODA statement for the bank account, e.g. “termijnrekening”.
The system will display an icon when there are same bank accounts imported from Isabel with the same currency. This means that the description needs to be filled in correctly to process the CODA files.
If new Bank Accounts were created, make sure that the setup is completed on the card in Business Central. Following setup will also be created when a new Bank Account is created when importing Bank Accounts from Isabel.
- Bank Account Posting Group with the Code equal to the first letters of the bank name and the G/L account indicated in the wizard.
- General Journal Templates and Batches (of type Financial). The code of the journal consists of the first letters of the bank name (except when a value has been inserted in the column G/L Account No. in the setup wizard for importing bank accounts from Isabel).
- Payment Journal Templates with the bank as balancing account. The first letters of this bank account will be used as code for the payment template, except when a value has been inserted in the column G/L Account No. in the setup wizard for importing bank accounts from Isabel.
4.7.2.5 Advanced Finance Setup
The last used document number can be consulted when statements are posted for a certain Bank Account. On the Financial Journals, it is possible to use the same Document No. for multiple lines by using this module.
This functionality needs to be set up in the Advanced Finance Setup Page.
- Choose the search icon, enter Advanced Finance Setup, and choose the related link.
- Navigate to the Bank & Payment Management Tab,
- Enable the option Automatic copying of the Document No. in the financial journal.
The Document Number will only increase when the financial journal is posted and not when a new line is created. After posting, the Last Used Document No. can also be found on the Bank Account Card of the related bank.
- General Journal Template For Payments
Specifies the value of the General Journal Template for Payment fields.
- General Journal Batch For Payments
Specifies the value of the General Journal Batch for payment fields.
- Enable the option Automatic copying of the Document No. in the financial journal.
4.7.2.6 Document no. on journal using Statement no
The Batch name of the Financial Journal that is used to process the imported statements is defined based on the value in the fieldDocument No. / Journal Batch Prefix on the Bank Account Card.
This value will be joined with the Statement Number from the imported file, resulting in a new batch name (e.g. KB23-123).
In case batches per statement are required, the Statement No. needs to be extracted from the SEPA CAMT files. Therefore, the Data Exchange Definition of the SEPA CAMT needs to be updated in order to read the ElectrncSeqNb. Following Column Definition needs to be added:
- Name: Stmt/ElctrncSeqNb;
- Path: /Document/BkToCstmrStmt/Stmt/ElctrncSeqNb
- Description: ElectrncSeqNb.
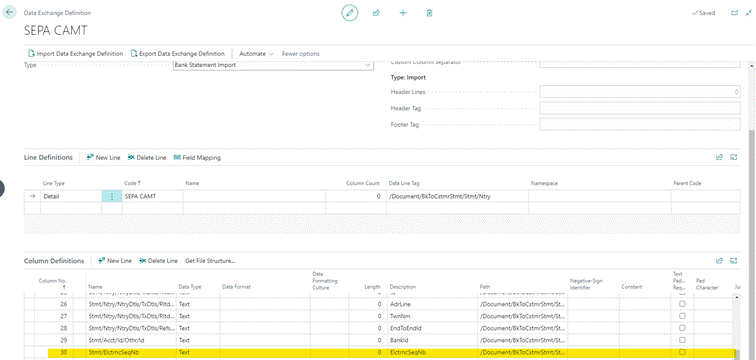
4.7.2.7 Uninstall of Isabel Connect on the tenant
It is always possible to uninstall the Isabel Connect if this feature is no longer needed on the Business Central environment. Contact the implementing partner in order to uninstall the connection.
4.7.2.8 Request Log
All requests that are sent and processed by Dynavision will be logged in the log table. This can be accessed by choosing the action Open Log on the Isabel Connect Setup page.
4.7.3 Isabel Connect Usage
The Isabel Connect interface in Dynavision has following features:
- Import of bank statements directly from Isabel.
- Upload a payment initiation file to Isabel.
- Download a bank statement from Isabel.
4.7.3.1 Matching of imported files
- Navigate to the Bank Accounts page (in any of the companies).
- Remark: if the multi setup is used from Isabel Connect, the Import function needs to be run for each setup. Run trough the steps mentioned below for a company that is linked to one of the other setups. Do this for each setup.
- Choose the action Import Bank Statements from Isabel Connect (the selected bank account line is not important).
- The Bank Statements for each synchronized Bank Account across all companies (linked to the same Isabel Connect Setup) will be downloaded directly from Isabel.
- The importing routine will download any file from the Isabel environment (for all companies), but will check if the setup on the Bank Account pages matches the imported document. Example given: is Isabel contains a MT940 file, but the bank account setup indicates that it should use CAMT053, this file will be ignored. However, if the same payment file is also available as CAMT053, this will be processed instead.
- CODA txt file format is also supported by the Isabel Connect functionality. This can be indicated on the Bank statement that needs to be imported in the Isabel Connect Import Type field on the Bank Account Card.
- If the message “Imported 0 statements” is displayed, make sure that there are reports available in Isabel (for the Isabel connect setup that is linked to the company).
- If there are any imported statements that need to be processed, the bank account will be indicated in blue.
- On the Isabel Connect Setup Page, the Last Report ID field will contain the ID of the last report that was imported using Isabel Connect.
- It is possible that a history of old CODA or SEPA CAMT statements are imported as well as the new reports. This happens because, when setting up Isabel Connect, it is not possible to indicate a Last Report ID from which the import should start. These documents can be deleted in Business Central, together worth the CODA statements and financial journal lines, for the bank statement that were already processed in the past.
- After executing the Import of the bank statements, the files will be downloaded and placed in the Import Mapping table for each relevant company. The system will automatically create a Job Queue in each company for importing the downloaded files. This Job Queue will be executed only once and will process any of the downloaded documents.
- The imported files will be automatically processed using the Job Queue. This will transfer the statement from the temporary Import Mapping table to the Business Central tables.
- The Imported files can also be manually processed by navigating to the Open Imported Documents for a Bank Account on the list page of Bank Accounts (by choosing the value in the column) and choosing the action Process.
- When the statement is a CAMT format, the open lines will be imported in the Financial Journal, where they should be processed.
- If there were already lines created in this journal, the information of the newly imported statement will be added in new lines.
- When the statement is a CODA format, the open lines will be imported in the CODA statements table.
- The CODA file will be added as attachment to the created CODA statement.
- If a CODA statement already exists for the same bank account, with the same statement number, this old statement will be overwritten by the new statement. The previous statement will thus be deleted.
- The imported files will first appear in the page Open Imported Documents, and after processing they will be moved to the list view Processed Imported Documents. These pages can be accessed for a Bank Account on the list page of Bank Accounts (by choosing the value in the column).
- It is always possible to manually process the files (again), or to download these files.
- In the list view, in the column Has Open CODA Lines and Has Open Financial Journal Lines indicate if these are lines that still need to be processed for the imported file. The lines can be accessed by choosing the value in the column.
- When the imported files from Isabel Connect are processed, and thus imported in the Financial Journal for SEPA CAMT files or the CODA Statement for CODA files, if the option Automatic Payment Matching is enabled on the Bank Account, the matching will automatically be executed after importing the files. Otherwise, the matching will be done manually by the user in the Financial Journal.
- In case CODA statements are imported, match the statement lines as described in section CODA Import and processing statements.
- In case a SEPA CAMT is imported and processed, in the financial journal, complete the matching process and post the lines.
- In case a customer Account Type and a Customer Account No. has been manually assigned while matching the lines, after posting the lines in the financial journal, there will be a Bank Account added to the Customer with the IBAN specified in the journal line that had been assigned manually.
- When choosing Apply Manually on the Financial Journal Page, the Structured message will be shown in the lines when there was a structured message in customer/vendor entries.
The Import of Bank Statements can be automated by creating a Job Queue, based on CodeUnit 71176672– ESCJ Import Bank Statements.
The same steps as described above apply:
- The Job queue for importing will automatically activate on a frequent base (as set up in the job queue entry).
- When activating, the statement files for all Bank Accounts across all companies will be imported.
- Another job queue will be launched once to process the imported files.
4.7.3.2 Export Payment File
It is possible to send a file directly to Isabel, from the Payment Journal Pages, without manually having to download the file from Business Central and then uploading it to Isabel. The file still has to be signed in Isabel, in order for a bank to process the request.
- Choose the Search icon, enter EB Payment Journals (or payment journals) and choose the related link.
- Select the Batch Name and Bank Account.
- Choose the action Send lines to Isabel to generate a SEPA file, based on your setup and upload it directly to Isabel. The posting date that is used in the file sent to Isabel is the workdate.
It is possible to overrule this date, by showing the export options and selecting the execution date.
There is also an option to transfer these lines to the General Journal, in order to post these lines from there. Do not forget to open the General Journal and post the lines. It is not possible to automatically post the lines from this General Journal.- NonSEPA file format is not supported.
- Remark: when the file format is not supported, the action will not be available for use.
If custom reports need to be used, this can be added via PTE, as is described in the Support Document.
- In the Payment Journal, use the factbox Payment File Errors if the export does not succeed, to view where the errors are that first need to be resolved.
- The action Open Isabel opens the site isabel.eu.
Remark: When issues are reported when trying to upload a file to Isabel Connect, it is possible to upload the file on following site https://www.mobilefish.com/services/sepa_xml_validation/sepa_xml_validation.php. Upload the file, select the file format and validate this file. This site will give more information about the issue that occurred when trying to process the file in Isabel Connect.
4.7.3.3 Direct Debit – send to Isabel
It is also possible to send direct debit payments to Isabel Connect. To make this possible, create a direct debit to a bank account that is connected to Isabel Connect.
On the Direct Debit page use the action Send to Isabel to send the payment file to Isabel.
The status will be changed in Business Central to show that the file is sent. Once the file is sent, this cannot be sent again, unless the status is reset.
4.7.3.4 Isabel Connect – Troubleshoot Guide
Most common issues that could occur when using Isabel Connect are documented in the following file: Isabel Connect – Troubleshoot Guide.
4.8 Payment Reconciliation Journal
The payment reconciliation journal is a standard Business Central functionality which can also be used to import bank statement files and match these to open vendor/customer ledger entries.
The matching can be done automatically or manually, based on certain information that can be read and linked by Business Central. After a validation, the payments can be posted.
4.8.1 Isabel Connect Import – journal selection
When using Isabel connect, the CAMT files that are imported in Business Central are by default transferred to the financial journal.
This can be changed so it is routed to the Payment Reconciliation Journal instead.
- Choose the Search icon, enter Advanced Finance Setup and choose the related link.
- In the section Bank & Payment Management, select the desired option in the dropdown menu for the field Bank Statement Import Journal.
- By default, the Financial Journal is selected.
- Change to Payment Reconciliation Journal to import the payment information in the desired journal for further processing.
Remark: payment Reconciliation requires a bank statement import format with a Table mapping for Bank Account Reconciliation Line.
- When a CAMT file is now imported, the lines will be added to the Payment Reconciliation Journal.
4.9 SODA XML import
In the General Journal, the functionality is added to import an XML file containing SODA information.
- Navigate to the General Journal and select the journal and batch.
- Choose the option Import SODA file. Select the XML file that is saved on the computer.
- Fill in the SODA Mapping Rules on the next screen that opens, if this is not yet setup.
Remark:choose the action Suggest to let the system suggest matches with GL accounts set up in the Business Central environment for GL accounts, if there are immediate matches that can be found.- SODA Account No.
Specifies the GL account that is read from the SODA file.
- SODA department
(Optional) Specifies the SODA department for which the GL account mappings are defined. This can be left empty to setup matching rules for all SODA files.
If filled in, the GL mapping will only be done for the department that is found in the read SODA file.
- G/L Account No.
Specifies the GL account no. to which the SODA GL account has to be mapped.
- Description
Specifies the description that needs to be used on the General Journal line. This can be the GL account description, or a description of choosing.- It is possible to use placeholders in the description, which will be filled in with system information on the moment that the SODA file is imported and the lines are added to the General Ledger Journal.
- SODA Account No.
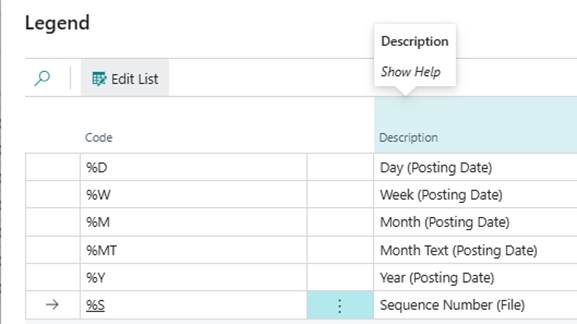
- Dimensions
(Optionally) add dimensions that need to be added to the mapped General Ledger line. - After setting up all matchings, choose Close to fill the General Journal with the read mapped lines.
4.10 Fiscal Reporting enhancements
4.10.1 Nondeductible VAT amount on VAT Entries page
On the page VAT entries, the Dynavision Advanced Finance module made the columns Non Ded. VAT Amount and Non Ded. Source Curr. VAT Amt. were made visible. These columns were also added to the VAT Entries Posting Preview pages.
In standard Business Central, there are two types of preview pages which can be set up in the General Ledger Setup Page in the field Posting Preview Type. The options are Extended (hierarchical view) or Standard.
4.10.2 VAT Preview page
The Dynavision Advanced Finance module added all VAT related declarations to the VAT Preview Page. This makes it possible to quickly and easily generate the needed VAT reports.
The actions added to the VAT Preview Page are:
- Detailed Report
View a statement of posted VAT and calculates the duty liable to the customs authorities for the selected period. The report is printed on the base of the definition of the VAT statement in the VAT Statement Line Table. This report can be used in connection with VAT settlement to the customs authorities and for own documentation. - Declaration Summary Report…
View a summary of the VAT declarations for different accounting periods. It is also possible to use the report to verify the amounts in the different VAT rows. - From/Intervat Declaration…
Send monthly or quarterly VAT declarations to an XML file. The declaration can be printed of can be send electronically using intervat. Note: this report is based on the VAT Statement template that is defined in the General Ledger Setup. Therefore it may export date that is not the same as what is shown in the VAT Statement Preview window. - VAT – VIES Declaration Tax Auth
View information to the customs and tax authorities for sales to other EU countries/regions. If the information must be printed to a file, the VAT – VIES Declaration Disk report can be used. - VAT – VIES Declaration Disk
Report the sales to other EU countries or regions to the customs and tax authorities. If the information must be printed out on a printer, the report VAT – VIES Declaration Tax Auth can be used. This information is shown in the same format as the declaration list from the customs and tax authorities. - Calculate and Post VAT Settlement
Close open VAT entries and transfer purchase and sales VAT amounts to the VAT Settlement Account. For every VAT posting group, the batch job finds all VAT entries in the VAT Entry table that are included in the definition window.
4.10.3 VAT Statement Detail
The report VAT Statement Detail can be run to export a PDF with more details than the VAT statement.
4.10.4 VAT Unit
Companies that are part of a VAT unit, do their VAT returns collectively as one single entity subjected to VAT.
For this purpose, the Dynavision Advanced Finance module is developed to be able to submit the VAT-statement collectively.
It is only possible to link companies in the same environment.
4.10.4.1 Setup
There needs to be a VAT-UNIT company set up in order to use the combined VAT functionality.
This company will contain all VAT items that are configured in the underlying coupled companies.
The VAT Declaration will be generated from within the VAT-UNIT company.
Following is recommended to be configured in the VAT-UNIT company:
- Company information,
- Chart of accounts,
- VAT Posting Setup (identical between the companies covered by the VAT unit),
- VAT Template.
Link the other companies to the VAT-UNIT Company. This can be done in the page Company information of the company that needs to be linked, in the Communication tab in field VAT Unit Link. This links the VAT Unit companies. This field needs to be filled in with the master VAT unit company. In the case of master VAT unit company, the own company must be set.
4.10.4.2 Usage
After all transactions (invoices, credit memos, etc.) are done for a certain VAT period, they can be transferred to the VAT-UNIT Company.
Make sure that all invoices are posted for the previous period. Also make sure to close all VAT entries by using the standard Business Central Calculate and Post VAT Settlement report.
This report can be found using the Search icon, or by choosing the action on the page VAT Statement preview.
When this is done for all underlying VAT companies, navigate to the master VAT-UNIT Company to make the collective VAT Declaration.
When navigating to VAT statement previewin the master VAT-UNIT Company, a factbox will display the linked underlying companies.
This VAT Unit Details factbox shows the total VAT entries, the closed VAT entries, the imported VAT entries, the total VAT corrections and the Imported VAT correction for the selected Date filter for each underlying company.
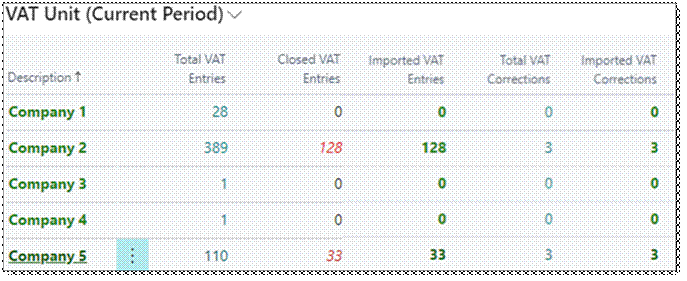
If the number of Total/Closed VAT entries/corrections is bigger than the number of imported VAT Entries/corrections, The VAT entries/corrections need to be imported from the underlying company into the VAT unit company.
In order to import the VAT entries from the underlying companies, choose the action Get VAT entries for VAT Unit.
When there are VAT entries/corrections that can be imported, a message will be shown to ask confirmation to import the these entries to the master VAT company.
When choosing Yes, the VAT entries/corrections will be transferred to the master company. When the action is finished, a message will be shown.
When the VAT entries are imported, these transferred entries can be seen in the VAT Entries Page.
The transferred VAT entries can be identified by the Company name that is filled in in the column Company.
When the Company is empty, the VAT entry belongs to the master VAT-UNIT Company.
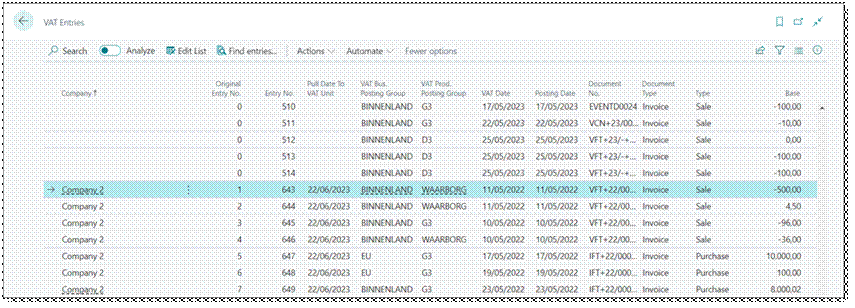
4.10.4.3 Check VAT unit entries, posted in previous periods
Newly added, posted and closed VAT entries in a VAT unit, posted in a closed VAT period that was already imported in the VAT master company, will be show in a separate factbox in the factbox pane.
The factbox, VAT Unit (Previous Period), on the VAT statement Preview will be populated, based on the set Date Filter on the VAT Statement Preview in the master VAT company.
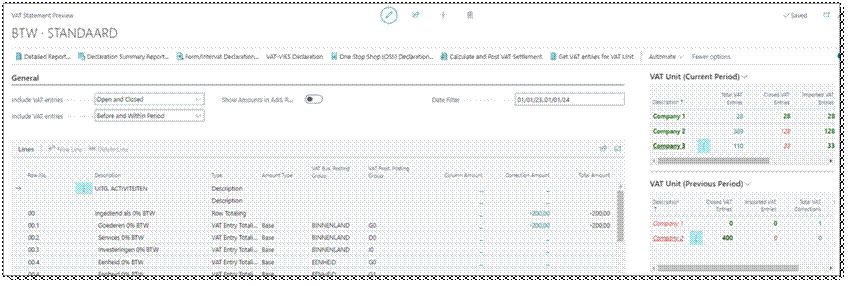
Drill down functionality is provided, to navigate to the VAT entries that are displayed in the previous factbox, to navigate to the entries in the VAT units. This will automatically apply the date filter set on the VAT master VAT statement Preview page.
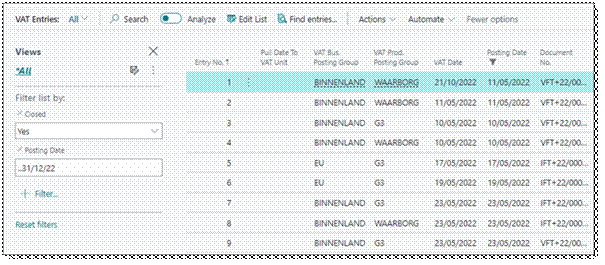
It is also possible to set a start date, that indicates the date from which entries must be checked when they are imported in the VAT master company. This starting date will thus be applied in the period filter to the imported entries in the underlying VAT units.
For example, set the date to 01/03/2022 for the example shown in the above images. The filter that is applied on the fetched VAT entries in the underlying VAT units is as follows.
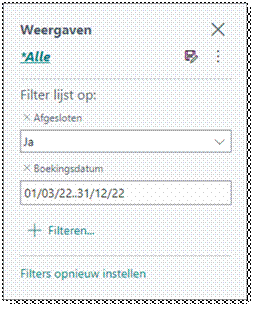
Navigate to the page Advanced Finance Setup. In the tab VAT Unit, specify the Vat Unit Start Date.
4.10.4.4 Manual VAT Correction additions
There is a Comment field added to the Manual VAT Correction List entries, in which extra information can be added that needs to be synced through VAT units.
In this Comment field, free text can be added. This information is synced to the Manual VAT Correction and Manual VAT Correction Detail that is synced through VAT Units.
Remark: if multiple VAT corrections would exist for the same statement line, date, … the comment field will be emptied on the Manual VAT Correction and stored, per company, on the manual VAT Correction Detail.
4.10.4.5 VAT Unit Declaration
It is possible to export a summarized declaration from the VAT Unit.
It is possible to create:
- the VAT Unit declaration regarding the monthly or quarterly (tax) obligation to the Belgian tax services (Intervat);
- the VAT Unit declaration regarding the quarterly or yearly (statistics) obligation to the National Belgian Bank (OneGate).
The declaration for tax purposes is created as usual via ‘form/intervat declaration’ and is exported in .xml format.
The statistical declaration is created via ‘VAT Unit Declaration’ and is exported in .csv format.
This document contains the information from the (selected) child companies that are linked to the VAT Unit. The declaration per child company will be on a separate line.
- Navigate to the VAT Statement Preview of the Template that is used to generate the VAT report for the VAT Unit company.
- Choose the action VAT Unit Declaration.
- Specify the options to generate the VAT unit declaration.
- Declaration type
Specifies if the declaration needs to be exported per quarter or per year.
- Quarter
Specifies the quarter to export if the declaration needs to be exported per quarter.
- Year
Specifies the year of the exported VAT declaration.
- Include VAT Entries
Specifies the VAT entries to be included in the report. The options are Open, Closed and Open and Closed.
- Filter: Company
Optionally filter the child companies that need to be included in the VAT declaration.
- Declaration type
- Choose OK to generate the CSV file of the VAT Declaration.
- This can now be submitted.
4.10.5 VAT restriction
In Dynavision Advanced Finance BE, a VAT Restriction table is available in which different restrictions can be defined with a linked Non Deductible VAT percentage.
- Choose the search icon, enter VAT Restrictions and choose the relevant link.
- Add the different VAT restrictions that can be applied in purchase documents.
- Code
Specifies the code used to identify the VAT restriction.
- Description
Specifies the description of the VAT restriction.
- Non Deductible VAT %
Specifies the percentage of VAT that cannot be deducted.
- Enabled
If disabled, the VAT restriction cannot be used on documents.
- Code
- Add dimensions on the VAT Restriction Code, by choosing the action Dimensions. These will be inherited on the purchase line (based on the optional dimension priority).
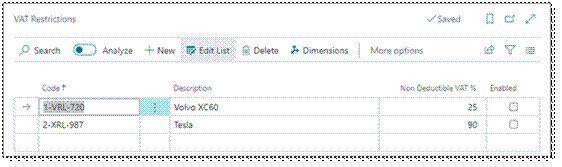
4.11 Intrastat report enhancements
In Business Central, an Intrastat feature is added. If this feature is enabled (in feature management), the Intrastat report can be created using a certain setup that can be specified in the Intrastat Report Setup.
Dynavision Advanced Finance added the possibility to define default Intrastat parameters, that are assigned to locations for inbound and outbound Intrastat transactions. If there are no specific Intrastat parameters defined (e.g. area, transport method) on the sales or purchase documents, when generating the Intrastat Report with the function Suggest Lines, these defaults will be noted for the lines in the report.
- Either choose the Search Icon, enter Intrastat Defaults, and choose the related link, or navigate to the Intrastat Report Setup page and choose the action Defaults.
- Choose the action Get Default Data to get a list of all configured Locations in the environment. Choose the locations for which the defaults need to be set up and choose OK.
- The lines for the locations will be created.
- The lines can also be added manually.
- For each line, fill in the requested information.
- Location Code
Specifies the location code for which the default is set up.
- Type
- Location Code
Specifies whether the item for the location is received or shipped.
- Transaction Type
Specifies the type of transaction that should be noted as default for the location code and type combination.- Transaction Specification
Indicates the specification of the document’s transaction that should be noted as default for the location code and type combination.
- Transport Method
Specifies the default transport method that should be noted as default for the location code and type combination.
- Area
Specifies the area of the customer/vendor that should be noted as default for the location code and type combination.
- Entry/Exit Point
Specifies the code of either the port of entry at which the items passed into your country/region, or the port of exit that should be noted as default for the location code and type combination.
- Partner VAT ID
Specifies the counter party’s VAT number that should be noted as default for the location code and type combination.
- Transaction Specification
4.12 Apply General Ledger Entries
Dynavision Advanced Finance has added the possibility to quickly apply General Ledger Entries.
This can be done on the page Apply General Ledger Entries (Quick).
- Navigate to the page Chart of Accounts and either select an account to open the card, or select the line. Choose the action Apply Entries (Quick).
The page can also be accessed by choosing the Search icon, entering Apply General Ledger Entries (Quick) and choosing the related link. - Specify the filters in order to view the needed General Ledger Entries that need to be applied.
- No.
Specifies the number of the G/L Account from which the entries need to be applied.
- Name
Displays the name of the G/L Account that has been selected.
- Global Dimension 1 Filter
Specifies the global dimension 1 to filter the entries.
- Global Dimension 2 Filter
Specifies the global dimension 2 to filter the entries.
- From Posting Date
Specifies the from posting date that will be used to filter the entries.
- To posting Date
Specifies the to posting date that will be used to filter the entries.
- Status
Specifies the status that the entries need to have that will be displayed.
The options are:- Not Applied,
- Applied, and
- Both.
- Applying Entry
Specifies if either the credit or debit entry will be used as applying entry.
- No.
- Section Applying Entry
- Based on the filter Status and Applying Entry, this section will show the entries that can be (or already have been) applied. The lines contain the necessary information and are sorted based on the Posting Date, oldest entries will be shown first.
- Use the action toggle Select, or use ctrl+F9 to quickly select multiple selected entries at once.
- Section Apply To Entries
- Based on the filter Status and Applying Entry, this section will show the entries to which the Applying can be (or already have been) applied. The lines contain the necessary information and are sorted based on the Posting Date, oldest entries will be shown first.
- Use the action toggle Select, or use ctrl+F9 to quickly select multiple selected entries at once.
It is possible that the select checkbox of an entry is colored red. This means that these entries are already linked somewhere else. This can be in the unposted Financial Journal or in the standard Business Central (unposted) Apply Entries page.
- Section with the amounts
- On the bottom of the page, some amounts will be displayed. The Available Amount, Applied Amount and Balance are displayed.
4.12.1 Post Application
- Select the entries in the left section, Applying Entry and select one or more entries in the right section Apply To Entries.
- The Applying Entry is the entry from which is applied from, the Apply To Entries are the entries on which the applying entry will be applied.
- Once selected, the lines are indicated with a green color. Choose the action Post Application in order to apply the entries. In the screen the entries will be updated with the remaining amount, and they will be closed if the application is complete for the entry.
- The Closed by Entry No. and Closed at Date will be filled in for the selected entries, if the application fully covers the selected entries.
- Remark: if multiple entries left are applied to multiple entries right, the closed by Entry number will be the same for alle selected entries.
If it is necessary that the ledger entries are one on one linked, then select only one applying entry and apply this to the apply to entries.
If needed, it is possible to filter the view in order to only view the entries to be applied. This can be done by choosing the action Filter selected entries.
Payment Discounts and Payment Tolerance differences will be processed through standard Business Central functionality.
When deselecting the Applying Entry, the Apply to Entries selection will also be cleared.
4.12.2 Auto Apply G/L Entries
Dynavision Advanced Finance BE added functionality to auto apply General Ledger entries when a ‘unique’ combination is found (a unique match of positive amount and negative amount).
The report can be executed using an action or can be scheduled using Job Queue Entries for (a set of filtered) G/L Accounts.
- Navigate to the page Apply General Ledger Entries (Quick) and choose the action Auto Apply, or choose the search icon, type Auto Apply G/L Entries, and choose the related link.
- A report page opens. Select optionally the G/L account(s) for which the auto apply needs to be executed.
- Add filters that need to be used to filter the entries that will be regarded by the system when executing the auto-apply action.
- Choose OK to run the report (or schedule to plan the execution of the report).
- The system will loop all G/L entries for the (selected) G/L Account(s) and look for a unique matching G/L entry with a reverse sign.
If one is found, the entry will be automatically matched, applied and posted. If multiple are found, the system will search for a unique match with the noted external document number.
If there are more G/L Entries for the external document number, the entry cannot be matched.
4.12.3 Unapply entries
It is also possible to unapply entries on the Apply General Ledger Entries (Quick) Page. In the Applying Entry pane, for the entry that needs to be unapplied, choose the three dots next to the Select column, and choose the action Unapply entries….
The record will be unapplied from all linked Apply To Entries.
4.13 Fiche 281.50
It is necessary to draw up Fiscal Fiche 281.50 for certain commissions, brokerage fees, refunds, accidental of non-accidental vacancy fees or honorary fees, bonusses or benefits in kind that are taxable professional income for the recipient.
This is also the case if business partners received business gifts from you for more than 125 euro in that financial year.
This fiche 281.50 is necessary because otherwise the costs incurred will not be accepted as deductible professional expenses.
The tax sheet 281.50 contains an overview of the allocated professional income mentioned above and is drawn up for each recipient. Only if a tax sheet 281.50 is drawn up for these costs, it is possible to deduct the expenses incurred as professional expenses (see https://www.zelfstandige.vlaanderen/wat-is-de-fiche-281-50/).
Dynavision Advanced Finance added the functionality to export the Fiche 281.50 from Business Central in a format that can be electronically submitted via the online tool Belcotax-on-web (BOW). This needs to be done once a year (around 30/6).
4.13.1 Setup
Setup is necessary on the following master data: Countries/regions, G/L Account and Vendor Card.
4.13.1.1 Countries/Regions
- Choose the Search icon, enter Countries/Regions, and choose the related link.
- Similar to the Intrastat Code that needs to be filled in on the Countries/Regions table, a column Fiche 281.50 Code was added to the according Country Code for which the Fiche 281.50 is applicable. These will be automatically added when installing Dynavision Advanced Finance.
- It is also possible to add the codes manually to the Countries using the configuration package that is available on a sandbox environment using the Get Default Data action on the page Dynavision Setup or Configuration Packages.
- Make sure that the Company Information is completed with following information:
- General: Name, address, City, Post Code, Region Code;
- Communication: Phone No., Email.
- Other: Enterprise No.
4.13.1.2 Vendor Card
It is possible to indicate that a fiche 281.50 needs to be set up for a certain vendor.
- Navigate to the Vendors and select the vendor for which the fiche 281.50 needs to be set up.
- In the General Tab, in the field Nature (Fiche 281.50) choose the type of the Vendor for generating the Fiche.
The options are:- Not Included ~ default value,
- Legal Entity, and
- Natural Person.
- For vendors of type Natural Person the Fiscal Identification Number needs to be completed as well since this is mandatory information in the fiche 281.50 declaration. This specifies the Fiscal identification No. of a non-resident (outside Belgium) or National No. for a resident (inside Belgium).
4.13.1.3 G/L Account Card
- Navigate to the Chart of Accounts and select the G/L Account to specify whether it needs to be included in the Fiche 281.50.
- In field Fiche 281.50 specify the group of the G/L Account Card if the G/L Account entries need to be added to the Fiche 281.50.
The options are:- Not included,
- Commissions,
- Fees or Vacancy,
- Advantage all kind, and
- Costs.
Example given: for account G/L Account 613101 Commission Fees,selectCommissions.
4.13.2 Usage
The transactions that are posted for the Vendors for which the fiche need to be generated, or transactions for the G/L Accounts that need to be included will now be included when generating the Fiche 281.50.
To generate the XML for the declaration, navigate to the Fiche 281.50 Page.
- Choose the Search icon, enter Fiche 281.50 and choose the related link.
- Specify the report filters and settings for including the correct information in the generated report.
- Year
Specifies the year to declare with the report. This will be automatically filled in with the current year (of the current work date) -1 year. This can be changed.
- Date Filter
Displays the date filter, based on the specified value in field Year.
- Test Declaration
Specifies if a test file needs to be generated.
- Minimum Amount
Specifies the minimum amount that the vendors need to have to filter the lines that are included on the Fiche 281.50.
- Name Contact Person
Specifies the name of the Contact Person. This will be added to the XML file for the generated Fiche 281.50.
- E-Mail Contact Person
Specifies the e-mail address of the Contact Person. This will be added to the XML file for the generated Fiche 281.50.
- G/L Entries
Displays the G/L Entries that will be included in the generated report.
- Year
Remark: the values in the option fields will be saved as filter for the next time you run the report.
- Choose the action Export to generate the XML file. The generated XML file will contain a fiche 281.50 for each vendor. All G/L entries from the vendor will be included in the XML.
- Remark: be aware that this .XML file will have to be converted to a .BOW file. This can be done using the validation software of Belcotax-on-web. This can be downloaded on the website Technische documentatie – BOW | FOD Financiën (belgium.be).
- Once the software is installed, open the program and upload the XML file.
- The field My KBO/BCE Number does not need to be filled in. Select the language of the CML file and choose the action Convert.
- The result is a .BOW file. This file can be uploaded on the Belcotax-on-web site.
4.13.2.1 Exclude G/L entries
It is possible to exclude G/L entries from the generated Fiche 281.50 xml file.
For this, on the G/L Entries lines, the option Exclude is added. When checked, the entry will not be included in the extracted XML file.
It is also possible to exclude lines in bulk by selecting the lines and choosing the action Exclude.
4.13.2.2 Fiche 281.50 file – extra information
- Structure of the file
- Sender information
- The Company (VAT) registration No. is included in this block.
- Declaration information.
- The Company (VAT) registration No. is included in this block.
- Several blocks of fiche 281.50 information, one for each vendor.
- The block starts with Fiche information, followed by the amounts for the current fiche. The VAT Registration Number of the Vendor is included in this block. For this number, following logic is used:
- Natural Person + Belgian: Fiscal Identification No of the Vendor Card is filled in in tag F2011.
- Legal Entity + Belgian: Enterprise No. of Vendor card is filled in in tag F2011.
- Natural Person + Non Belgian: Fiscal Identification No of the Vendor Card is filled in in tag F2109.
- Legal Entity + Non Belgian: Enterprise No. of Vendor card is filled in in tag F2109.
- It is possible that some information is limited in the number of characters. This information will then be cut of if it contains a value that is more than that number of characters.
- If the Country, specified on the vendor is BE, then the postal code of the Vendor will be included in field 2016. Otherwise, the postal code will be noted in tag 2112. If the postal code is empty on the Vendor Card, value 0 will be added in field 2112.
- The amounts declared for a certain Vendor are retrieved from the G/L entries for that vendor filtered on year and amount. These entries are summed up for each category.
- The block starts with Fiche information, followed by the amounts for the current fiche. The VAT Registration Number of the Vendor is included in this block. For this number, following logic is used:
- Sender information
4.13.3 Message Type
It is also possible to facilitate the export of the Fiche 281.50 by using a Message Type.
4.13.3.1 Setting up the Message Type
Choose the search icon, enter Message Types, then choose the related link.
There are two options to set up the necessary Message Type:
4.13.3.1.1Option 1 – Get Default data functionality
- Select the plus sign next to the New action in the actions bar on the opened page. Choose the action Get Default Data…
- A list opens with a filtered view of the available, not yet downloaded and configured Message Types. Choose the Message Type that needs to be set up and choose the action Apply.
- The Message Type will be created and it is possible to navigate to the created Message Type Card.
- In this card, the fields will be filled in with the information that has been set up in the Data link for the Message Type.
- After the creation of this Message Type, the Card can be edited in case something needs to be changed. Remark: once the message type has been downloaded, it will not be visible anymore when choosing the Get Default Data… action again. The Card needs to be managed in the system.
4.13.3.1.2Option 2 – Manually add Message Type
- Choose the action New to set up a new message Type card.
- Specify the necessary fields for Fiche 281.50. In the Format field, select Fiche 281.50.
Remark: the fields of the Message Type card are described in the Dynavision Connect manual.
4.14 Posting Preview on invoices enhancements
The posting preview on invoices also includes the VAT boxes (Row No.) for the base and amount values for the VAT entries.
The VAT statement template and name that are configured on the General Ledger Setup is used and applied by default. This can be changed in the preview to see the effect with another VAT template.
On these documents, the factbox with the line details is also enhanced to show the VAT row no. for the line for the amount and base values.
4.15 VAT Entries enhancements
The VAT Entries page also displays the Row No. columns for the base and amount values, using the VAT statement template and name that are configured on the General Ledger Setup.
4.16 VAT Annual listing
In the Report VAT annual listing, customers that have bought more than a certain minimum amount, to include in the generated VAT listing. In this minimum amount, there is no distinction between reusable packaging items and regular items that were bought by the customers. In order to facilitate the possibility to exclude these reusable packaging items from the total order amount of customers, a filter on the VAT groups is implemented.
- Choose the Search Icon, enter Annual Listing, then choose the related link.
- On the report page, choose the options and specify filters if needed to generate the needed listing with the correct information.
- Wrong Enterprise No.
Specifies if erroneous enterprise numbers need to be included in the report.
- VAT Annual Listing
Specifies if the VAT Annual Listing report needs to be printed.
- Year
Specifies the year of the period for which the report needs to be printed. The year must be entered as a 4 digit code.
Example given, to print a declaration for 2013, you should enter “2013” (instead of “13”).
- Excluded VAT Groups
Specifies the VAT Groups that need to be excluded from the VAT Entries that are used for generating the report.
Choose the value in the field to select the VAT Product Posting Groups in order to omit the turnover from specific items in the report.
- VAT Groups Filtertext
Displays the VAT Groups that are specified in the Excluded VAT Groups in text format.
- Minimum Amount
Specifies the minimum customer’s year balance to be included in the report. If the yearly balance of the customer is less than the minimum amount (and there are no negative entries), the customer will not be included in the declaration.
- Include Customers From
Specifies whether to include customers from all countries/regions or from a specific county/region in the report.
- Country/Region
Specifies the Country/Region to include in the report.
- Wrong Enterprise No.
- Choose the action Print or Preview to generate the annual listing.
4.17 Detail Trial Balance report optimalisation
The report Detail Trial Balance is extended with the possibility to select the entries that need to be included in the report. The options are: All, Open or Closed.
4.18 Reusable Packaging: VAT-VIES Declaration Tax Auth (Modified)
The report Reusable Packaging: VAT- VIES Declaration Tax Auth (Modified) is set up, in order to generate the VAT-VIES Declaration Tax Auth report in which certain Product Posting Groups can be excluded.
- Choose the Search Icon, enter Reusable Packaging: VAT- VIES Declaration Tax Auth (Modified), then choose the related link.
- On the report page, choose the options and specify filters if needed to generate the needed listing with the correct information.
- Show Amounts in Add. Report Currency
Specifies if the amounts need to be printed in the additional reporting currency. If this is disabled, the amounts will be printed in the local currency.
- Start date
Specifies the start date for the report.
- End date
Specifies the end date for the report.
- VAT Registration No. Filter
Specifies a VAT registration number in order to limit the report to one or more customers and vendors.
- Excluded VAT Groups
Specifies the VAT Groups that need to be excluded from the VAT Entries that are used for generating the report.
Choose the value in the field to select the VAT Product Posting Groups in order to omit the turnover from specific items in the report.
- VAT Groups Filtertext
Displays the VAT Groups that are specified in the Excluded VAT Groups in text format.
- Included VAT Business Posting Groups
Specifies the VAT Business Posting Groups that need to be included in the report.
- VAT Business Posting Groups Filtertext
Displays the VAT Business Posting Groups that are specified in the Included VAT Business Posting Groups.
- Show Amounts in Add. Report Currency
- Choose the action Print or Preview to generate the Declaration.
4.19 Purchase/Sales Ledger Detail RDL
Dynavision added a RDLC for the printout of the sales ledger or purchase ledger in Business Central.
- Choose the Search Icon, enter Sales Ledger or Purchase Ledger, then choose the related Reports and Analysis link.
- Make sure that the Report LayoutSales Ledger (Detail) or Purchase Ledger (Detail) is selected to be printed.
- Tip: set this report as default in order to always print this RDL instead of the Business Central standard layout.
- Print the report.
- The report contains two extra columns, in which the VAT Box (Row No. set in the VAT statement) is printed for each line, for the VAT Base and VAT Amount.
4.20 General/Financial Ledger Detail RDL
Dynavision added a RDLC for the printout of the General ledger in Business Central.
- Choose the Search Icon, enter General Ledger or Financial Ledger, then choose the related Reports and Analysis link.
- Make sure that the Report LayoutGeneral Ledger (Detail) or Financial Ledger (Detail) is selected to be printed.
- Tip: set this report as default in order to always print this RDL instead of the Business Central standard layout.
- Print the report.
- The report contains two extra columns, in which the VAT Box (Row No. set in the VAT statement) is printed for each line, for the VAT Base and VAT Amount.
4.21 VAT Annual Listing RDL
Dynavision added a RDLC for the printout of the Annual VAT listing in Business Central.
- Choose the Search Icon, enter Annual Listing, then choose the related Reports and Analysis link.
- Make sure that the Report LayoutVAT Annual Listing is selected to be printed.
- Tip: set this report as default in order to always print this RDL instead of the Business Central standard layout.
- Print the report.
- The report contains two extra columns, containing if the customer is VAT liable (indicated by X in the column), and the Country/Region code of the customer.
4.22 OSS Declaration
4.22.1 Setup
4.22.1.1 VAT Setup
The VAT Statement Templates, VAT Business Posting Groups and VAT Posting Setup need to be completed in order to generate the OSS declaration.
- Choose the Search Icon, enter VAT Statement Templates, then choose the related link.
- Add following line:
- Name: BTW,
- Description: specify the description for the BTW declaration.
- Navigate to the VAT Business Posting Groups.
- Add a posting group for each county that will be served through the webshop. In the field OSS Country/Region Code, select the Country/Region code that will be used in the OSS declaration for sales using the VAT Business Posting Group. The ‘EU Country/Region Code’ from the country is then used to specify the ‘MemberStateOfConsumption’.
- Navigate to the VAT Posting Setup page.
- Add the VAT Business Posting Groups that have been defined for the webshop sales., fill in the other information for these Posting Groups.
- OSS Supply Type
Specifies the supply type used by the OSS declaration.
The options are:- Goods,
- Services.
- OSS VAT Rate Type
Specifies the VAT rate type used by the OSS declaration.
The options are:- Standard,
- Reduced.
- OSS Supply Type
When using the action Get Default data in a Sandbox environment, the rapidstart package OSS declaration will be available. This package will overwrite VAT product posting groups and Country/region information.
It is advised to only import this package in the sandbox, set up the other information as needed for the production environment and to export this package to import in the production environment.
4.22.2 Generating the XML
- Choose the Search icon, enter One Stop Shop (OSS) Declaration, then choose the related Report.
The Report can also be generated by navigating to the VAT Statement Preview page and choosing the action OSS Declaration. - Specify the options and filters to generate the needed OSS xml file.
- Declaration type
Specifies the type of declaration that you want to print.
The options are:- Month, and
- Quarter.
- Month or Quarter
Specifies the month or quarter of the VAT declaration.
If Month is selected in the Declaration Type field, a value between 1 and 12 must be entered (1 = January, 2 = February, 3 = March, etc.).
If Quarter is selected in the Declaration Type field, a value between 1 and 4 must be entered (1 = first quarter, 2 = second quarter, 3= third quarter, 4 = fourth quarter).
- Year
Specifies the year of the VAT declaration. The year should be entered as a 4 digit code.
- Include VAT Entries
Specifies the VAT entries to be included in the report.
The options are:- Open,
- Closed, and
- Open and Closed.
- Add Representative
Specifies if a VAT declaration representative should be added to the generated XML.
A representative is a person or an agency that has license to make a VAT declaration.
- Identifier
Specifies the ID of the representative who is responsible for making the VAT declaration.
- Statement Template Name
Specifies the ID of the Statement Template Name to be used when generating the XML.
- Name
Enter the VAT statement Name that needs to be used when generating the XML.
- Declaration type
- After supplying the required information, choose the action OK to generate the XML. If the XML could be generated, the WML will be downloaded. Otherwise an error would be shown.
- Remark: If manual VAT corrections are added to the VAT Statement (corrections), they are included in the file. They are included once per country for the current period only.
In order to fetch the code that will be added to the OSS declaration following logic is used:
- Fetch the Country/region code that has been assigned to the entity.
- Check the corresponding Intrastat Code that has been assigned to the Country/Region Code.
- If the Intrastat Code has a value in the system, use this code in the generation of the OSS for the Country/Region.
- If the Intrastat Code is BLANK, use the value in the ISO Code that has been assigned to the Country/Region Code.
4.23 Bill Retainment (Inhoudingsplicht)
It is possible that some vendors are marked by the government as having a Bill Retainment.
This means that a part of the purchase invoice needs to be directly paid to the government, instead of the vendor. This can be set up using Dynavision Advanced Finance BE.
4.23.1 Set up Vendor Cards for Social Security and FPS Finance
If Bill Retainment is active for a vendor, a part of the purchase invoice amount will need to be paid to the government. This means that the system will need to know the information of the Social Security and/or FPS Finance to which part of the invoice amount needs to be paid.
For this, create a vendor card for Social Security, with the necessary information (address, VAT number, etc.). Add the Vendor Bank Account to which the money needs to be transferred to the Vendor Card of Social Security.
Do the same for FPS Finance if applicable.
Tip: set up the fields in the Vendor Templates for types of vendors, to immediately fill in the correct information in these fields. The fields are by default empty.
4.23.2 Advanced Finance Setup
For the fields of the functionality to be visible and available, first there needs to be done some setup on the page Advanced Finance Setup.
- Choose the Search icon, enter Advanced Finance Setup, then choose the related link.
- In the section Bank & Payment Management, configure the following fields, noted under the title Bill Retainment.
- Vendor No. (Social Security)
Select the vendor that is configured for Social Security.
- Vendor Bank Account (Social Security)
Select the Vendor Bank Account, which is configured, to which the money needs to be transferred.
- Percentage (Social Security)
- Vendor No. (Social Security)
This specifies the percentage that needs to be calculated to be paid to Social Security. This will be defaulted to 35 when selecting the Vendor No. for the Social Security.
- Vendor No. (FPS Finance)
Select the vendor that is configured for Social Security.- Vendor Bank Account (FPS Finance)
Select the Vendor Bank Account, which is configured, to which the money needs to be transferred.
- Percentage (FPS Finance)
This specifies the percentage that needs to be calculated to be paid to Social Security. This will be defaulted to 35 when selecting the Vendor No. for the Social Security.
- Vendor Bank Account (FPS Finance)
4.23.3 Setup Bill Retainment on Vendor Card
On the Vendor Card, it is possible to indicate if for this vendor, a check needs to be executed to see if there is a Bill Retainment currently active for the vendor.
- Navigate to the Vendor for which the check needs to be executed.
- In the tab Payments, configure the fields that are noted under the title Bill Retainment.
- Bill Retainment (Social Security)
Specifies if the vendor is subject to bill retainment for social security.
The options are:- Blank
When no value is selected in this option, the vendor is excluded from the bill retainment checks for social security.
- To Check
There is a check needed to see if the vendor is subject to Bill Retainment for Social Security.
For social security, the check will be done using the web service that is supplied.
- Yes
- Blank
- Bill Retainment (Social Security)
After executing the check, this status indicates that the vendor is subject to Bill Retainment.
- No
After executing the check, this status indicates that the vendor is not subject to Bill Retainment.- Not Found
Indicates that the API returned a technical error that there is no information found for the vendor.
- Last Check (Social Security)
Indicates the date on which the Bill Retainment was lastly checked for the vendor.
- Not Found
- Bill Retainment (FPS Finance)
Specifies if the vendor is subject to bill retainment for FPS Finance.
The options are:- Blank
When no value is selected in this option, the vendor is excluded from the bill retainment checks for FPS Finance.
- To Check
There is a check needed to see if the vendor is subject to Bill Retainment for FPS Finance.
For FPS Finance, the check needs to be executed manually, as there is no webservice provided that can be used by the system.
- Yes
After executing the check, this status indicates that the vendor is subject to Bill Retainment.
- No
After executing the check, this status indicates that the vendor is not subject to Bill Retainment.
- Not Found
N/A for FPS Finance.
- Last Check (FPS Finance)
Indicates the date on which the Bill Retainment was lastly checked for the vendor.
- Blank
4.23.4 Vendor Payment Processing
After setting up the configuration for the Vendors regarding Bill Retainment, we can create the payment suggestions for the vendor.
- Navigate to the EB Payment Journal (or payment journal).
- Choose the action Suggest Vendor Payments to create the payment suggestions for the vendors. (Or manually create payment lines for the vendor.)
- When the action is executed, the suggested lines will be split according to the status of the bill retainment fields for the vendor.
- On the (EB) Payment Journal, the fields Bill Retainment (Social Security)/(FPS Finance) indicate if the vendor needs to be checked, or the result of the Bill Retainment Check if executed.
- Execute the check for the Bill Retainment if this still needs to be done.
- (Optionally) Choose the action Export Vendors to export all vendors subjected to bill retainment checks included in the current payment journal to a txt file. This file can be submitted on the site of the Belgian government, to check if the vendors are subjected to bill retainment.
- Choose the action Show Vendors under the tab Bill Retainment.
- The list opens with the Vendors for which there are lines noted in the (EB) Payment Journal.
- On this page, the export function can also be executed.
- For the Bill Retainment (FPS Finance) the check needs to be done manually outside the system, and the field needs to be manually set in Business Central.
- The status can also be changed for a selection of vendors, by selecting the vendors, and choosing the action Status > No or Status > Yes in the relevant tab on the page (Social Security).
- For the Bill Retainment (Social Security), use the action Update Status to use the webservice to check the Bill Retainment Status for all vendors in the list. (currently not implemented, so also needs to be changed manually for this moment.)
- The status can also be changed for a selection of vendors, by selecting the vendors, and choosing the action Status > No or Status > Yes in the relevant tab on the page (Social Security).
- After checking the Bill Retainment Status, if the status is set to Yes, this will be indicated in red in the payment lines, if they are not yet split for separating the amount to be paid to the government and the amount to be paid to the vendor.
- Split the lines that are subject to bill retainment, if this was not split automatically because the Status of the vendor needed to be checked and adapted after the payment suggestions were generated.
- Select the line that needs to be split, and choose the relevant action Split Line (Social Security) or Split Line (FPS Finance).
- Check the amount that is noted on the line. This will be calculated using the percentages set up on the Vendor Card for the Social Security or FPS Finance (on the amount excl. VAT of the purchase invoice).
- It is always possible to manually change the amount that is noted on the split lines. When this is changed, the amount to be paid to the vendor will also be recalculated to reflect the correct difference.
- Currently, there is no Structured Message suggested for the split lines. This needs to be generated manually on the site of the government, and needs to be added on the suggested payment line before posting.
- In a factbox on the (EB) Payment Journal page, the information about the Bill Retainment split and data can be viewed for the selected line.
- Once all information is correct on the lines, the payments can be processed. The payment will be posted to the vendor number, but will use the bank account that is noted on the (EB) payment journal lines. This ensures that the Vendor Ledger Entry can be closed correctly.
5 Dynavision Advanced Finance
5.1 Enhancements for order and invoice processing
5.1.1 G/L account on purchase and sales document lines
In standard Business Central, there is a possibility to open the Item Card, using the link in the fact box Sales/Purchase Line details that is visible on sales and purchase documents. This can be used to check or edit information concerning the item.
In order to make it also possible to quickly navigate to the card of a G/L Account, Resource, Fixed Asset and Charge Item when this is entered on a sales line, the same functionality has been added to the fact box by the Dynavision Advanced Finance module.
Selecting the No. displayed in the fact box after selecting a sales line, the card is opened of the asset noted on the selected line.
For Items, Resources, Fixed Assets and Charge items, the G/L Account on which will be posted will be displayed in the field Underlying G/L Account in the fact box. This G/L Account Card can be opened by selecting the displayed value of this field.
The G/L Account that is displayed in the field Underlying G/L Account in the fact box is determined as follows (using the Posting Groups of the customer and item or subclass code on Fixed Asset):
- For Type Item
Go to the General Posting Setup and fetch the configured Sales/Purchase (Credit Memo) Account. - For Type Resource
Go to the General Posting Setup and fetch the configured Sales/Purchase (Credit Memo) Account. - For Type Fixed Asset
Go to the FA Posting Groups and fetch the configured Acquisition Cost Account (on disposal). - For Type Charge Item
Go to the General Posting Setup and fetch the configured Sales/Purchase (Credit Memo) Account.
5.1.2 Payment discount excl. VAT on vendor Card
On the vendor card, functionality is added, in order to indicate if the payment discount for purchase invoices and credit memo’s is calculated based on amounts including or excluding VAT.
- Navigate to the Vendor Card of the Vendor on which the payment discount needs to be calculated on the amounts excluding VAT.
- Navigate to the tab Payments.
- Activate the field Pmt. Disc. Excl. VAT to calculate the invoice discount for the purchase invoices made to this vendor, on the amounts excl. VAT.
When a new vendor is created, the value of the field Pmt. Disc. Excl. VAT on the Vendor Card will be filled in with the value of the field Pmt. Disc. Excl. VAT on the General Ledger Setup page.
When creating a Purchase Invoice or purchase credit memo, the setting of the Pay-to Vendor will be taken into account for the field Pmt. Disc. Excl. VAT.
5.1.3 Journal Template on Vendor/Customer Card
On the Vendor and Customer Card, fields are added in order to be able to select templates that will be applied when posting the Purchase or Sales documents that are created for the Vendor or Customer.
Remark: these fields are only visible when the option Journal Templ. Name Mandatory is enabled on the General Ledger Setup page. Is the option is disabled, the templates will not be used and not be visible.
- Navigate to the Vendor Card or Customer Card to set up the templates.
- Navigate to the Invoicing Tab.
- Journal Templ. Purch./Sales Invoice
Specifies a specific journal template for posting purchase/sales invoices for this Vendor/Customer.
- Journal Templ. Purch./Sales Credit Memo
Specifies a specific journal template for posting purchase/sales credit memos for this Vendor/Customer.
- Journal Templ. Purch./Sales Invoice
The values of these fields are copied to sales or purchase documents and overrule the default Journal Templates configured in the Sales & Receivables Setup. This makes it possible to categorize Vendors and Customers in different Journal Templates.
On the Invoices and Credit Memo’s for the Customer or Vendor, the set Journal Template can be seen in the Invoice Details Tab. This can always be changed if needed.
When changing the Pay-to Vendor or Bill-to Customer (in the Shipping and Payment of Shipping and Billing Tab), the Journal will be updated according to the settings on the newly selected Vendor or Customer.
The Journal Template set on the Customer/vendor will also be used when correcting invoices using the standard Business Central actions Create Corrective Credit Memo, Cancel and Correct on the posted invoice.
Remark: the templates will not be applied on the Sales/Purchase Prepayment documents and Service Invoices and Service Credit Memo’s.
5.1.4 VAT Deviation Code for deviating VAT for customers/documents
In some cases, a lowered VAT percentage can be applicable for a customer or on a document, e.g. for renovations of houses in Belgium.
This can be achieved using VAT Deviation Codes, that can be assigned to certain customers, or can be applied on documents.
- Choose the Search icon, enter VAT Deviation Code, then choose the related link.
- Add all deviation codes necessary. Enter a Code and Description for each possible deviation.
- For each deviation code, the VAT Deviation Setup needs to be completed. Select the line that needs to be set up and choose the action Setup.
- Add the necessary information on the VAT Deviation Setup page. On this page, it will be configured which VAT Product Posting Groups need to be translated to another VAT Product posting group when the Deviation Code is applied on a document.
- Code
Specifies the code of the VAT Deviation for which the mapping is set up.
- VAT Prod. Posting Group (Original)
Specifies the VAT Product Posting Group of the involved item or resource that needs to be mapped to another VAT Product Posting Group if the Deviation Code is set on a sales document.
- VAT Prod. Posting Group (New)
Specifies the new VAT Product Posting Group that will be set for the item or resource that contains the original VAT Prod. Posting Group when the Deviation Code is added on the sales document.
- Code
- Once all Deviation codes are created and set up, these can be added on the Customer Card in the (hidden) field VATDeviation Code. (Make the field visible through personalization.).
- This setting will be taken over for sales documents that are created for the customer.
- The Deviation Code can also be added to a specific sales document. Use personalization to add the field to the sales document, and set the wanted Deviation Code.
- A confirmation will be asked to update the existing lines on the document, using the set VAT Deviation Code. Confirm to update the lines on the document according to the set mappings for the selected Deviation Code.
- Once the Deviation Code is set on the document, newly added lines will immediately be updated using this deviation code.
5.1.5 Bill-to Customer and Pay-to Vendor Details fact box
On Sales and Purchase Invoices and Credit Memo’s, in order to make sure the correct Bill-to Customer and Pay-to Vendor is added to the document, a fact box is added with this information. This fact box contains the Vendor/Customer No., the Name and the VAT Registration/Enterprise No.
If the environment is set in BE localization, if the Enterprise No. is filled in, that value will be taken and shown in the fact box, otherwise, take the information of the VAT Registration No. field.
If the environment set to a localization other than BE, The value set in the VAT Registration No. will be displayed in the fact box.
5.1.6 Posted Sales documents – Change “Your Reference”, language Code or External Document No.
The standard Business Central functionality Update Document on Posted Sales Invoices, has been extended with the possibility to modify the value of the field Your Reference, External Document No. and Language Code for this Posted Sales Invoice.
This functionality has also been added to the Posted Service Invoice and the Posted Sales Credit Memo.
This functionality is not available on the Posted Service Credit Memo, since there is no standard Business Central Update Document functionality on this type of document.
Remark: on the posted sales shipment, the language can also be edited using the Update Document action.
5.1.7 Check of Invoice amount when Releasing/approving a Purchase Invoice or Purchase credit memo
In the Advanced Finance Setup, an extension has been implemented to the standard Business Central Check Doc. Totals Amounts option, that will check the purchase amount incl VAT on a purchase document when posting.
When Dynavision Advanced Finance is installed, and the option is enabled, the system will also execute the check when the purchase document is released or approved to be released.
5.1.8 Approval (payment of) Posted Purchase Invoices/Credit Memo’s
According to the Belgian law, all received and valid Purchase Invoices must be posted in the bookkeeping of the company. If a purchase invoice is disputed by the company, it is possible to refuse the payment and to demand a Credit Memo that can be used to cancel the Purchase Invoice. The posting of the document is however mandatory.
Business Central has a default approval flow that can be only performed before the postingof the Purchase Invoice.
Dynavision Advanced Finance makes it possible to set up an approval flow after the posting of the invoice. Using this approval will make sure that the payment of the invoice is only possible once the Posted Purchase Invoice is approved.
- Choose the Search icon, enter Advanced Finance Setup, and choose the related link.
- Navigate to the Accounts PayableTab.
- On Hold Code
Specifies the On Hold Code that will be used by the workflow to block the Vendor Ledger Entries of a Posted Purchase Invoice.
- On Hold Code
- Choose the Search icon, enter Workflows, and choose the related link.
- Choose the action New Workflow from Template and select the Posted Purchase Invoice Approval Workflow/Posted Purchase Credit Memo Workflow.
- Fill in the necessary fields on the Workflow card. These fields are the same fields as the standard Business Central Workflow Fields. (More information in the Microsoft Documentation.)
- Finish the setup of the workflow by Enabling the workflow.
- If there are already Posted Purchase Invoices in the System, a message will be shown with the question if the system needs to create approval requests for all existing unpaid Posted Purchase Invoices/Credit Memo’s.
- If chosen for Yes, the Posted Purchase Documents will receive the Status Waiting For Approval and the related Vendor Ledger Entries will be put on hold, using the set On Hold Code.
- Remark: if the user who enabled the workflow is also indicated as the approver on the workflow, the requests for approval will be automatically approved.
The Vendor Ledger Entries will no longer have an On Hold Code and the Posted Purchase Invoices will get the Status Released.
- Dynavision Advanced Finance also added the possibility to batch process the Requests for Approval on the Request To Approve page.
5.1.8.1 Example – Basic Approval Flow – Purchase invoice
Case: the Approval Flow is set up for the Posted Purchase Invoices.
- Navigate to a Purchase Invoice and Post the invoice.
- Once the document is posted, navigate to the Posted Purchase Invoice.
- On this document, that Status is visible and is set to Pending Approval.
- As the Approver, the buttons are available on the Document, which can be used to approve the document.
- In the Approval Entries, the newly created Approval Entry is visible in the list.
- Navigate to the Vendor Ledger Entries.
- The On Hold column is filled in and cannot be manually emptied by the user. This Code will be filled in until the Posted Purchase Invoice has been approved. This functionality is implemented to assure that the payment for the document cannot be exported as long as the Posted Purchase Invoice is not Approved.
- Remark: the On Hold field on the Posted Purchase Invoice will remain empty, the information is not synchronized between the Posted Purchase Document and the Vendor Ledger Entries.
A Purchase Invoice that is on hold, and thus not yet approved will not be included in the Suggest Payment Task.
- As the Approver, navigate to the Approval Request in order to approve this request.
- As Approver, it is possible to add Approval Comments to the request.
- The request can be approved on the Requests To Approve Page, or on the Posted Purchase Invoice Card.
- It is also possible to batch approve requests on the Requests To Approve Page.
- Navigate to the Posted Purchase Invoice. The status of the document is now Released. On the Vendor Ledger Entries, the On Hold Code is also cleared.
- The Posted Purchase Invoice can now be exported as payment and will be proposed in the (EB) Payment Journal.
Remark: it is possible to view an overview of the status of all Posted Purchase Invoices in the list view. This information is noted in the column Status.
5.1.9 Pre-assigned No. on Posted Purchase Invoices / Credit Memo list
Dynavision Advanced Finance added the possibility to add the Business Central column Pre-Assigned No. in the list view of the Posted Purchase invoices and Posted Purchase Credit Memo’s.
This column, Pre-Assigned No. contains the number that was assigned in Business Central when the Purchase Invoice or Credit memo was registered in Business Central before posting.
After posting of the documents, this column can then be used when searching for the definitive posting number of the created Purchase Invoice or Purchase Credit Memo.
5.1.10 Apply Customer and Vendor Entries
Dynavision Advanced Finance provides a screen in which it is possible to visually apply debit and credit entries for customers and vendors.
- Navigate to the Customers or Vendors list and either select a Customer or Vendor to open the card. Choose the action Apply Entries (Quick).
The page can also be accessed by choosing the Search icon, entering Apply Customer Entries (Quick) or Apply Vendor Entries (Quick) and choosing the related link. - Specify the filters in order to view the needed General Ledger Entries that need to be applied.
- No.
Specifies the number of the Customer/Vendor from which the entries need to be applied.
- Name
Displays the name of the Customer/Vendor that has been selected.
- Global Dimension 1 Filter
Specifies the global dimension 1 to filter the entries.
- Global Dimension 2 Filter
Specifies the global dimension 2 to filter the entries.
- From Posting Date
Specifies the from posting date that will be used to filter the entries.
- To posting Date
Specifies the to posting date that will be used to filter the entries.
- Status
Specifies the status that the entries need to have that will be displayed.
The options are:- Not Applied,
- Applied, and
- Both.
- Applying Entry
Specifies if either the credit or debit entry will be used as applying entry. Depending on if the page is opened for the customer or vendor, the value will be default filled in with Credit or Debit.
- No.
- Section Applying Entry
- Based on the filter Status and Applying Entry, this section will show the entries that can be (or already have been) applied. The lines contain the necessary information and are sorted based on the Posting Date, oldest entries will be shown first.
- It is possible to add the Structured Message column to the list view using Personalization.
- Section Apply To Entries
- Based on the filter Status and Applying Entry, this section will show the entries to which the Applying can be (or already have been) applied. The lines contain the necessary information and are sorted based on the Posting Date, oldest entries will be shown first.
- Use the action toggle Select, or use ctrl+F9 to quickly select multiple selected entries at once.
- It is possible to add the Structured Message column to the list view using Personalization.
It is possible that the select checkbox of an entry is colored red. This means that these entries are already linked somewhere else. This can be in the unposted Financial Journal or in the standard Business Central (unposted) Apply Entries page.
- Section with the amounts
- On the bottom of the page, some amounts will be displayed. The Available Amount, Applied Amount and Balance are displayed.
5.1.10.1 Post Application
- Select the entry in the left section, Applying Entry and select one or more entries in the right section Apply To Entries.
- The Applying Entry is the entry from which is applied from, the Apply To Entries are the entries on which the applying entry will be applied.
Only one Applying entry can be selected to be applied.
- The Applying Entry is the entry from which is applied from, the Apply To Entries are the entries on which the applying entry will be applied.
- Once selected, the lines are indicated with a green color. Choose the action Post Application in order to apply the entries.
- The Post Application will be shown in which information needs to be specified, related to the posting of the entries. Fill in this information and choose the action OK.
- In the apply screen the entries will be updated with the remaining amount, and they will be closed if the application is complete for the entry.
- It is also possible to firstly generate a preview of the posting that will be executed by choosing the action Preview Posting.
If needed, it is possible to filter the view in order to only view the entries to be applied. This can be done by choosing the action Show only Selected Entries to Be Applied.
Payment Discounts and Payment Tolerance differences will be processed through standard Business Central functionality.
When deselecting the Applying Entry, the Apply to Entries selection will also be cleared.
5.1.10.2 Unapply entries
It is also possible to unapply entries on the Apply Customer Entries (Quick) Page or the Apply Vendor Entries (Quick) Page. In the Applying Entry pane, for the entry that needs to be unapplied, choose the three dots next to the Select column, and choose the action Unapply entries….
The record will be unapplied from all linked Apply To Entries.
5.2 General Ledger
5.2.1 General Ledger Entries extra columns
In order to see all necessary information in the General Ledger Entries, some information is made available.
- Source Code and Source Name
Show the source from/for which the ledger entry is created. The Source Name field is a calculated field. - Journal Template Name
Displays the name of the journal template in which the source of the line is posted.
5.3 Payment Journal Enhancements
5.3.1.1 Inherit beneficiary bank account for manually entered payment line
When using the suggest vendor payment action, the beneficiary bank account was inherited by the system from the Vendor Ledger Entries.
This is now also supported when the line is entered manually, and an Applies to Document Number is validated on the line.
5.4 General Journal – Post difference
In order to make it more easy to post differences in open customer entries, with a remaining amount less than a certain amount (and that have already been applied in the past number of weeks) to a G/L account, Dynavision Advanced Finance added the functionality to the General Journal.
In order to use this functionality, some setup is required.
5.4.1 Difference Codes
In the Difference Codes, the codes are set up that will be used when posting differences on the General Journal using the added function Get Open Customer Entries.
When this is filled in for the entry on the journal, the underlying entry is linked via the Applied to document no. field for the remaining amount.
The balance account fields are updated based on the chosen difference code, this can be manually changed.
- Choose the Search Icon, enter Difference Codes, and choose the related link.
- Add the Difference Codes that can be used when posting differences.
- Code
Specifies the Code that can be attached to the journal line.
- Description
Specifies a description of what the code stands for.
- Bal. Account Type
Specifies the type of account that a balancing entry will be posted to. This will be a G/L Account in most cases.
- Bal. Account No.
Specifies the number of the general ledger, customer, vendor or bank account that the balancing entry is posted to, such as a cash account for cash purchases.
- Reason Code
Specifies the reason code. This is a supplementary source code that enables to trace the entry.
- Code
5.4.2 Usage in General Journal
- Navigate to the General Journal. Select the correct batch for processing of the open customer entries.
- Choose the action Get Open Customer Entries.
- Specify the Options and Filters in order to fetch the correct open customer entries, for which the differences need to be posted, to add to the journal.
This also includes credit memo’s.- Document No.
Specifies the default document number of the journal line.
- Posting Date
Specifies the date for the posting of this batch hob. By default, the working date is filled in.
- Document Date
Specifies the document date that will be inserted on the created records.
- Journal Template
Specifies the journal template that the customer journal is based on.
- Batch Name
Specifies the name of the journal batch, a personalized journal layout, that the journal is based on.
- Maximum Remaining Amount
Specifies the maximum remaining amount that the customer ledger entries must have to be included in the report.
- Only include Entries with Payments since
Specifies to only fetch the open customer ledger entries with a payment since the specified date formula. The entered date formula must be negative (in the past).
- Default Difference Code
- Document No.
- Specify the Options and Filters in order to fetch the correct open customer entries, for which the differences need to be posted, to add to the journal.
Specifies the default Difference Code that will be inserted on the created records.
- The fetching happens based on the specified parameters.
The entries are filtered on account number and a remaining amount less than the a set amount. - All matching entries will be fetched and there will be created new general journal lines for these matches.
- The Account No., document type, account type, etc. are copied from the entry itself.
- An extra field is added, Difference Code. When this is filled in, the underlying entry is linked via the Applied to document no. field for the remaining amount. The balance account fields are updated based on the chosen difference code, this can be manually changed.
- Choose the action Add Difference Code to insert a value in the selection of the lines on the General Journal. When multiple Difference codes are defined, a Difference Code has to be selected on the next page that opens. When only one Difference Code is defined, this code will be inserted for the lines.
- When the journal lines are posted, the lines without difference code have to be manually removed in the journal.
Remark: the differences are posted with another document number than the bank statement no.
The document types that are supported are:
- Invoice,
- Reminder, and
- Finance Charge Memo.
5.5 Credit collection management
In Business Central there is no easy way to manage issued reminders or overdue customer entries. Users that handle these reminders usually contact the customer to handle these (open) customer entries and it could happen that the due date is delayed, or the reminder level is decreased/increased.
With the Debtor Management it is possible to handle all these changes and have a history of the interactions.
With this functionality it is possible to view all interactions with the customer regarding payments and manage effort to collect unpaid customer transactions.
5.5.1 Setup
The contact person that will act as debtor manager for a certain Customer has to be indicated. This is the person that needs to be contacted when trying to collect outstanding invoices for the customer.
- Navigate to the Advanced Finance Setup.
- CC Job Responsibility Code
Specifies the code for job responsibilities that is set up for credit collections. When creating an interaction, the program selects the contact with this job responsibility from the contacts assigned to the customer.
- CC Job Responsibility Code
- Navigate to the Contact Card.
- Choose the action Job Responsibilities, which can be found by choosing Related, Contact, Person.
- Select the Job Responsibility Code that was set up in the Advanced Finance Setup page.
5.6 Direct Debit Collections enhancement
On the page Direct Debit Mandates for a customer, the value of the field Debit Counter can be edited, in case the customer has used the mandate previously.
5.6.1 Usage
- Navigate to the Customer Ledger Entries page.
- Select the entry for which the interaction needs to be created and choose the action Create Credit Collection Interaction.
- The information regarding the interaction can be found on the page that opens. In the fact box panel, a quick summary is shown of the selected Customer Ledger Entry and the contact.
The invoice for which a Credit Collection Interaction is created can be viewed by choosing the action Show Document.- The first fields of the Credit Collection Card shows the Debtor Manager Information.
If a contact is linked and marked as debtor manager, the Contact No. and additional information will be filled in automatically.
Remark: if multiple debtor managers were selected for one customer, Dynavision will automatically propose the first contact (sorted on Contact No.) from the contacts list. This contact can still be changed.
The selected contact on the interaction can be set as default by choosing the action Set Contact as Default.
- Choose the Correspondence Type
The options are:- Email,
- Phone,
- Mail, and
- Others.
- In the Summary, a interaction summary can be noted that will be saved for the interaction.
- The first fields of the Credit Collection Card shows the Debtor Manager Information.
- In the Update section, it is possible to update some information on the customer ledger entries or the linked source document if necessary.
Remark: the fields will be prefilled with the information that was added on the linked source document.- New Due Date
Specifies the new due date that needs to be changed on the customer ledger entry and linked source document.
- New Reminder Level
Specifies the new reminder level that needs to be changed on the customer ledger entry and linked source document.
- New Promised Pay Date
Specifies the new promised pay date that needs to be changed on the customer ledger entry and linked source document.
- New Dispute Status
Specifies the new dispute status that needs to be changed on the customer ledger entry and linked source document.
- After editing the information that needs to be updated on the Customer Ledger Entry or linked source document, choose the action Update Entry/Document Info to commit the changes
- New Due Date
5.6.2 Credit Collection Interactions
The interactions can be consulted in the Credit Collection Interactions Page.
- Navigate to the page Customer Ledger Entries.
- Select the entry for which the log needs to be viewed. Choose the action Credit Collection Interactions, which can be found by choosing Entry. The page can also be accessed by choosing the value in the column Credit Collection Interactions.
- The details card is opened with the information of the interaction.
- The list view of all interactions can be found by choosing the Search Icon, entering Credit Collection Interactions, and choosing the related link. The fact box contains more detailed information for the lines in the list view.
5.7 Fixed Assets
5.7.1 Value Columns on list page
On the list page of the Fixed Assets, columns have been added by Dynavision Advanced Finance.
Those columns are:
- Acquisition Value
Shows the Acquisition Value of the Fixed Asset. - Depreciations
Shows the Depreciations of the Fixed Asset. - Book Value
Shows the Book Value of the Fixed Asset.
This value is calculated depending on the fact if the Fixed Asset is disposed of or not. - Disposed of
Specifies if the Fixed Asset is disposed or not.
It is possible to select the values in the added columns Acquisition Value, Depreciations and Book Value in order to navigate to the overview of all related Fixed Asset Entries.
Only the values in the Default Depreciation Book (indicated in the Fixed Asset Setup Page) will be shown in the list of the related Fixed Asset Entries.
By having these values as columns on the list page, there is a sort of light depreciation table? This can be exported to Excel.
5.7.2 Fixed Asset Components factbox
In order to make it more easy to manage the components of a main fixed asset, Advanced Finance adds factboxes to the listpage and Fixed asset card (of the main Asset).
The factbox Components also makes it possible to quickly Edit the Components of a main asset.
5.7.3 Depreciation Books on Fixed Asset Card
On the Fixed Asset Card, an extra functionality is added in order to be able to add new Deprecation Books. This functionality is added to the FA Subclasses.
- Choose the search icon, enter Fixed Assets and choose the related link.
- Choose the action New to add a new Fixed Asset.
- Fill in the necessary fields in order to set up the fixed asset.
- FA Subclass Code
Select the three dots in the value field in order to open the FA Subclasses list.
The Deprecation Books for the Subclass can be set by choosing the value in the column Deprecation Books or by choosing the action Deprecation Books.
- Extra fields are added to the Deprecation Books page:
- Depreciation Method
Specifies how deprecation is calculated for the Depreciation Book. Only the Straight line depreciation method can be used according to Belgian Bookkeeping law.
- Deprecation Starting Date
Specifies the date on which depreciation of the fixed asset starts.
the options are:- Document Date
This will take the date of the purchase order or purchase invoice on which the fixed asset is created.
- Posting Date
This will take the posting date of the purchase order or purchase invoice on which the fixed asset is created.
- Date formula
The starting date will be calculated using a specified date formula on the line using the workdate in Business Central.
- Document Date
- Straight-line%
Specifies the percentage to depreciate the fixed asset by the straight-line principle, but with a fixed yearly percentage.
- Fixed Depr. Amount
Specifies an amount to depreciate the fixed asset, by a yearly amount.
- No. of Deprecation years
Specifies the length of the depreciation period, expressed in years.
- No. of Deprecation Months
Specifies the length of the deprecation period, expressed in months.
- Declining-Balance %
Specifies the percentage to depreciate the fixed asset by the declining-balance principle, but with a fixed yearly percentage.
- Depreciation Method
- FA Subclass Code
Remark: changing the FA subclass code will not update the FA Deprecation Books.
Normally, in standard Business Central, the user needs to fill in the Deprecation Starting date manually on the Fixed Asset Card in the Depreciation Books lines.
In Dynavision Advanced Finance, the functionality is added in order to fill in this field automatically when creating the fixed asset from a Purchase order or purchase invoice.
When multiple fixed assets are created from a purchase order/invoice the document date of the document is copied to all related asset cards. Remark: this is only possible if the Deprecation Starting Date was not filled in on the asset card.
This value can always be modified by the user if needed.
5.7.4 Fixed Asset Book Value 01 – Excel Report Layout
An Excel layout is added to extract the information of the Fixed Asset book value to an excel format.
- Navigate to the Fixed Asset Book Value 01 report page.
- Open the Report Layouts selection and choose the Excel layout Fixed Asset Book Value 01.
- Choose OK and run the report by filling in the necessary fields.
- An Excel file is downloaded with added information.
- Description 2,
- Serial No.,
- Global Dimension code 1/2,
- FA posting group,
- Depreciation method,
- Depreciation starting date,
- Depreciation ending date,
- No. of depreciation years, and
- Acquisition date.
5.7.5 (Balancing) Account Name on Fixed Asset G/L Journals
Dynavision Advanced Finance adds the fields Account Name and Balancing Account Name to the Fixed Asset G/L Journals page. This makes it possible to quickly view the selected account name on the lines.
5.7.6 Sales invoice lines – function Add Main Asset Components
On the sales invoice, it is possible to quickly add the main asset components to the sales invoice lines.
- Navigate to a sales invoice and add a Fixed Asset with components to the lines.
- Add a quantity of the fixed asset.
- Make sure the Fixed Main Asset line is selected, choose Line, Functions and Add Main Asset Components.
- The Components of the main line will be added to the sales invoice lines.
- Remarks:
- The Quantity on the component lines will be the same that was noted on the main component line when the function was activated. The quantity will not be synced from the main line to the component lines.
- The location information of the main line will not be inherited on the component lines. This will need to be changed manually on the lines.
- Remarks:
5.8 Reminders enhancements
5.8.1 Reminder level and document date on Issued Reminders
In order to make it more efficient to manage reminders, Dynavision Advanced Finance added the Document Date and Reminder Level fields to the Issued Reminders list that is opened from the Customer Card.
- Navigate to a Customer Card for which the Issued Reminders need to be viewed.
- Choose the action Issues Reminders, which can be found by choosing the action Related, Documents, Issued Documents.
- The list view opens, wit the columns mentioned above.
- Select the reminder that needs to be opened. On the Card, the fields are also available and visible.
5.8.2 Add responsibility information to Issued Reminder
5.8.2.1 Report Layout additions
On the layout of the Issued reminder, it is now possible to add the information of the responsibility center that is responsible for the issued reminder.
- Navigate to the Report Layout Setup listpage and select the Reminder layout.
- On the Report Layout Setup Card, following can be added for the Responsibility Center.
- Addresses: in the address blocks, the option Responsibility Center Address is now selectable.
- Header – Logo source: the option Responsibility Center is now selectable.
- Footer – Footer image source: the option Responsibility Center is now selectable.
5.8.2.2 Reminder Additions
On the (issued) Reminder, a field is added in which the Responsibility Center is saved.
When the issue is created, the Responsibility Center of the user setup will be added to the field. If none is set on the user, the one on the customer will be noted.
If none is set at all, no Responsibility Center will be noted on the document.
This Responsibility Center is also used to make sure that only users that belong to the set Responsibility Center of the reminder can see these and modify these ones.
The Responsibility Center will also be validated when another user is assigned to the reminder.
The issued reminders are visible to all users, regardless of their Responsibility Center.
5.8.3 Add PDF to reminder mail
5.8.3.1 Description
When sending an e-mail for an issued reminder, the functionality has been added to make it possible to attach the PDF of the related Sales or Service invoices to the e-mail that is generated for the Issued Reminder.
5.8.3.2 Setup
- Navigate to the Advanced Finance Setup page.
- In the Accounts Receivable Tab, there are two options added to send PDF’s of the invoices as attachment to reminders.
- Include Invoice Attachment on reminders.
This field specifies if invoice attachments will be included as e-mail attachment when issuing reminders. If there are no attachments created of the documents in Business Central, a (temporary) PDF will be created that will be included as attachment in the mail. This temporary PDF will not be saved in the system, unless the option Save invoice attachments is enabled.
- Save invoice attachments
This field specifies if missing invoice attachments will be created and saved as document attachments (to the originating documents in Business Central) when issuing reminders.
Remark: this can only be enabled if the option Include Invoice Attachment on reminders is enabled.
- Include Invoice Attachment on reminders.
5.8.3.3 Basic flow
When sending issued reminders by using the Send by Email functionality or when issuing reminders and choosing Email in the Print field in the Report Page that opens and choosing the Send email to send the email, the system will fetch all attachments with report usage sales invoice for all involved sales invoices.
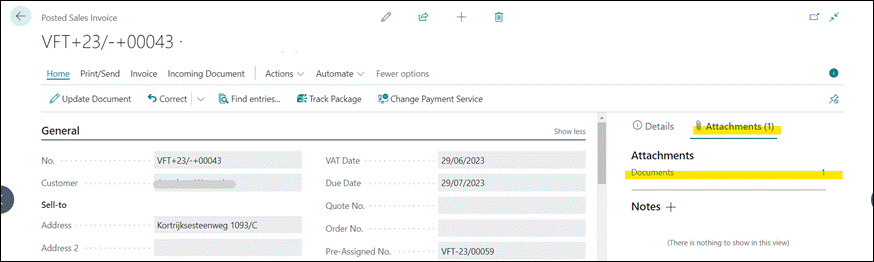
When no attachment is found for the linked sales Invoice, the PDF will be generated for the invoice and added to the mail as attachment. This document will also be saved in the system as Attachment to the linked invoice for which the PDF is generated.
It is still possible to add or remove attachments in the generated reminder e-mail if needed.
The Incoming document attachments that were added when posting invoices using the sales journal will also be included.
5.8.3.4 Remarks
- It is possible that a sales invoice has multiple different attachments due to different report selection sales entries for usage invoice, or due to the user/system running the Attach as PDF action twice or more, resulting in multiple versions of the invoice PDF. All these attachments will be included.
Example given:
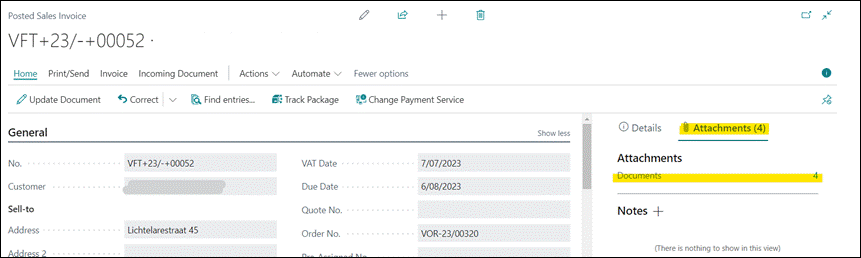
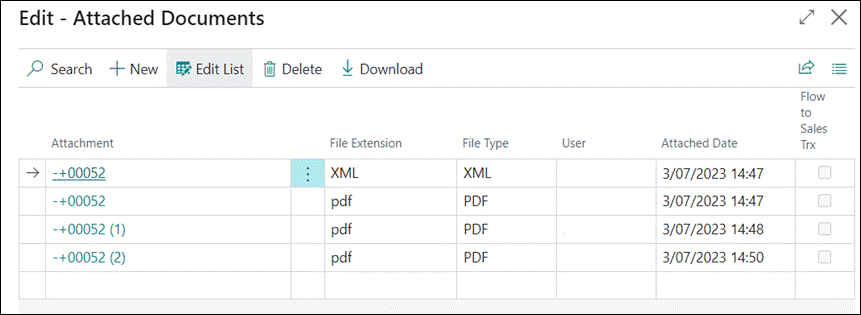
- Please be aware that reminders with a lot of invoices (or large invoice PDFs) might result in the e-mail not being accepted by the e-mail server of the sender or receiver. This will normally result in a failure on the Email Outbox. The user van resend the issued reminder and manually remove the redundant attachment before sending again.
- This functionality will only add linked Sales invoices to the reminder, Credit Memo’s will not be included and need to be added manually as attachment if needed.
- Service invoices are not yet supported, as there are no attachments supported to these invoices at this time in Business Central. Microsoft is planning on implementing this in the future. When this is supplied and available in Business Central, this will also be added to the automatically generated issued reminder attachments.
5.9 Check closed inventory period when closing the fiscal year
When closing the accounting period, an additional check will be performed to check if the corresponding Inventory Period is closed.
If the Inventory Period is not yet closed, a message will be shown. If the inventory period is already closed, the message will not be displayed.
The shown message will not block the closing of the Accounting Period. It is still possible to close an Accounting Period with an open Inventory Period.
5.9.1 Usage
- Choose the Search icon, enter Accounting Periods and choose the related link.
- Choose the action Close Year.
- If the corresponding Inventory Period is not yet closed, a message is shown. “No closed Inventory Period with Ending Date X available, this can impact your future inventory postings. It’s advised to close the Inventory Period. Do you want to continue?”
- If the option No is chosen, the accounting period will not be closed.
In case the option Yes is chosen, the accounting period will be closed, and the inventory period will remain open.
5.10 Closing Income Statement enhancements
There is an option added to the Closing Income Statement report page, in order to have the option to ignore missing dimensions when posting the statement, or to block the posting if the dimensions are missing on the lines of the income statement.
On the Advanced Finance Setup page, the default value for this option can be set, in the other tab in the field Close Income Statement Dimensions Errors.
- Choose the Search icon, enter Close Income Statement and choose the related link.
- The option Dimension Errors is added.
- Choose Block in case the posting in the general journal should be blocked if there are missing dimensions for the journal line.
- Choose Ignore if the posting in the general journal should continue, even if there are missing dimensions for the journal lines.
